
How to install Restic REST server on Synology NAS
Create a directory for the backups to reside in
First, create a directory where the backups will reside. I recommend creating a shared directory for this purpose.
Open Control Panel -> Shared Folders and click Create. Enter a name (e.g. restic-backups), and click Next.
I recommend enabling data checksums but not data compression on the next page
You don’t need any special settings here, so click Next until you can click Done.
Download the image
Open the Container Manager.
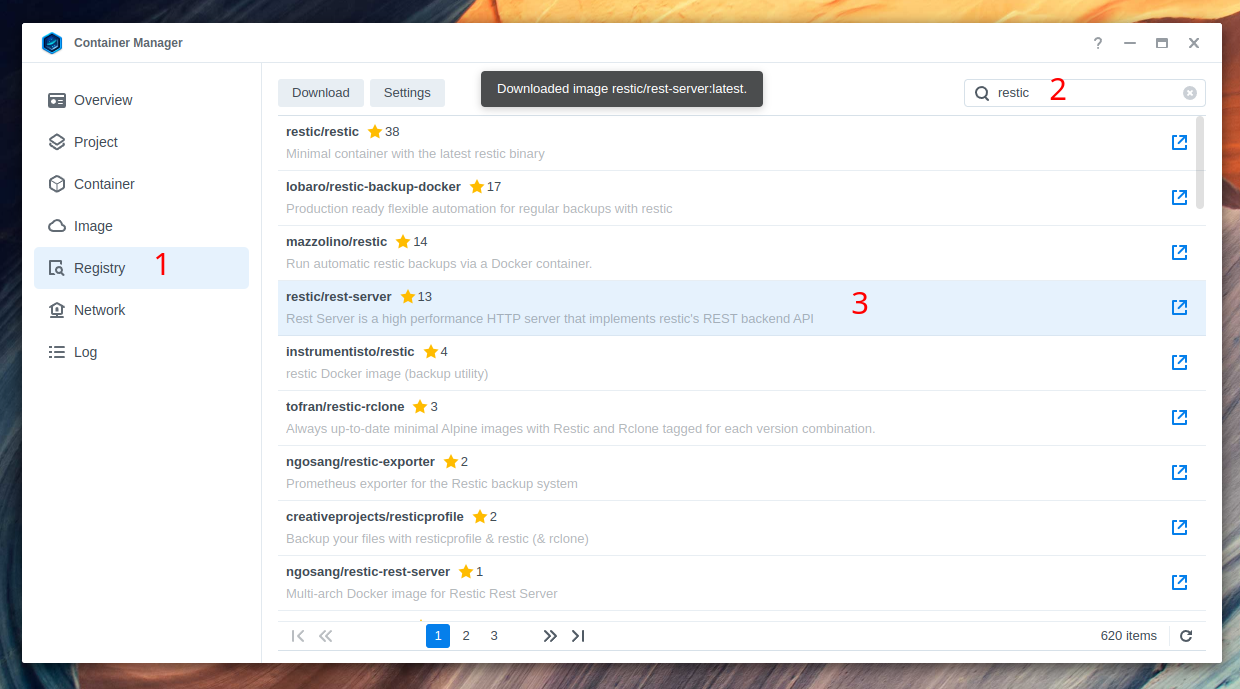
Click on Registry (1), search for restic (2), and double-click the restic/rest-server image (3).

Now click Apply.
The image will now download. Wait approximately 5 minutes for the download to finish (you can check via the Images tab).
Create the container
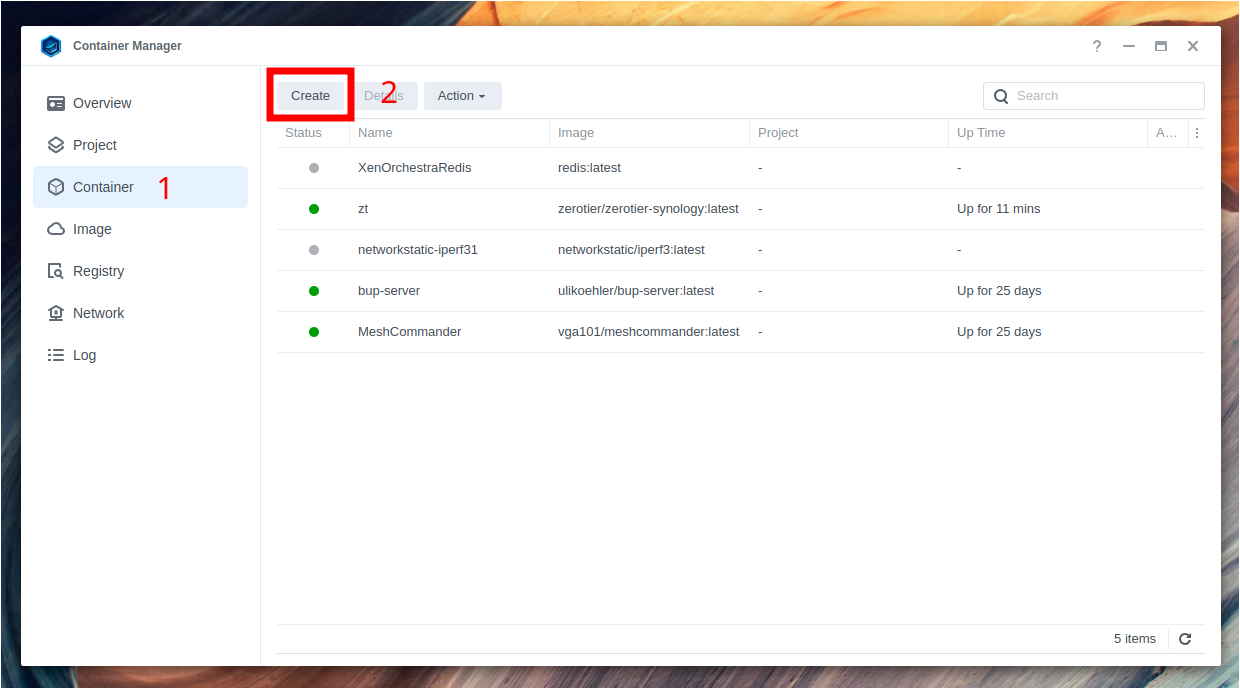
Click on Container (1), then Create (2).
Now select restic/rest-server:latest as the image(1).
After that, enter a suitable container name such as restic-rest-server (2). You can choose this name yourself.
Now, enable Auto-restart (3). This will ensure that the container is restarted automatically after a reboot, and in case it crashes.
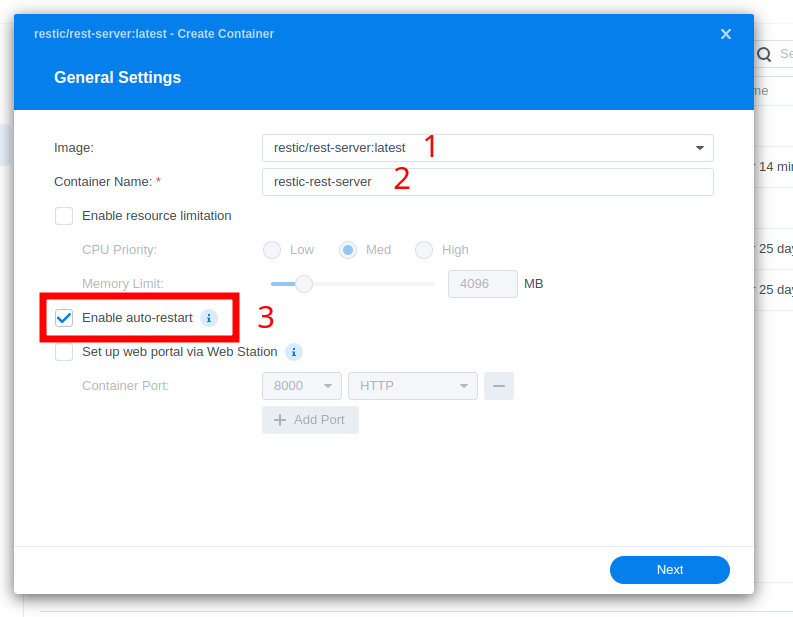
Now, click Next:
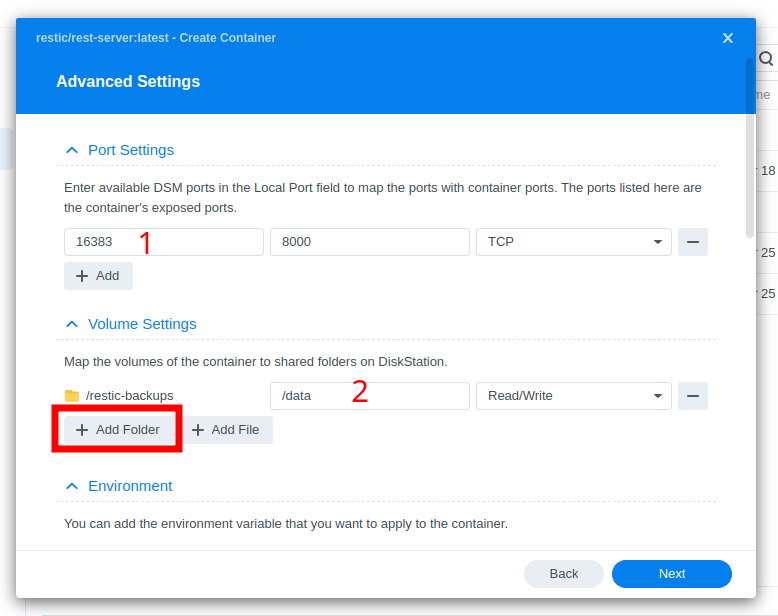
On this page, you first need to add a port binding for the REST server (1). You can use any port here. In this example, I’ll use port 16383 (this is just a random unused port). It needs to be mapped to port 8000.
Next, you need to add a volume binding (2) for Restic to store the data in (which we created in the step above).
Click on Add Folder, select the directory to backup into, and enter /data as the mount path in the container.
Now click Next.
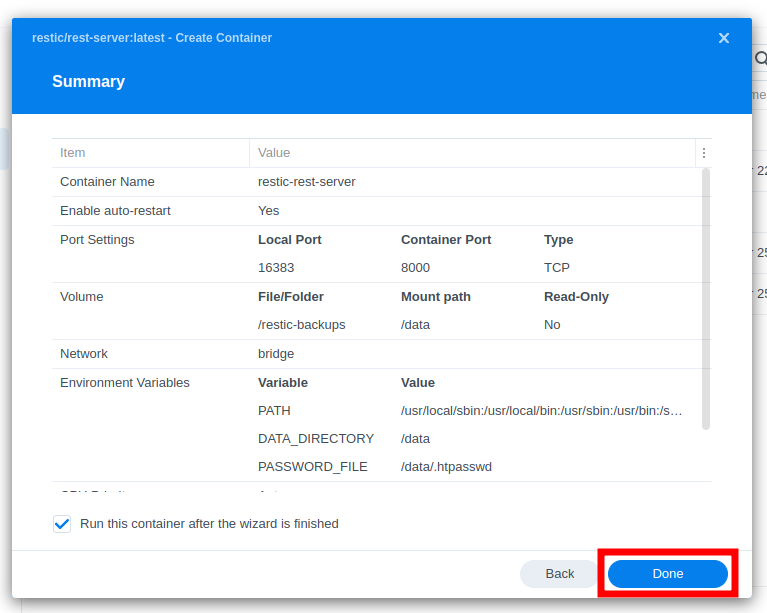
This is just a summary page. Check your settings, then click Done.
Now wait for the container to finish creating.
Configuring users
Now, you need to create the htpasswd file in the data directory (e.g. restic-backups) so the container sees it as /data/.htpasswd.
This can be done in many ways, but I recommend to use
htpasswd -nbB restic aiQu9Aiwoowe8ingeitheep2quezaH > .htpasswdObviously, choose a different random password.
Now, upload .htpasswd to the directory you created earlier.
There is typically need to restart your container after that.
Testing the restic server
Now, you can access the restic REST server directly using http://10.2.3.4:16383/ where 10.2.3.4 is the IP of your Synology NAS.
When you access it using your web browser, you should see an Unauthorized text. This is expected.
In order to check your credentials, you can use curl:
curl -fsSL "http://restic:[email protected]:16383/"- If you have the wrong username/password, you’ll see
curl: (22) The requested URL returned error: 401(401means unauthorized) - If you have the correct username/password, you’ll see
curl: (22) The requested URL returned error: 405(405means forbidden method)
If your username/password doesnt work, restart your container and check if you’ve uploaded .htpasswd to the correct location (root directory of the volume you mounted as /data, i.e. /data/.htpasswd from the view of the container).