This generator allows you to generate a systemd service file for a docker-compose setup that is automatically restarted if it fails.
16
Mar
2019
This generator allows you to generate a systemd service file for a docker-compose setup that is automatically restarted if it fails.
You want to run ElasticSearch using docker, but the container immediately stops again using this error message
elasticsearch exited with code 78
or
elasticsearch2 exited with code 78
If you look through the entire log message, you’ll find lines like
elasticsearch | [1]: max virtual memory areas vm.max_map_count [65530] is too low, increase to at least [262144]
Therefore we need to increase the vm.max_map_count limit:
sudo sysctl -w vm.max_map_count=524288
Now we need to edit /etc/sysctl.conf so the setting will also be in effect after a reboot.
Look for any vm.max_map_count line in /etc/sysctl.conf. If you find one, set its value to 524288. If there is no such line present, add the line
vm.max_map_count=524288
to the end of /etc/sysctl.conf
Original source: GitHub
wget -qO- https://techoverflow.net/scripts/install-docker.sh | sudo bash /dev/stdin
After that, logout and login (or close your SSH session and re-connect) (else, you will only be able to run the docker client as root – see Solving Docker permission denied while trying to connect to the Docker daemon socket)
Copy and paste these command blocks into your Linux shell. You need to copy & paste one block at a time – you can paste the next block once the previous block is finished!
# Install prerequisites
sudo apt-get update
sudo apt-get -y install apt-transport-https ca-certificates curl software-properties-common
# Add docker's package signing key
curl -fsSL https://download.docker.com/linux/ubuntu/gpg | sudo apt-key add -
# Add repository
sudo add-apt-repository -y "deb [arch=$(dpkg --print-architecture)] https://download.docker.com/linux/ubuntu $(lsb_release -cs) stable"
# Install latest stable docker stable version
sudo apt-get update
sudo apt-get -y install docker-ce
# Install docker-compose
sudo curl -L "https://github.com/docker/compose/releases/download/v2.10.0/docker-compose-$(uname -s)-$(uname -m)" -o /usr/local/bin/docker-compose
sudo chmod a+x /usr/local/bin/docker-compose
# Enable & start docker
sudo systemctl enable docker
sudo systemctl start docker
Note that this will install Docker as deb package whereas docker-compose will be downloaded to /usr/local/bin.
In case you intend to use docker under your normal user account (i.e. without sudo), you might want to add that user to the docker group (we recommend you do this):
sudo usermod -a -G docker $USER
This settings requires that you logout and log back in (or completely terminate your SSH session and open a new SSH session) in order to take effect.
In case that does not work and you still get permission denied error messages try rebooting your computer.
In order to check if your user is currently a member of the docker groups, run
groups
Example output:
uli adm tty lp uucp dialout cdrom sudo dip plugdev lpadmin sambashare vboxusers lxd docker
These are the groups your user currently belongs to (as said before, changes only take effect after logging out and logging back in or terminating and re-opening your SSH session). If docker is listed in the output of groups (tip: it’s typically near the end in case you have just added it!), you should be able to access the docker socket. See the Background information section of Solving Docker permission denied while trying to connect to the Docker daemon socket for more details on docker sockets and their permissions.
To download files, use
lxc file pull <container name>/<path>/<filename> <target directory>
To download directories, use
lxc file pull --recursive <container name>/<path>/<filename> <target directory>
Download /root/myfile.txt from mycontainer to the current directory (.):
lxc file pull mycontainer/root/myfile.txt .
Download /root/mydirectory from mycontainer to the current directory (.):
lxc file pull -r mycontainer/root/mydirectory .
In a previous post I detailed how to install Redmine on Linux using the excellent Bitnami docker image.
This post will teach you how to easily make an online backup of your Redmine installation. Note that automating the backup is not within the scope of this post.
We assume that the redmine is installed as shown in my previous post in /var/lib/redmine. and that you want to backup to my.backup.server:~/redmine-backup/ using rsync.
This is pretty easy, as the data is all in just one directory. You can sync it using
rsync --checksum -Pavz /var/lib/redmine/redmine_data my.backup.server:~/redmine-backup/
Note that old versions of files in redmine_data will be overwritten, however files that are deleted locally will not be deleted on the backup server. To me, this seems like a good compromise between the ability to recover deleted files and the used storage space.
This part is slightly more complicated, since we need to access the MariaDB server running in a different container. Important note: The container ID can change so it is not sufficient to just find the container ID once and then use it. You need to determine the appropriate ID each time you do a backup. See below on instructions how to do that.
Full command:
docker exec -it $(docker container ls | grep redmine_mariadb_1 | cut -d' ' -f1) mysqldump -uroot bitnami_redmine | xz -e9 -zc - > redmine-database-dump-$(date -I).sql.xz
Let’s break it down:
docker exec -it (container ID) (command): Run a command on a running docker container.docker container ls | grep redmine_mariadb_1 | cut -d' ' -f1: Get the ID (first field of the output cut -d' ' -f1) of the running docker container named redmine_mariadb_1mysqldump -uroot bitnami_redmine: This is run on the docker container and dumps the Redmine Database as SQL to stdout. No password is neccessary since the Bitnami MariaDB image allows access without any password.xz -e9 -zc -: Takes the data from mysqldump from stdin (-), compresses it using maximum compression settings (-e9 -z) and writes the compressed data to stdout.> redmine-database-dump-$(date -I).sql.xz: Writes the compressed data from xz into a file called redmine-database-dump-(current date).sql.xz in the current directory.The resulting file is called e.g. redmine-database-dump-2019-02-01.sql.xz and it’s placed in the current directory. Ensure that you run the command in a suitable directory. Run it in /tmp if you don’t know which directory might be suitable.
Now we can rsync it to the server:
rsync --checksum -Pavz redmine-backup-*.sql.xz my.backup.server:~/redmine-backup/
Since the filename contains the current data, this approach will not overwrite old daily backups of the database, so you can restore your database very flexibly.
In a previous post I detailed how to install Redmine on Linux using the excellent Bitnami docker image.
This post shows you how to install a custom theme like A1 (which I used successfully for more than 5 years) if you use the bitnami Docker image. We will assume that you installed redmine in /var/lib/redmine and your systemd service is called redmine.
Note: If you get any permission denied errors, try running the same command using sudo.
First, we need to create the themes directory.
sudo mkdir /var/lib/redmine/themes
The first thing we need to do is to copy the current (default) themes to that directory, since Redmine won’t be able to start up if the default theme isn’t available in the correct version.
In order to do this, we must first ensure that your container is running:
sudo systemctl start redmine
Now we can find out the container ID of the running redmine container:
uli:/var/lib/redmine$ docker container ps | grep redmine
ae4de10d0b41        bitnami/redmine:latest    "/app-entrypoint.sh …"   30 minutes ago      Up 30 minutes   0.0.0.0:3718->3000/tcp   redmine_redmine_1
c231d11c48e9        bitnami/mariadb:latest    "/entrypoint.sh /run…"   30 minutes ago      Up 30 minutes   3306/tcp redmine_mariadb_1
From these lines, you need to select the line that says redmine_redmine_1 at the end. The one that lists redmine_mariadb_1 at the end is the database container and we don’t need that one for this task.
From that line, copy the first column – this is the container ID – e.g. ae4de10d0b41 in this example.
Now we can copy the default theme folder:
docker cp ae4de10d0b41:/opt/bitnami/redmine/public/themes /var/lib/redmine/themes
Now copy your custom theme (e.g. the a1 folder) to /var/lib/redmine/themes.
The next step is to fix the permissions. The bitnami container uses the user with UID 1001, so we need to change the owner to that. Repeat this every time you changed something in the themes directory:
sudo chown -R 1001:1001 /var/lib/redmine/themes
At this point we need to edit the docker-compose config (in /var/lib/redmine/docker-compose.yml) to mount /var/lib/redmine/themes in the correct directory. This is pretty easy: Just add - '/var/lib/redmine-szalata/themes:/opt/bitnami/redmine/public/themes' to the volumes section of the redmine container.
The finished config file will look like this:
version: '2'
services:
  mariadb:
    image: 'bitnami/mariadb:latest'
    environment:
      - ALLOW_EMPTY_PASSWORD=yes
    volumes:
      - '/var/lib/redmine/mariadb_data:/bitnami'
  redmine:
    image: 'bitnami/redmine:latest'
    environment:
      - REDMINE_USERNAME=admin
      - REDMINE_PASSWORD=redmineadmin
      - [email protected]
      - SMTP_HOST=smtp.gmail.com
      - SMTP_PORT=25
      - [email protected]
      - SMTP_PASSWORD=yourGmailPassword
    ports:
      - '3718:3000'
    volumes:
      - '/var/lib/redmine/redmine_data:/bitnami'
      - '/var/lib/redmine/themes:/opt/bitnami/redmine/public/themes'
    depends_on:
      - mariadb
Now you can restart Redmine:
sudo systemctl restart redmine
and set your new theme by selecting it in Administration -> Settings -> Display.
Similarly to my previous article about installing Redmine via docker behind a reverse proxy, this article details. Since I am running an instance of Redmine and an instance of Gitlab on the same virtual server, plus tens of other services.
While the Gitlab CE docker container is nicely preconfigured for standalone use on a dedicated VPS, running it behind a reverse proxy is not supported and will lead to a multitude of error messages – in effect, requiring lots of extra work to get up and running.
Note that we will not setup GitLab for SSH access. This is possible using this setup, but usually makes more trouble than it is worth. See this article on how to store git https passwords so you don’t have to enter your password every time.
# Install prerequisites
sudo apt-get update
sudo apt-get -y install apt-transport-https ca-certificates curl software-properties-common
# Add docker's package signing key
curl -fsSL https://download.docker.com/linux/ubuntu/gpg | sudo apt-key add -
# Add repository
sudo add-apt-repository -y "deb [arch=amd64] https://download.docker.com/linux/ubuntu $(lsb_release -cs) stable"
# Install latest stable docker stable version
sudo apt-get update
sudo apt-get -y install docker-ce
# Install docker-compose
sudo curl -L "https://github.com/docker/compose/releases/download/1.23.2/docker-compose-$(uname -s)-$(uname -m)" -o /usr/local/bin/docker-compose
sudo chmod a+x /usr/local/bin/docker-compose

# Add current user to the docker group
sudo usermod -a -G docker $USER
# Enable & start docker service
sudo systemctl enable docker
sudo systemctl start docker
After running this shell script, log out & login from the system in order for the docker group to be added to the current user.
We will install Gitlab in /var/lib/gitlab which will host the data directories and the docker-compose script. You can use any directory if you use it consistently in all the configs (most importantly, docker-compose.yml and the systemd service).
# Create directories
sudo mkdir /var/lib/gitlab
Next, we’ll create /var/lib/gitlab/docker-compose.yml.
There’s a couple of things you need to change here:
gitlab_rails['gitlab_email_from'] and gitlab_rails['gitlab_email_display_name'] to whatever sender address & name you want emails to be sent fromgitlab_rails['smtp_address'], gitlab_rails['smtp_port'], gitlab_rails['smtp_user_name'], gitlab_rails['smtp_password'] & gitlab_rails['smtp_domain']) to a valid SMTP server. In rare cases you also have to change the other gitlab_rails['smtp_...'] settings.gitlab.mydomain.de to your domain.'9080:80' means that Gitlab will be mapped to port 9080 on the local PC. This port is chosen somewhat arbitarily – as we will run Gitlab behind an nginx reverse proxy, the port does not need to be any port in particular (as long as you use the same port everywhere), but it may not be used by anything else. You can use any port here, provided that it’s not used for anything else. Leave 80 as-is and only change 9080 if required.gitlab:
image: 'gitlab/gitlab-ce:latest'
restart: always
hostname: 'gitlab.mydomain.de'
environment:
GITLAB_OMNIBUS_CONFIG: |
external_url 'https://gitlab.mydomain.de'
letsencrypt['enabled'] = false
# Email
gitlab_rails['gitlab_email_enabled'] = true
gitlab_rails['gitlab_email_from'] = '[email protected]'
gitlab_rails['gitlab_email_display_name'] = 'My GitLab'
# SMTP
gitlab_rails['smtp_enable'] = true
gitlab_rails['smtp_address'] = "mail.mydomain.de"
gitlab_rails['smtp_port'] = 25
gitlab_rails['smtp_user_name'] = "[email protected]"
gitlab_rails['smtp_password'] = "yourSMTPPassword"
gitlab_rails['smtp_domain'] = "mydomain.de"
gitlab_rails['smtp_authentication'] = "login"
gitlab_rails['smtp_enable_starttls_auto'] = true
gitlab_rails['smtp_tls'] = true
gitlab_rails['smtp_openssl_verify_mode'] = 'none'
# Reverse proxy nginx config
nginx['listen_port'] = 80
nginx['listen_https'] = false
nginx['proxy_set_headers'] = {
"X-Forwarded-Proto" => "https",
"X-Forwarded-Ssl" => "on",
"Host" => "gitlab.mydomain.de",
"X-Real-IP" => "$$remote_addr",
"X-Forwarded-For" => "$$proxy_add_x_forwarded_for",
"Upgrade" => "$$http_upgrade",
"Connection" => "$$connection_upgrade"
}
ports:
- '9080:80'
volumes:
- './config:/etc/gitlab'
- './logs:/var/log/gitlab'
- './data:/var/opt/gitlab'Next, we’ll configure the systemd service in /etc/systemd/system/gitlab.service.
Set User=... to your preferred user in the [Service] section. That user needs to be a member of the docker group. Also check if the WorkingDirectory=... is correct.
[Unit]
Description=Gitlab
Requires=docker.service
After=docker.service

[Service]
Restart=always
User=root
Group=docker
WorkingDirectory=/var/lib/gitlab
# Shutdown container (if running) when unit is stopped
ExecStartPre=/usr/local/bin/docker-compose -f docker-compose.yml down -v
# Start container when unit is started
ExecStart=/usr/local/bin/docker-compose -f /docker-compose.yml up
# Stop container when unit is stopped
ExecStop=/usr/local/bin/docker-compose -f docker-compose.yml down -v

[Install]
WantedBy=multi-user.target
After creating the file, we can enable and start the gitlab service:
sudo systemctl enable gitlab
sudo systemctl start gitlab
The output of sudo systemctl start gitlab should be empty. In case it is
Job for gitlab.service failed because the control process exited with error code.
See "systemctl status gitlab.service" and "journalctl -xe" for details.
you can debug the issue using journalctl -xe and journalctl -e
The first startup usually takes about 10 minutes, so grab at least one cup of coffee. You can follow the progress using journalctl -xefu gitlab. Once you see lines like
Dec 17 17:28:04 instance-1 docker-compose[4087]: gitlab_1 | {"method":"GET","path":"/-/metrics","format":"html","controller":"MetricsController","action":"index","status":200,"duration":28.82,"view":22.82,"db":0.97,"time":"2018-12-17T17:28:03.252Z","params":[],"remote_ip":null,"user_id":null,"username":null,"ua":null}the startup is finished.
Now you can check if GitLab is running using
wget -O- http://localhost:9080/
(if you changed the port config before, you need to use your custom port in the URL).
If it worked, it will show a debug message output. Since gitlab will automatically redirect you to your domain (gitlab.mydomain.de in this example) you should see something like
--2018-12-17 17:28:32--  http://localhost:9080/
Resolving localhost (localhost)... 127.0.0.1
Connecting to localhost (localhost)|127.0.0.1|:9080... connected.
HTTP request sent, awaiting response... 302 Found
Location: https://gitlab.gridbox.de/users/sign_in [following]
--2018-12-17 17:28:32--  https://gitlab.mydomain.de/users/sign_in
Resolving gitlab.gridbox.de (gitlab.mydomain.de)... 35.198.165.121
Connecting to gitlab.gridbox.de (gitlab.mydomain.de)|35.198.165.121|:443... failed: Connection refused.
Since we have not setup nginx as a reverse proxy yet, it’s totally fine that it’s saying connection refused. The redirection worked if you see the output listed above.
We’ll use nginx to proxy the requests from a certain domain (Using Apache, if you use it already, is also possible but it is outside the scope of this tutorial to tell you how to do that). Install it using
sudo apt -y install nginx
First, you’ll need a domain name with DNS being configured. For this example, we’ll assume that your domain name is gitlab.mydomain.de ! You need to change it to your domain name!
First, we’ll create the config file in /etc/nginx/sites-enabled/gitlab.conf. Remember to replace gitlab.mydomain.de by your domain name! If you use a port different from 9080, replace that as ewll.
map $http_upgrade $connection_upgrade {
    default upgrade;
    '' close;
}

server {
    server_name gitlab.mydomain.de;

    access_log /var/log/nginx/gitlab.access_log;
    error_log /var/log/nginx/gitlab.error_log info;

    location / {
        proxy_pass http://127.0.0.1:9080; # docker container listens here
        proxy_read_timeout 3600s;
        proxy_http_version 1.1;
        # Websocket connection
        proxy_set_header Upgrade $http_upgrade;
        proxy_set_header Connection $connection_upgrade;
    }

    listen 80;
}
Now run sudo nginx -t to test if there are any errors in the config file. If everything is alright, you’ll see
nginx: the configuration file /etc/nginx/nginx.conf syntax is ok
nginx: configuration file /etc/nginx/nginx.conf test is successful
Once you have fixed all errors, if any, run sudo service nginx reload to apply the configuration.
We need to setup a Let’s Encrypt SSL certificate before we can check if Gitlab is working:
First we need to install certbot and the certbot nginx plugin in order to create & install the certificate in nginx:
sudo apt -y install python3-certbot python3-certbot-nginx
Fortunately certbot automates most of the process of installing & configuring SSL and the certificate. Run
sudo certbot --nginx
It will ask you to enter your Email address and agree to the terms of service and if you want to receive the EFF newsletter.
After that, certbot will ask you to select the correct domain name:
Which names would you like to activate HTTPS for?
-------------------------------------------------------------------------------
1: gitlab.mydomain.de
-------------------------------------------------------------------------------
Select the appropriate numbers separated by commas and/or spaces, or leave input
blank to select all options shown (Enter 'c' to cancel):
In this case, there is only one domain name (there will be more if you have more domains active on nginx!).
Therefore, enter 1 and press enter. certbot will now generate the certificate. In case of success you will see an output including a line like
Deploying Certificate to VirtualHost /etc/nginx/sites-enabled/gitlab.mydomain.de.conf
Now it will ask you whether to redirect all requests to HTTPS automatically:
Please choose whether or not to redirect HTTP traffic to HTTPS, removing HTTP access.
-------------------------------------------------------------------------------
1: No redirect - Make no further changes to the webserver configuration.
2: Redirect - Make all requests redirect to secure HTTPS access. Choose this for
new sites, or if you're confident your site works on HTTPS. You can undo this
change by editing your web server's configuration.
-------------------------------------------------------------------------------
Select the appropriate number [1-2] then [enter] (press 'c' to cancel):
Choose Redirect here: Type 2 and press enter. Now you can login to GitLab and finish the installation.
You need to renew the certificate every 3 months for it to stay valid, and run sudo service nginx reload afterwards to use the new certificate. If you fail to do this, users will see certificate expired error messages and won’t be able to access Gitlab easily! See this post for details on how to mostly automate this process!
Now you can open a browser and have a first look at your new GitLab installation:
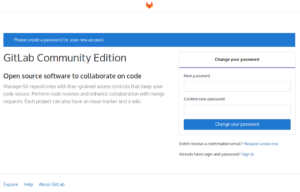
Set the new password and then login with the username root and your newly set password.
After that, open the admin area at the top by clicking at the wrench icon in the purple navigation bar at the top.

At the navigation bar at the left, click on Settings (it’s at the bottom – you need to scroll down) and then click on General.
Click the Expand button to the right of Visibility and access controls. Scroll down until you see Enabled Git access protocols and select Only HTTP(S) in the combo box.
Then click the green Save changes button.
Since we have now disabled SSH access (which we didn’t set up in the first place), you can now use GitLab. A good place to start is to create a new project and try checking it out. See this article on how to store git https passwords so you don’t have to enter your git password every time.
Note: If GitLab doesn’t send emails, check config/gitlab.rb, search for smtp and if neccessary fix the SMTP settings there. After that, sudo systemctl stop gitlab && sudo systemctl start gitlab
Note: Previous version of this post listed letsencrypt['enabled'] = false instead of letsencrypt['enable'] = false (the d in enabled is missing in the correct version) – see this GitLab issue for more details. Thanks to Jonas Hohmann for informing me about this.
You want to run the Gitlab CE docker image, but since you want to run it together with other services behind a reverse proxy, you see an error message like this:
gitlab_1 | letsencrypt_certificate[gitlab.mydomain.com] (letsencrypt::http_authorization line 3) had an error: RuntimeError: acme_certificate[staging] (/opt/gitlab/embedded/cookbooks/cache/cookbooks/letsencrypt/resources/certificate.rb line 20) had an error: RuntimeError: [gitlab.mydomain.com] Validation failed for domain gitlab.mydomain.com
Add
letsencrypt['enable'] = false
to GITLAB_OMNIBUS_CONFIG. See this file on GitHub for more Let’s Encrypt-related configs you can add.
In docker-compose.yml it could look like this:
gitlab:
   image: 'gitlab/gitlab-ce:latest'
   restart: always
   hostname: 'gitlab.mydomain.com'
   environment:
     GITLAB_OMNIBUS_CONFIG: |
       external_url 'https://gitlab.mydomain.com'
       letsencrypt['enable'] = false
   ports:
     - '7080:80'
     - '1022:22'
   volumes:
     - '/var/lib/gitlab/config:/etc/gitlab'
     - '/var/lib/gitlab/logs:/var/log/gitlab'
     - '/var/lib/gitlab/data:/var/opt/gitlab'
Note: Also see this followup post on how to use custom themes in this setup and this followup post on how to backup Redmine using this setup.
This tutorial shows you step-by-step the easiest method of setting up a fresh redmine installation I have found so far. The commands have been tested on Ubuntu 18.04, but they should work with minimal modification on other DEB-based distributions
Please follow the instructions in How to install docker and docker-compose on Ubuntu in 30 seconds
We will install redmine in /var/lib/redmine which will host the data directories and the docker-compose script.
# Create directories
sudo mkdir /var/lib/redmine
sudo mkdir -p /var/lib/redmine/redmine_data /var/lib/redmine/mariadb_data
# Set correct permissions for the directories
sudo chown -R $USER:docker /var/lib/redmine
sudo chown -R 1001:1001 /var/lib/redmine/redmine_data /var/lib/redmine/mariadb_data
Next, we’ll create /var/lib/redmine/docker-compose.yml.
There’s a couple of things you need to change here:
REDMINE_EMAIL to the email of the admin user you want to use (usually that is your email!)SMTP_HOST, SMTP_PORT, SMTP_USER and SMTP_PASSWORD) to a valid SMTP server. SMTP_TLS defaults to true – in the rare case that'3718:3000' means that Redmine will be mapped to port 3718 on the local PC. This port is chosen somewhat arbitarily – as we will run redmine behind an nginx reverse proxy, the port does not need to be any port in particular (as long as you use the same port everywhere), but it may not be used by anything else. You can use any port here, provided that it’s not used for anything else. Leave 3000 as-is and only change 3718 if required.Note that you do not need to change REDMINE_PASSWORD – when you login for the first time, redmine will force you to change the password anyway.
version: '2'
services:
  mariadb:
    image: 'bitnami/mariadb:latest'
    environment:
      - ALLOW_EMPTY_PASSWORD=yes
    volumes:
      - '/var/lib/redmine/mariadb_data:/bitnami'
  redmine:
    image: 'bitnami/redmine:latest'
    environment:
      - REDMINE_USERNAME=admin
      - REDMINE_PASSWORD=redmineadmin
      - [email protected]
      - SMTP_HOST=smtp.gmail.com
      - SMTP_PORT=25
      - [email protected]
      - SMTP_PASSWORD=yourGmailPassword
    ports:
      - '3718:3000'
    volumes:
      - '/var/lib/redmine/redmine_data:/bitnami'
    depends_on:
- mariadbNext, we’ll configure the systemd service in /etc/systemd/system/redmine.service.
Set User=... to your current user in the [Service] section.
[Unit]
Description=Redmine
Requires=docker.service
After=docker.service

[Service]
Restart=always
User=uli
Group=docker
# Shutdown container (if running) when unit is stopped
ExecStartPre=/usr/local/bin/docker-compose -f /var/lib/redmine/docker-compose.yml down -v
# Start container when unit is started
ExecStart=/usr/local/bin/docker-compose -f /var/lib/redmine/docker-compose.yml up
# Stop container when unit is stopped
ExecStop=/usr/local/bin/docker-compose -f /var/lib/redmine/docker-compose.yml down -v

[Install]
WantedBy=multi-user.target
After creating the file, we can enable and start the redmine service:
sudo systemctl enable redmine
sudo systemctl start redmine
The output of sudo systemctl start redmine should be empty. In case it is
Job for redmine.service failed because the control process exited with error code.
See "systemctl status redmine.service" and "journalctl -xe" for details.
debug the issue using journalctl -xe and journalctl -e
The first startup usually takes about 3 minutes, so grab a cup of coffee.
Now you can check if redmine is running using
wget -qO- http://localhost:3718/
(if you changed the port config before, you need to use your custom port in the URL).
If it worked, it will show a large HTML output, ending with
[...]
<div id="footer">
<div class="bgl"><div class="bgr">
Powered by <a href="https://www.redmine.org/">Redmine</a> © 2006-2018 Jean-Philippe Lang
</div></div>
</div>
</div>
</div>
</body>
</html>
If the output is empty, try wget -O- http://localhost:3718/ to see the error message
We’ll use nginx to proxy the requests from a certain domain (Using Apache, if you use it already, is also possible but it is outside the scope of this tutorial to tell you how to do that). Install it using
sudo apt -y install nginx
First, you’ll need a domain name with DNS being configured. For this example, we’ll assume that your domain name is redmine.techoverflow.net ! You need to change it to your domain name!
First, we’ll create the config file in /etc/nginx/sites-enabled/redmine.conf. Remember to replace redmine.techoverflow.net by your domain name! If you use a port different from 3718, replace that as ewll.
server {
    listen 80;
    server_name redmine.techoverflow.net;

    access_log /var/log/nginx/redmine.access_log;
    error_log /var/log/nginx/redmine.error_log info;

    location / {
        proxy_pass http://127.0.0.1:3718; # docker-compose forwarded
        proxy_read_timeout 3600s;
        proxy_http_version 1.1;
    }

}
Now run sudo nginx -t to test if there are any errors in the config file. If everything is alright, you’ll see
nginx: the configuration file /etc/nginx/nginx.conf syntax is ok
nginx: configuration file /etc/nginx/nginx.conf test is successful
Once you have fixed all errors, if any, run sudo service nginx reload to apply the configuration.
Test the setup by navigating your domain name in the browser. You should see the redmine interface:

First we need to install certbot and the certbot nginx plugin in order to create & install the certificate in nginx:
sudo apt -y install python3-certbot python3-certbot-nginx
Fortunately certbot automates most of the process of installing & configuring SSL and the certificate. Run
sudo certbot --nginx
It will ask you to enter your Email address and agree to the terms of service and if you want to receive the EFF newsletter.
After that, certbot will ask you to select the correct domain name:
Which names would you like to activate HTTPS for?
-------------------------------------------------------------------------------
1: redmine.techoverflow.net
-------------------------------------------------------------------------------
Select the appropriate numbers separated by commas and/or spaces, or leave input
blank to select all options shown (Enter 'c' to cancel):
In this case, there is only one domain name (there will be more if you have more domains active on nginx!).
Therefore, enter 1 and press enter. certbot will now generate the certificate. In case of success you will see
Deploying Certificate to VirtualHost /etc/nginx/sites-enabled/redmine.techoverflow.net.conf
Now it will ask you whether to redirect all requests to HTTPS automatically:
Please choose whether or not to redirect HTTP traffic to HTTPS, removing HTTP access.
-------------------------------------------------------------------------------
1: No redirect - Make no further changes to the webserver configuration.
2: Redirect - Make all requests redirect to secure HTTPS access. Choose this for
new sites, or if you're confident your site works on HTTPS. You can undo this
change by editing your web server's configuration.
-------------------------------------------------------------------------------
Select the appropriate number [1-2] then [enter] (press 'c' to cancel):
Choose Redirect here: Type 2 and press enter. Now you can login to redmine and finish the installation.
You need to renew the certificate every 3 months for it to stay valid, and run sudo service nginx reload afterwards to use the new certificate. If you fail to do this, users will see certificate expired error messages and won’t be able to access Redmine easily! See this post for details on how to mostly automate this process!
Go to your domain name (if you have followed the instructions above, it should automatically redirect you to HTTPS). Click Login at the top right and login with the username admin and the default password redmineadmin. Upon first login, it will require you to change the password to a new – and more secure password.
I won’t describe in detail how to setup Redmine for your project. However there’s two things you should take care of immediately after the first login:
Host name and path to your domain name, e.g. redmine.techoverflow.net. Set Protocol to HTTPS. You can also set a custom name for your Redmine installation under Application TitleEmission email address (usually you would use [email protected] here, but you might want to use your SMTP username for some SMTP providers like GMail)Send a test email which will send a test email to the current redmine user’s email adress. Unless you have changed it, the default is the address configured in REDMINE_EMAIL in /var/lib/redmine/docker-compose.yml.In case the email does not work, change SMTP_...=... in /var/lib/redmine/docker-compose.yml but you also have to change it in /var/lib/redmine/redmine_data/redmine/conf/configuration.yml ! After doing the changes, restart redmine by
sudo systemctl restart redmine
which will use the new configuration from the config file.
ufw is a simple Firewall for Ubuntu. Use sudo apt install ufw to install it and sudo ufw enable to activate it. The default configuration will allow SSH but it will block other ports, including port 3718 or any other custom port you might have used.
In order to enable it, use
sudo ufw enable
sudo ufw allow ssh
sudo ufw allow http
sudo ufw allow https
Remember to add any ports you need to have open to the list as well. See the ufw docs for more information.
In order to run docker-compose up in the background, use
docker-compose up -d
The -d option means --detach, i.e. the process is detached from the foreground shell you are running.
You are setting up a docker-based redmine installation using the bitnami image, but you’re getting this error message when you use a host directory mounted as volume:
cannot create directory '/bitnami/mariadb': Permission denied
Run
sudo chown -R 1001:1001 <directory>
on the host directories used by both the MariaDB container and the Redmine container.
In order to find the directories, look for these lines in the docker-compose YML file::
# Example: This can be found in the mariadb section:
    volumes:
      - '/var/lib/myredmine/mariadb_data:/bitnami'
# Example: This can be found in the redmine section
    volumes:
      - '/var/lib/myredmine/redmine_data:/bitnami'
In this example, you would have to run
sudo chown -R 1001:1001 /var/lib/myredmine/mariadb_data /var/lib/myredmine/redmine_data
and then restart the container:
docker-compose down
docker-compose up # Use 'docker-compose up -d' to run in the background
Here’s my template for running a docker-compose service as a systemd service:
# Save as e.g. /etc/systemd/system/my-service.service
[Unit]
Description=MyService
Requires=docker.service
After=docker.service

[Service]
Restart=always
User=uli
Group=docker
# Shutdown container (if running) when unit is stopped
ExecStartPre=/usr/local/bin/docker-compose -f /home/uli/mydockerservice/docker-compose.yml down -v
# Start container when unit is started
ExecStart=/usr/local/bin/docker-compose -f /home/uli/mydockerservice/docker-compose.yml up
# Stop container when unit is stopped
ExecStop=/usr/local/bin/docker-compose -f /home/uli/mydockerservice/docker-compose.yml down -v

[Install]
WantedBy=multi-user.target
In order to get it up and running for your application, you need to modify a couple of things:
/usr/local/bin/docker-compose (as I do, because I use the docker-ce installation from the official docker repositories for Ubuntu 18.04) or in /usr/bin/docker-compose (in which case you need to set the correct docker-compose path in all 3 places in the service file)uli in this example) is a member of the docker group (sudo usermod -a -G docker <user>), and set the correct user in the User=... lineDescription=... linedocker-compose YML config file in all the Exec…=… lines (i.e. replace /home/uli/mydockerservice/docker-compose.yml by your YML path).After that, you can start your service using
sudo systemctl start my-service # --> my-service.service, use whatever you named your file as
and optionally enable it at bootup:
systemctl enable docker # Docker is required for your service so you need to enable it as well!
systemctl enable my-service # --> my-service.service, use whatever you named your file as
You’re running a docker command like docker ps, but you only see this error message:
Cannot connect to the Docker daemon at unix:///var/run/docker.sock. Is the docker daemon running?
As the error message already tells you, the docker daemon is currently not running.
On Ubuntu (16.04 upwards) and many other systemd-based distributions, you can fix this by
sudo systemctl start docker
In most cases, you want to automatically start the docker daemon at boot. In order to do this, run
sudo systemctl enable docker
After that, run your command (e.g. docker ps) again.
You are running a command like docker ps but you get this error message:
Got permission denied while trying to connect to the Docker daemon socket at unix:///var/run/docker.sock: Get http://%2Fvar%2Frun%2Fdocker.sock/v1.39/containers/json: dial unix /var/run/docker.sock: connect: permission denied
As a quick fix, running the command as root using sudo (e.g. sudo docker ps) will solve the issue temporarily.
The issue here is that the user you’re running the command as is not a member of the docker group. In order to add it to the docker group, run
sudo usermod -a -G docker $USER
After running that command, you need to logout and log back in to your computer (or terminate your SSH session and re-connect in case you are logged in using SSH) – else, the group change does not take effect.
Running groups should show you that you now belong to the docker group:
$ groups
uli sudo www-data lxd docker # Check if docker appears here!
After that, retry running the command (e.g. docker ps) – the error should now have disappeared.
See What does sudo usermod -a -G group $USER do on Linux? for details on what this command changes on your system and what the parameters mean.
When you run any docker command on Linux, the docker binary will try to connect to /var/run/docker.sock. This allows you to run docker commands as non-root-user without using sudo all the time.
When you start the docker daemon, it will create /var/run/docker.sock as a unix socket for client applications to connect to.
You can have a look at the owner, group and permissions of the docker socket by using stat /var/run/docker.sock on the command line:
$ stat /var/run/docker.sock
  File: /var/run/docker.sock
  Size: 0               Blocks: 0          IO Block: 4096   socket
Device: 16h/22d Inode: 677         Links: 1
Access: (0660/srw-rw----)  Uid: (    0/    root)   Gid: (  999/  docker)
Access: 2019-04-30 01:32:21.718150679 +0200
Modify: 2019-04-24 18:37:39.236357175 +0200
Change: 2019-04-24 18:37:39.240357175 +0200
 Birth: -
For our purposes, the interesting information is Uid: ( 0/ root) Gid: ( 999/ docker) which tells you that the docker socket is owned by the user root and the group docker. The group ID might be different on your computer, but only the name of the group is relevant.
Given the permissions Access: (0660/srw-rw----), both the owner (root) and the group (docker) can read & write (rw) to the docker socket. This means that if you are either the user root (which you can become temporarily using sudo) or you are a member of the docker group, you will be able to connect to that socket and communicate with the docker daemon.
Note that the docker daemon itself (dockerd) is running as root, which you can check using
$ ps aux | grep dockerd
root      2680  0.1  0.3 1247872 19828 ?       Ssl  Apr24   7:44 /usr/bin/dockerd -H fd://
For more information on the docker daemon, see the official Docker daemon guide.
To list all currently running docker containers run
docker ps
If no containers are running, this will give you this output:
CONTAINER ID IMAGE COMMAND CREATED STATUS PORTS NAMES
In case some containers are running, there will be additional lines listing the container like
CONTAINER ID        IMAGE                    COMMAND                  CREATED             STATUS              PORTS                    NAMES
1bd0a1461b38        bitnami/mariadb:latest   "/entrypoint.sh /run…"   6 minutes ago       Up 6 minutes        3306/tcp                 mydb
You know you can launch an Ubuntu LXC container using
lxc launch ubuntu:18.04 myvm
Now you want to launch a Debian VM using
lxc launch debian:jessie myvm
but you only get this error message:
Error: The remote "debian" doesn't exist
The debian images are (by default) available from the images remote, not the debian remote, so you need to use this:
lxc launch images:debian/jessie myvm
In order to determine the size of a LXC container, first run lxc storage list to list your storage pools:
uli@myserver:~$ lxc storage list
+---------+-------------+--------+------------------------------------+---------+
|  NAME   | DESCRIPTION | DRIVER |               SOURCE               | USED BY |
+---------+-------------+--------+------------------------------------+---------+
| default |             | dir    | /var/lib/lxd/storage-pools/default | 2       |
+---------+-------------+--------+------------------------------------+---------+
If the driver is not dir, you are using a COW-type storage backend. Using this technology it is not possible to easily determine the storage size of a container. The following instructions apply only for the dir driver.
Now open a root shell and cd to the directory listed in the SOURCE column and cd to its containers subdirectory:
root@myserver ~ # cd /var/lib/lxd/storage-pools/default
root@myserver /var/lib/lxd/storage-pools/default # cd containers/
root@myserver /var/lib/lxd/storage-pools/default/containers #
This directory contains the storage directory for all containers. Run du -sh * in order to find the size of each container:
root@myserver /var/lib/lxd/storage-pools/default/containers # du -sh *
2.0G    my-container
In this example, the container my-container occupies 2.0 Gibibytes of disk space.
The enormous amount of IPv6 addresses available to most commercially hosted VPS / root servers with a public IPv6 prefix allows you to route a public IPv6 address to every container that is running on your server. This tutorial shows you how to do that, even if you have no prior experience with routing,
We assume you have already done this – just for reference, here’s how you can create a container:
lxc launch ubuntu:18.04 my-container
First you need to find out what prefix is routed to your host. Usually you can do that by checking in your provider’s control panel. You’re looking for something like 2a01:4f9:c010:278::1/64. Another option would be to run sudo ifconfig
and look for a inet6 line in the section of your primary network interface (this only works if you have configured your server to have an IPv6 address). Note that addresses that start with fe80:: and addresses starting with fd, among others, are not public IPv6 addresses.
Then you can define a new IPv6 address to your container. Which one you choose – as long as it’s within the prefix – is entirely your decision.
Often, <prefix>::1 is used for the host itself, therefore you could, for example, choose <prefix>::2. Note that some providers use some IP addresses for other purposes. Check your provider’s documentation for details.
If you don’t want to make it easy to find your container’s public IPv6, don’t choose <prefix>::1, <prefix>::2, <prefix>::3 etc but something more random like <prefix>:af15:99b1:0b05:1, for example2a01:4f9:c010:278:af15:99b1:0b05:0001. Ensure your IPv6 address has 8 groups of 4 hex digits each!
For this example, we choose the IPv6 address 2a01:4f9:c010:278::8.
We need to find the ULA (unique local address – similar to a private IPv4 address which is not routed on the internet) of the container. Using lxc, this is quite easy:
uli@myserver:~$ lxc list
+--------------+---------+-----------------------+-----------------------------------------------+
|     NAME     |  STATE  |         IPV4          |                     IPV6                      |
+--------------+---------+-----------------------+-----------------------------------------------+
| my-container | RUNNING | 10.144.118.232 (eth0) | fd42:830b:36dc:3691:216:3eff:fed1:9058 (eth0) |
+--------------+---------+-----------------------+-----------------------------------------------+
You need to look in the IPv6 column and copy the address listed there. In this example, the address is fd42:830b:36dc:3691:216:3eff:fed1:9058.
Now we can tell the host Linux to route your chosen public IPv6 to the container’s private IPv6. This is quite easy:
sudo ip6tables -t nat -A PREROUTING -d <public IPv6> -j DNAT --to-destination <container private IPv6>
In our example, this would be
sudo ip6tables -t nat -A PREROUTING -d 2a01:4f9:c010:278::8 -j DNAT --to-destination fd42:830b:36dc:3691:216:3eff:fed1:9058
First, test the command by running it in a shell. If it works (i.e. if it doesn’t print any error message), you can permanently store it e.g. by adding it to /etc/rc.local (after #!/bin/bash, before exit 0). Advanced users should prefer to add it to /etc/network/interfaces.
Note: This step requires that you have working IPv6 connectivity at your local computer. If you are unsure, check at ipv6-test.com
First, open a shell on your container:
lxc exec my-container bash
After running this, you should see a root shell prompt inside your container:
root@my-container:~#
The following commands should be entered in the container shell, not the host!
Now we can create a user to login to (in this example, we create the uli user):
root@my-container:~# adduser uli
Adding user `uli' ...
Adding new group `uli' (1001) ...
Adding new user `uli' (1001) with group `uli' ...
Creating home directory `/home/uli' ...
Copying files from `/etc/skel' ...
Enter new UNIX password:
Retype new UNIX password:
passwd: password updated successfully
Changing the user information for uli
Enter the new value, or press ENTER for the default
        Full Name []:
        Room Number []:
        Work Phone []:
        Home Phone []:
        Other []:
Is the information correct? [Y/n]
You only need to enter a password (you won’t see anything on screen when entering it) twice, for all other lines you can just press enter.
The ubuntu:18.04 lxc image used in this example does not allow SSH password authentication in its default configuration. In order to fix this, change PasswordAuthentication no to PasswordAuthentication yes in /etc/ssh/sshd_config and restart the SSH server by running service sshd restart. Be sure you understand the security implications before you do that!
Now, logout of your container shell by pressing Ctrl+D. The following commands can be entered on your desktop or any other server with IPv6 connectivity.
Now login to your server:
ssh <username>@<public IPv6 address>
in this example:
ssh uli@2a01:4f9:c010:278::8
If you configured everything correctly, you’ll see the shell prompt for your container:
uli@my-container:~$
Note: Don’t forget to configure a firewall for your container, e.g. ufw! Your container’s IPv6 is exposed to the internet and just assuming noone will guess it is not good security practice.
You want to launch a lxc container using lxc launch, but you get this error message instead:
Error: The remote isn't a private LXD server
You are using a command like this:
lxc launch mycontainer ubuntu:18.04
You’ve swapped the container name and image arguments! The correct command looks like this:
lxc launch ubuntu:18.04 mycontainer
You want to launch some lxd container using lxc launch […] but instead you get the following error message:
Failed container creation: No storage pool found. Please create a new storage pool.
You need to initialize lxd before using it:
lxd init
When it asks you about the backend
Name of the storage backend to use (btrfs, dir, lvm) [default=btrfs]:
choosing the default option (btrfs) means that you’ll have to use a dedicated block device (or a dedicated preallocated file image) for storage. While this is more efficient if you run many containers at a time, I recommend to choose the dir backend for the default storage pool, because that option will be easiest to configure and will not occupy as much space on your hard drive.
See Storage management in lxd for more more details, including different options for storage pools in case you need a more advanced setup.