Embedded

How to install OctoPi using rpi-imager

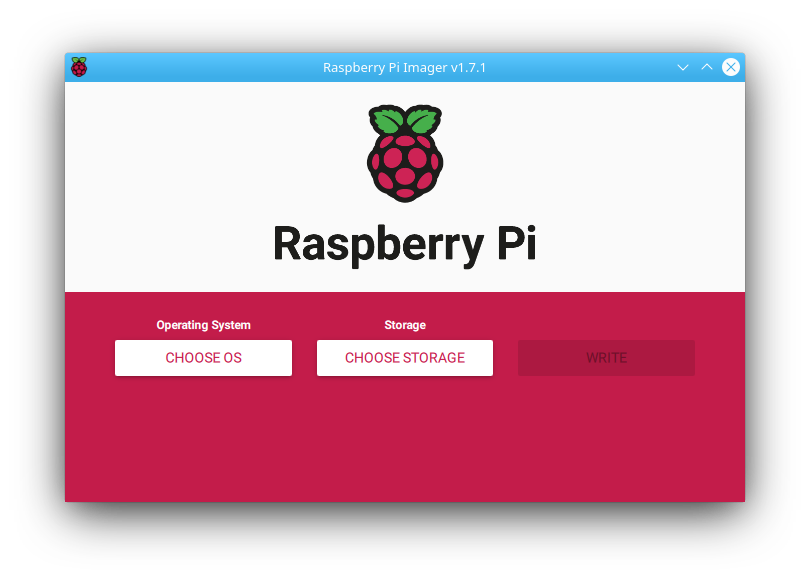
First open rpi-imager:

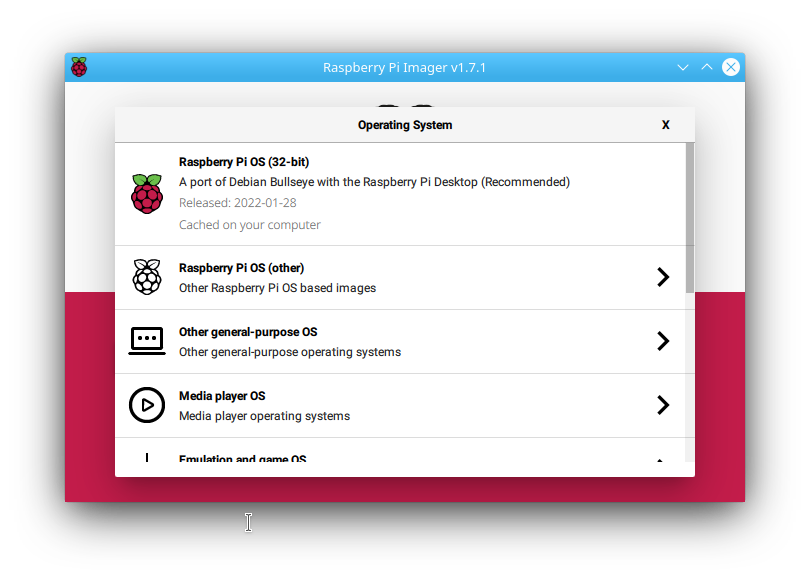
then select Choose OS

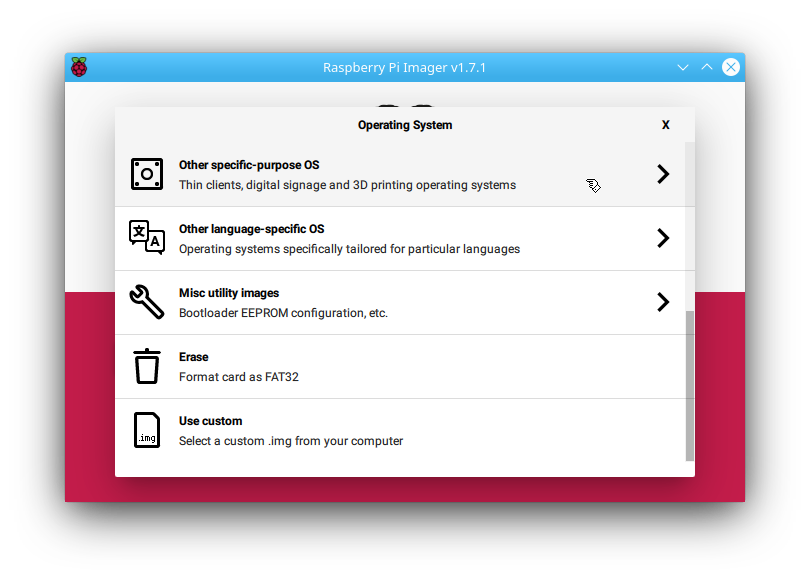
Sroll down to Other specific-purpose OS (do not click on Other general-purpose OS, even though it sounds similar!)

Click on Other specific-purpose OS:

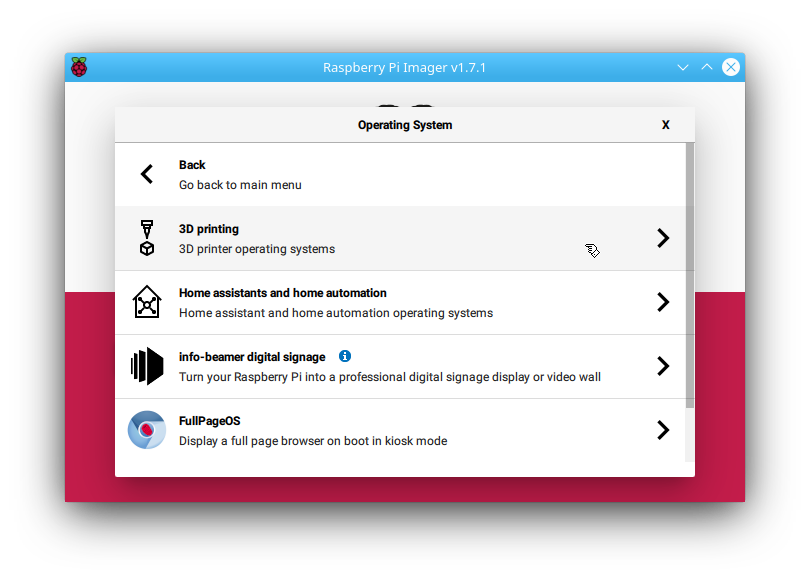
Now click on 3D printing:

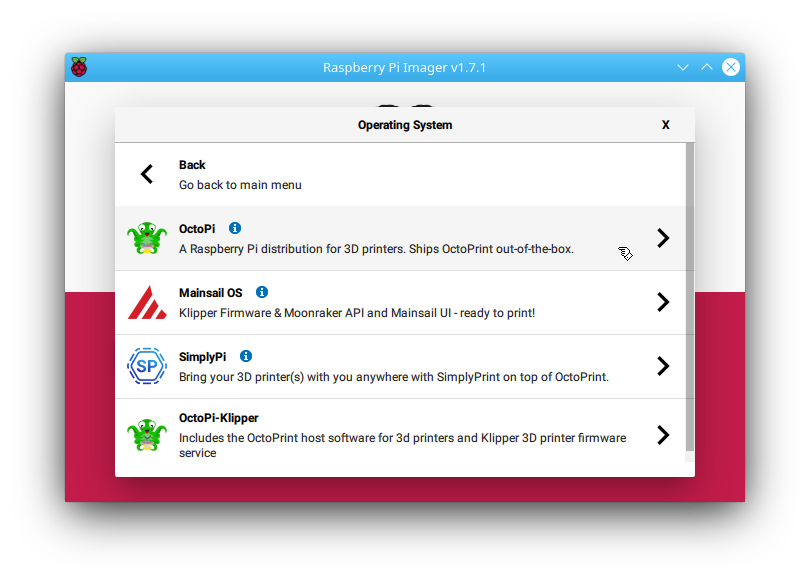
Click on OctoPi:

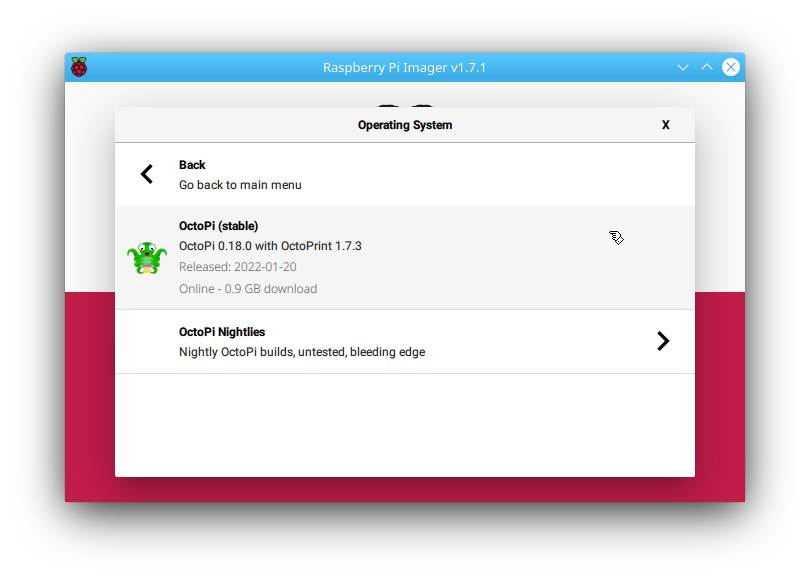
Now click on OctoPi (stable):

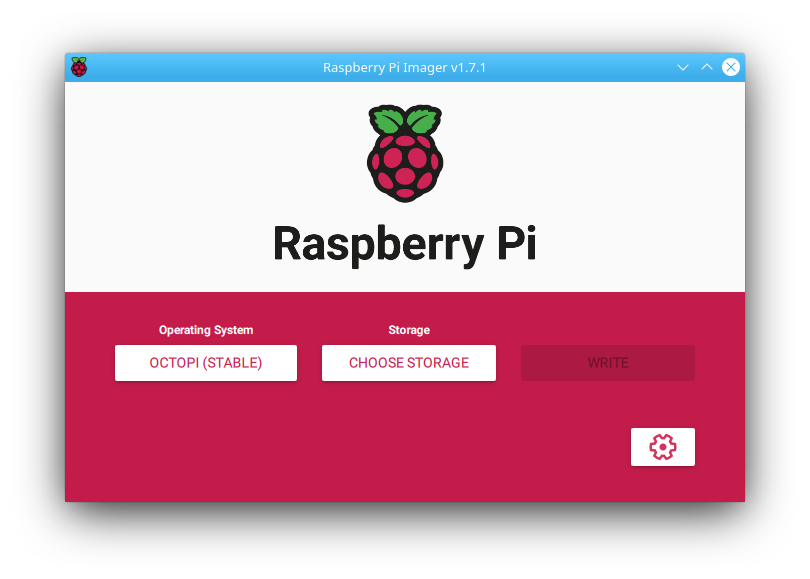
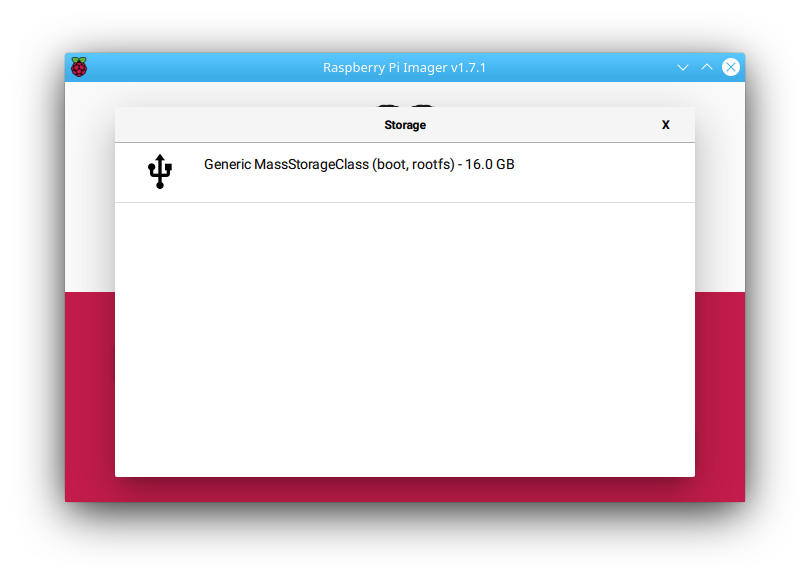
Now click on Choose Storage to select the SD card you want to write the image to:

Click on the correct device to select it – double check to make sure you have selected the correct device !

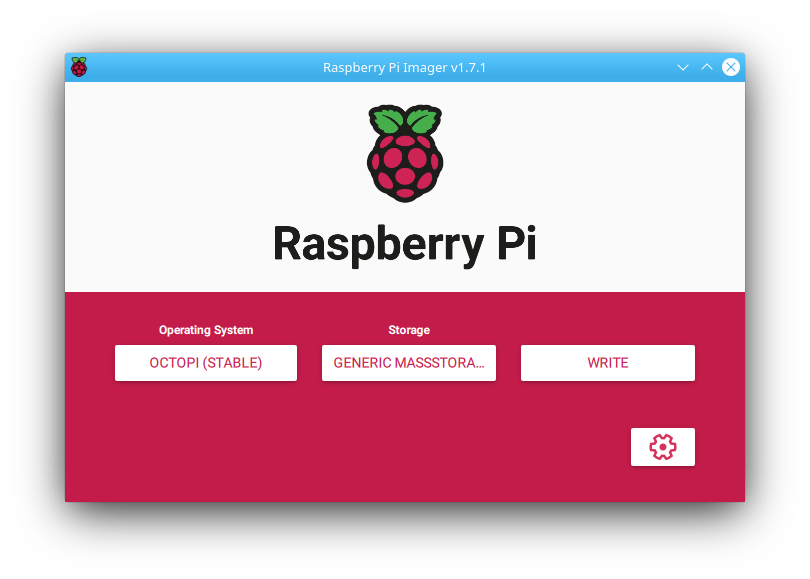
Now click Write to download the image and write it to the SD card:

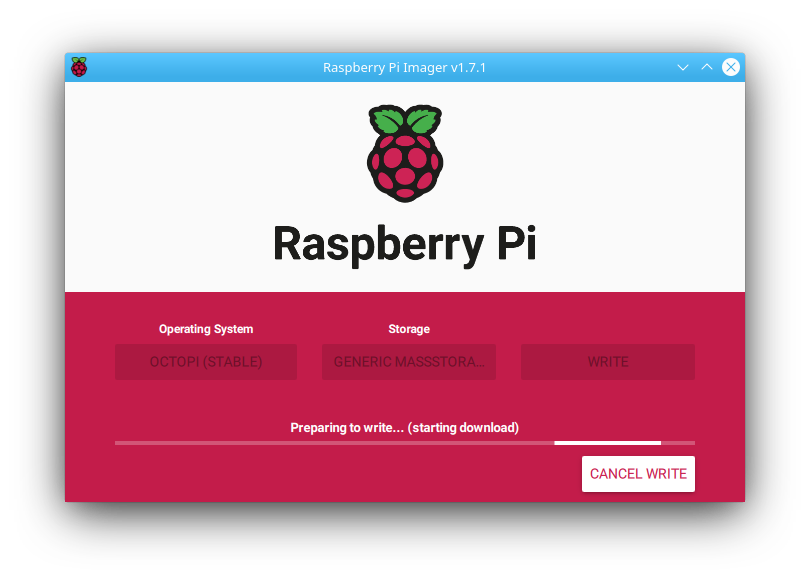
and now grab a coffee since it will take a couple of minutes to write:

Posted by Uli Köhler in 3D printing, Raspberry Pi

How long is the Raspberry Pi DSI display cable?

The DSI display cable that comes with the Raspberry Pi 7″ display is 10cm (100mm) long:

Posted by Uli Köhler in Raspberry Pi

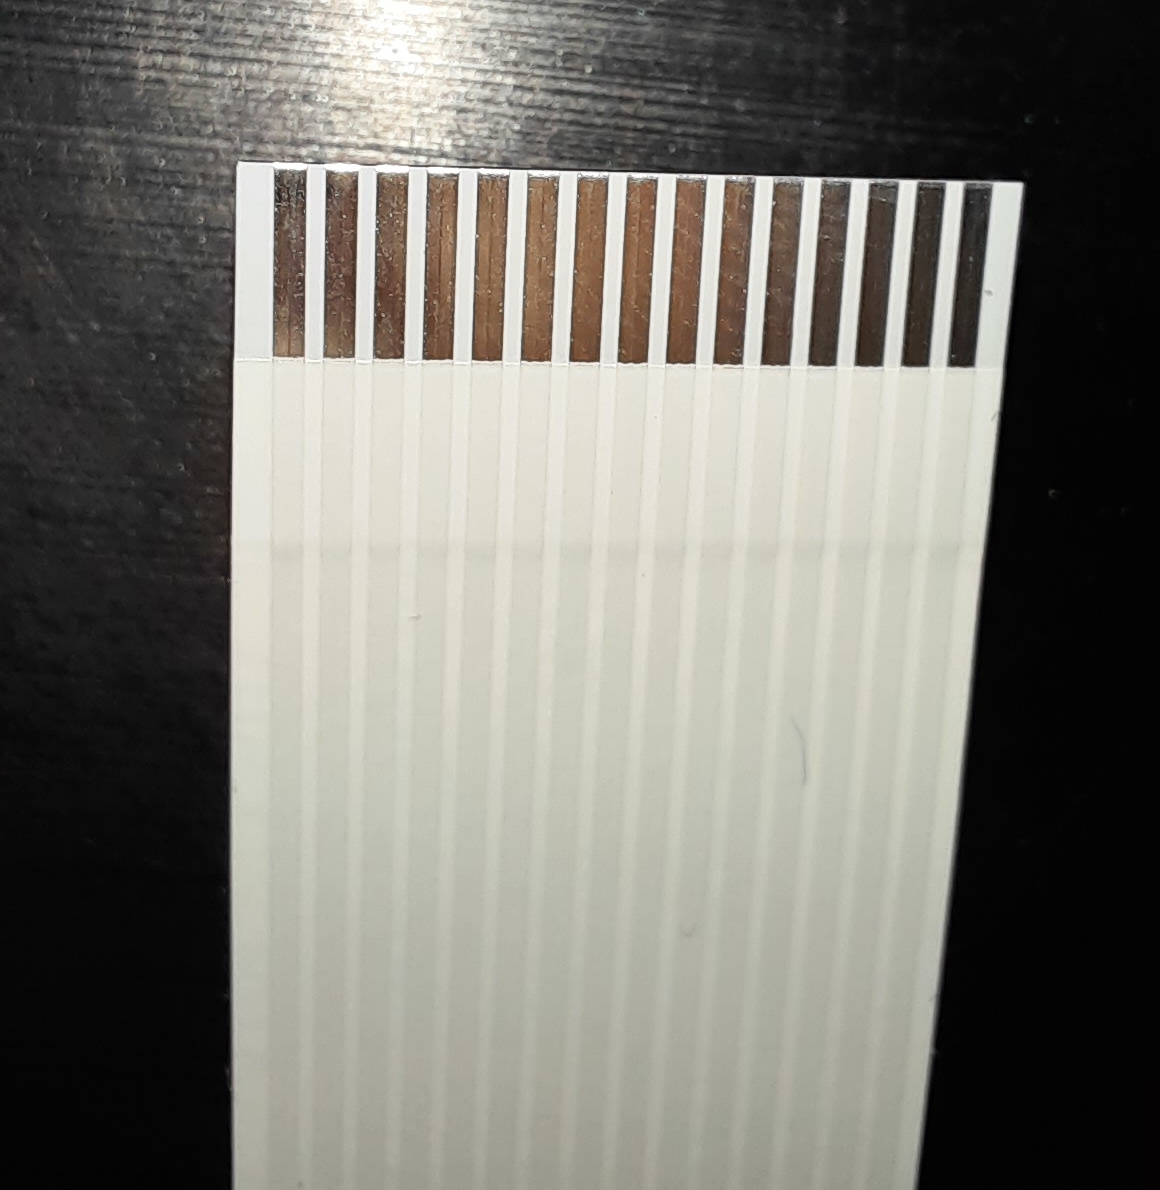
How many pins does the Raspberry Pi display DSI cable have?

The Rasbperry Pi DSI connector / cable has 15 pins:

Posted by Uli Köhler in Raspberry Pi

How to enable Raspberry Pi (Raspbian) WiFi connection on boot

Open the boot partition on the Rasbian SD card and create a file wpa_supplicant.conf there, with the following content:

country=de
update_config=1
ctrl_interface=/var/run/wpa_supplicant

network={   
   scan_ssid=1
   ssid="MyWifi"  
   psk="abc123abc"
}

Always set the country code at the top ! If you don’t set it correctly, it won’t work!

Set ssid to the name of the wireless network.

Set psk to the wifi password.

Posted by Uli Köhler in Raspberry Pi

How to fix apt E: Unable to locate package rpi-imager

Problem:

While trying to install rpi-imager using

sudo apt install rpi-imager

you see this error message:

Reading package lists... Done
Building dependency tree       
Reading state information... Done

No apt package "rpi-imager", but there is a snap with that name.
Try "snap install rpi-imager"

E: Unable to locate package rpi-imager

Solution:

sudo apt -y install rpi-imager only works on Raspbian. On Ubuntu etc, you can install rpi-imager using

sudo snap install rpi-imager

Then start it using

rpi-imager

Posted by Uli Köhler in Linux, Raspberry Pi

How to fix ESP32 A fatal error occurred: ESP32 ROM does not support function erase_flash.

Problem:

When running esptool erase_flash, you an error message like:

esptool.py v2.8
Found 1 serial ports
Serial port /dev/ttyUSB0
Connecting....
Detecting chip type... ESP32
Chip is ESP32D0WDQ6 (revision 1)
Features: WiFi, BT, Dual Core, 240MHz, VRef calibration in efuse, Coding Scheme None
WARNING: Detected crystal freq 41.01MHz is quite different to normalized freq 40MHz. Unsupported crystal in use?
Crystal is 40MHz
MAC: 7c:9e:bd:f4:60:e0
Enabling default SPI flash mode...
Erasing flash (this may take a while)...

A fatal error occurred: ESP32 ROM does not support function erase_flash.

Solution:

You are likely using an outdated version of esptoolUse the esptool from GitHub:

git clone https://github.com/espressif/esptool.git

then run it using

cd esptool
python3 esptool.py erase_flash
Posted by Uli Köhler in Electronics, ESP8266/ESP32

LIRC Setup for Raspberry Pi (Receiver)

Quite simple. Just install it using

sudo apt-get install lirc

Update /boot/config.txt with dtoverlay=gpio-ir,gpio_pin=18

To use lirc in “default” mode (the default mode after installation is “devinput” mode) modify by sudo nano /etc/lirc/lirc_options.conf.

Change to driver = default

BTW: My first post on this blog 🙂

Posted by Tobias Gutmann in Raspberry Pi

How long does portMAX_DELAY actually wait in FreeRTOS?

Although portMAX_DELAY is listed as value for waiting indefinitely, it will only actually wait indefinitely if INCLUDE_vTaskSuspend is enabled in the FreeRTOS config.

portMAX_DELAY is typically defined as 0xFFFFFFFF i.e. 2^32-1:

#define portMAX_DELAY ( TickType_t ) 0xffffffffUL

(however if 16 bit ticks are enabled using configUSE_16_BIT_TICKS it will be defined as 0xFFFF (2^16-1).

In case INCLUDE_vTaskSuspend is enabled, this is treated as a special value and will actually wait indefinitely. If INCLUDE_vTaskSuspend is not defined, it will only wait for 0xFFFFFFFF ticks (assuming 32-bit system ticks.

In other words, this will wait for only about 7 weeks if FreeRTOS is defined to tick every millisecond.

Posted by Uli Köhler in Embedded, FreeRTOS

How to fix PlatformIO ArduinoJSON .pio/libdeps/ESP32/ArduinoJson/src/ArduinoJson/Variant/ConverterImpl.hpp:43:5: error: static assertion failed: To use 64-bit integers with ArduinoJson, you must set ARDUINOJSON_USE_LONG_LONG to 1

Problem:

While trying to compile your PlatformIO project, you see an error message like

.pio/libdeps/ESP32/ArduinoJson/src/ArduinoJson/Variant/ConverterImpl.hpp:43:5: error: static assertion failed: To use 64-bit integers with ArduinoJson, you must set ARDUINOJSON_USE_LONG_LONG to 1. See https://arduinojson.org/v6/api/config/use_long_long/
     ARDUINOJSON_ASSERT_INTEGER_TYPE_IS_SUPPORTED(T);
     ^~~~~~~~~~~~~~~~~~~~~~~~~~~~~~~~~~~~~~~~~~~~
In file included from .pio/libdeps/ESP32/ArduinoJson/src/ArduinoJson.hpp:30,
                 from .pio/libdeps/ESP32/ArduinoJson/src/ArduinoJson.h:9,
                 from include/MQTT/StatusMessage.hpp:2,
                 from src/MQTT/StatusMessage.cpp:1:
.pio/libdeps/ESP32/ArduinoJson/src/ArduinoJson/Variant/ConverterImpl.hpp: In instantiation of 'static void ArduinoJson6185_1::Converter<T, Enable>::toJson(const T&, ArduinoJson6185_1::VariantRef) [with T = long long int (*)(); Enable = void]':
.pio/libdeps/ESP32/ArduinoJson/src/ArduinoJson/Variant/VariantRef.hpp:98:27:   required from 'bool ArduinoJson6185_1::VariantRef::set(T*) const [with T = long long int()]'
.pio/libdeps/ESP32/ArduinoJson/src/ArduinoJson/Object/MemberProxy.hpp:58:5:   required from 'ArduinoJson6185_1::MemberProxy<TParent, TStringRef>::this_type& ArduinoJson6185_1::MemberProxy<TParent, TStringRef>::operator=(TChar*) [with TChar = long long int(); TObject = ArduinoJson6185_1::JsonDocument&; TStringRef = const char*; ArduinoJson6185_1::MemberProxy<TParent, TStringRef>::this_type = ArduinoJson6185_1::MemberProxy<ArduinoJson6185_1::JsonDocument&, const char*>]'

Solution

Add -DARDUINOJSON_USE_LONG_LONG=1 to the build_flags in platformio.ini. If build_flags does not exist in platformio.ini, create it after [env:...]

build_flags = -DARDUINOJSON_USE_LONG_LONG=1


Posted by Uli Köhler in Arduino, Electronics, ESP8266/ESP32, PlatformIO

ESP32 Wireguard example with HTTP access over Wireguard (PlatformIO)

In this example we will use Wireguard-ESP32-Arduino in order to make HTTP requests over Wireguard on the ESP32.

[env:esp32-gateway]
platform = espressif32
board = esp32-gateway
framework = arduino
monitor_speed = 115200
lib_deps =
    ciniml/WireGuard-ESP32@^0.1.5
#include <WiFi.h>
#include <WireGuard-ESP32.h>

// WiFi configuration --- UPDATE this configuration for your WiFi AP
char ssid[] = "MyWifiESSID";
char password[] = "my-wifi-password";

// WireGuard configuration --- UPDATE this configuration from JSON
char private_key[] = "gH2YqDa+St6x5eFhomVQDwtV1F0YMQd3HtOElPkZgVY=";
IPAddress local_ip(10, 217, 59, 2);
char public_key[] = "X6NJW+IznvItD3B5TseUasRPjPzF0PkM5+GaLIjdBG4=";
char endpoint_address[] = "192.168.178.133"; // IP of Wireguard endpoint to connect to.
int endpoint_port = 19628;

static WireGuard wg;

void setup()
{
    Serial.begin(115200);
    Serial.println("Connecting to the AP...");
    WiFi.begin(ssid, password);
    while( !WiFi.isConnected() ) {
        delay(100);
    }
    Serial.println(WiFi.localIP());
    Serial.println("Adjusting system time...");
    configTime(9 * 60 * 60, 0, "ntp.jst.mfeed.ad.jp", "ntp.nict.jp", "time.google.com");

    Serial.println("Connected. Initializing WireGuard...");
    wg.begin(
        local_ip,
        private_key,
        endpoint_address,
        public_key,
        endpoint_port);
}

void loop()
{
    WiFiClient client;

    /**
     * Connect to
     * python3 -m http.server
     */
    if( !client.connect("10.217.59.1", 8000) ) {
        Serial.println("Failed to connect...");
        delay(1000);
        return;
    } else { // Client connected successfully. Send dummy HTTP request.
        client.write("GET /wireguard-test HTTP/1.1\r\n");
        client.write("Host: wireguard.test.com\r\n");
        client.write("\r\n\r\n");
    }

}

Remember to replace 192.168.238.133 by the IP address of the computer your ESP32 should connect to (i.e. the computer running WireGuard). You also need to enter the correct Wifi credentials.

On the computer, deploy this WireGuard config:

[Interface]
# Name = Computer
PrivateKey = ONj6Iefel47uMKtWRCSMLan2UC5eW3Fj9Gsy9bqcyEc=
Address = 10.217.59.1/24
ListenPort = 19628

[Peer]
# Name = ESP32
PublicKey = H3KaL/X94984cLDNWFsM4Hx6Rs/Ku0bW2ECkDUn7wFw=
AllowedIPs = 10.217.59.2/32
PersistentKeepalive = 60

which is auto-generated by the following GuardMyWire config:

{
    "rules": {
        "Node": {
            "connect_to": ["*"],
            "keepalive": 60
        }
    },
    "peers": [
        {
            "name": "Computer",
            "endpoint": "192.168.178.233:19628",
            "addresses": [
                "10.217.59.1/24"
            ],
            "type": "Node",
            "interface_name": "wg0"
        }, {
            "name": "ESP32",
            "addresses": [
                "10.217.59.2/24"
            ],
            "type": "Node",
            "interface_name": "wg0"
        }
    ]
}

Enable this config and start a Python HTTP server to receive the requests using

python3 -m http.server

Now flash the firmware on the ESP32.

Using wg show you should see the ESP connecting:

interface: Computer
  public key: X6NJW+IznvItD3B5TseUasRPjPzF0PkM5+GaLIjdBG4=
  private key: (hidden)
  listening port: 19628

peer: H3KaL/X94984cLDNWFsM4Hx6Rs/Ku0bW2ECkDUn7wFw=
  endpoint: 10.9.1.108:19628
  allowed ips: 10.217.59.2/32
  latest handshake: 5 seconds ago
  transfer: 11.71 MiB received, 10.43 MiB sent
  persistent keepalive: every 1 minute

Look for the

latest handshake: 5 seconds ago

line.

On the shell running python3 -m http.server you should see the dummy HTTP requests:

10.217.59.2 - - [31/Dec/2021 02:36:48] "GET /wireguard-test HTTP/1.1" 404 -
10.217.59.2 - - [31/Dec/2021 02:36:48] code 404, message File not found
10.217.59.2 - - [31/Dec/2021 02:36:48] "GET /wireguard-test HTTP/1.1" 404 -
10.217.59.2 - - [31/Dec/2021 02:36:48] code 404, message File not found
10.217.59.2 - - [31/Dec/2021 02:36:48] "GET /wireguard-test HTTP/1.1" 404 -
10.217.59.2 - - [31/Dec/2021 02:36:48] code 404, message File not found
Posted by Uli Köhler in ESP8266/ESP32, PlatformIO, Wireguard

FreeRTOS task queue minimal example

This is how you create and use a task queue in FreeRTOS:

Global declaration

Declare the structure of a task (I recommend to use a task type enum class in order to keep the flexibility of using multiple task types:

#include <freertos/queue.h>

enum class I2CTaskType : uint8_t {
    MyTaskType = 0
};

struct I2CTask {
    I2CTaskType type;
    // Parameters
    int16_t value;
};
static QueueHandle_t i2cTaskQueue;

Initialization code

Call this once, before using it:

// Create task queue
i2cTaskQueue = xQueueCreate(8 /* Number of queue slots */, sizeof(I2CTask));

In the thread processing the queue

if (xQueueReceive(i2cTaskQueue, (void *)&task, portMAX_DELAY /* Wait infinitely for new tasks */) == pdTRUE) {
    if(task.type == I2CTaskType::MyTaskType) {
        // TODO process task
        Serial.printf("My task type: %d\r\n", task.value);
    }
}

How to add a task to the queue

void AddTask(int16_t val) {
    I2CTask task;
    task.type = I2CTaskType::MyTaskType;
    task.value = val;
    xQueueSend(i2cTaskQueue, (void*)&task, 10 / portTICK_PERIOD_MS /* timeout */);
}


Posted by Uli Köhler in C/C++, Embedded, FreeRTOS, PlatformIO

ESPAsyncWebserver handler example with String query argument

This example is based on our basic example and shows how to use an String query parameter, e.g. http://192.168.1.112/api/test?param=abc123

server.on("/api/test", HTTP_GET, [](AsyncWebServerRequest *request) {
      String param = request->getParam("param")->value();
      // TODO: Do something with param!

      // Respond with JSON {"status": "ok"}
      AsyncResponseStream *response = request->beginResponseStream("application/json");
      DynamicJsonDocument json(1024);
      json["status"] = "ok";
      json["param"] = param;
      serializeJson(json, *response);
      request->send(response);
});


Posted by Uli Köhler in ESP8266/ESP32, Networking

How to insert “null” value in ArduinoJSON

Just use nullptr:

json["myvalue"] = nullptr;

If nullptr is not available, use the equivalent (char*)0:

json["myvalue"] = (char*)0;


Posted by Uli Köhler in Arduino, Embedded

How to fix error: invalid conversion from ‘int’ to ‘esp_mqtt_event_id_t’ on the ESP8266 or ESP32

If you see an error message like

src/main.cpp: In function 'void InitMQTT()':
/home/uli/.platformio/packages/framework-arduinoespressif32/tools/sdk/esp32/include/esp_event/include/esp_event_base.h:37:32: error: invalid conversion from 'int' to 'esp_mqtt_event_id_t' [-fpermissive]
 #define ESP_EVENT_ANY_ID       -1               /**< register handler for any event id */

src/main.cpp:80:44: note: in expansion of macro 'ESP_EVENT_ANY_ID'
     esp_mqtt_client_register_event(client, ESP_EVENT_ANY_ID, mqtt_event_handler, client);
                                            ^~~~~~~~~~~~~~~~

replace ESP_EVENT_ANY_ID by MQTT_EVENT_ANY and recompile. This will fix the issue. Using ESP_EVENT_ANY_ID was possible in an outdated version of the MQTT library.


Posted by Uli Köhler in Arduino, Embedded, ESP8266/ESP32, MQTT, Networking, PlatformIO

How to use a specific espressif32 platformio version in PlatformIO

For production projects, you often want to lock platform & library versions in order to avoid an update suddenly breaking your code:

In platformio.ini, instead of

platform = espressif32

use this syntax to refer to the git repository and a specific tag (v3.4.0 in this example) directly:

platform = https://github.com/platformio/platform-espressif32.git#v3.4.0
Posted by Uli Köhler in Arduino, Electronics, Embedded, ESP8266/ESP32, PlatformIO

What ESP-IDF version does PlatformIO with Arduino use

On Dec 17th 2021, PlatformIO with this default platformio.ini config (with platformio-espressif32 v3.4.0):

[env:ESP32]
platform = espressif32
board = esp32dev
framework = arduino

uses ESP-IDF version 3.3.5

You can find this out yourself by printing all preprocessor flags as described in our post on How to print all preprocessor flags in PlatformIO and then looking for ESP_IDF_VERSION_... definitions using:

grep ESP_IDF_VERSION .pio/build/ESP32/src/main.cpp.o

which currently results in

#define ESP_IDF_VERSION_MINOR 3
#define ESP_IDF_VERSION_MAJOR 3
#define ESP_IDF_VERSION_PATCH 5


Posted by Uli Köhler in Arduino, ESP8266/ESP32, PlatformIO

How to use specific arduino-esp32 version in PlatformIO

Add this line to platformio.ini in order to use a specific arduino-esp32 version – such as 1.0.6:

platform_packages = framework-arduinoespressif32 @ https://github.com/espressif/arduino-esp32.git#1.0.6

Note that for some upstream versions – at Dec 17 2021 that is arduino-esp32 v2.x, you also need to use a different platform:

platform = https://github.com/platformio/platform-espressif32.git#feature/arduino-upstream
platform_packages = framework-arduinoespressif32 @ https://github.com/espressif/arduino-esp32.git#2.0.1
Posted by Uli Köhler in Arduino, Embedded, ESP8266/ESP32, PlatformIO

How to fix Arduino error: ‘size_t’ has not been declared

Problem:

In Arduino, you see an error message like

src/main.cpp:7:48: error: 'size_t' has not been declared
void MyFunction(size_t size);

Solution:

Include stddef.h where size_t is declared:

#include <stddef.h>

Add this line to the top of the file where the error occured.

Posted by Uli Köhler in Arduino, C/C++, Embedded, PlatformIO

How to fix Arduino I2C Wire error: call of overloaded ‘begin(const int&, const int&, int)’ is ambiguous

Problem:

You are trying to call Wire.begin() for I2C using

Wire.begin(Pin_I2C_SDA, Pin_I2C_SCL, 400000);

but you see an error message like

src/MyI2C.cpp: In function 'void MyInitI2C()':
src/NyI2C.cpp:139:47: error: call of overloaded 'begin(const int&, const int&, int)' is ambiguous
     Wire.begin(Pin_I2C_SDA,Pin_I2C_SCL, 400000);
                                               ^
In file included from include/MyIO.hpp:2:0,
                 from src/MyI2C.cpp:2:
/home/uli/.platformio/packages/framework-arduinoespressif32/libraries/Wire/src/Wire.h:79:10: note: candidate: bool TwoWire::begin(int, int, uint32_t)
     bool begin(int sda=-1, int scl=-1, uint32_t frequency=0); // returns true, if successful init of i2c bus
          ^
/home/uli/.platformio/packages/framework-arduinoespressif32/libraries/Wire/src/Wire.h:80:10: note: candidate: bool TwoWire::begin(uint8_t, int, int, uint32_t)
     bool begin(uint8_t slaveAddr, int sda=-1, int scl=-1, uint32_t frequency=0);

Solution:

This happens with specific versions of the Arduino framework. For me it happened specifically when upgrading to arduino-esp32 version 2.0.1.

You need to explicitly cast the third argument (400000) to uint32_t in order to tell the compiler which of the two functions you want to call:

Wire.begin(Pin_I2C_SDA, Pin_I2C_SCL, 400000);
Posted by Uli Köhler in Arduino, C/C++, Embedded, PlatformIO

How to initialize LittleFS in PlatformIO on the ESP32 using the lorol/LittleFS library

Note: I don’t recommend using the loros/LittleFS library when using an up-to-date version of the arduino-esp32 framework such as 2.0.5 – the newer versions of this framework come with an embedded LittleFS framework. See TODO for instructions how to initialize the library.

Currently you need to add the LittleFS-ESP32 library in platformio.ini (the library is available as part of the core arduino-espressif32 bleeding edge version but you need that library in the standard version):

lib_deps =
    lorol/LittleFS_esp32 @ ^1.0.6

Now include LittleFS:

#include <LITTLEFS.h>

#define SPIFFS LITTLEFS

Initialize it using

// Initialize LittleFS
if (!LITTLEFS.begin(false /* false: Do not format if mount failed */)) {
  Serial.println("Failed to mount LittleFS");
  if (!LITTLEFS.begin(true /* true: format */)) {
    Serial.println("Failed to format LittleFS");
  } else {
    Serial.println("LittleFS formatted successfully");
  }
} else { // Initial mount success
}


Posted by Uli Köhler in Arduino, Embedded, ESP8266/ESP32, PlatformIO