Important: In newer versions of PlatformIO, most ESP32 boards will crash with this example unless you create a custom lv_conf.h config file specifying to use internal memory instead of PSRAM. See How to fix ESP32 LVGL crash / reboot in lv_tlsf_create() / lv_mem_init() for instructions how to fix that.
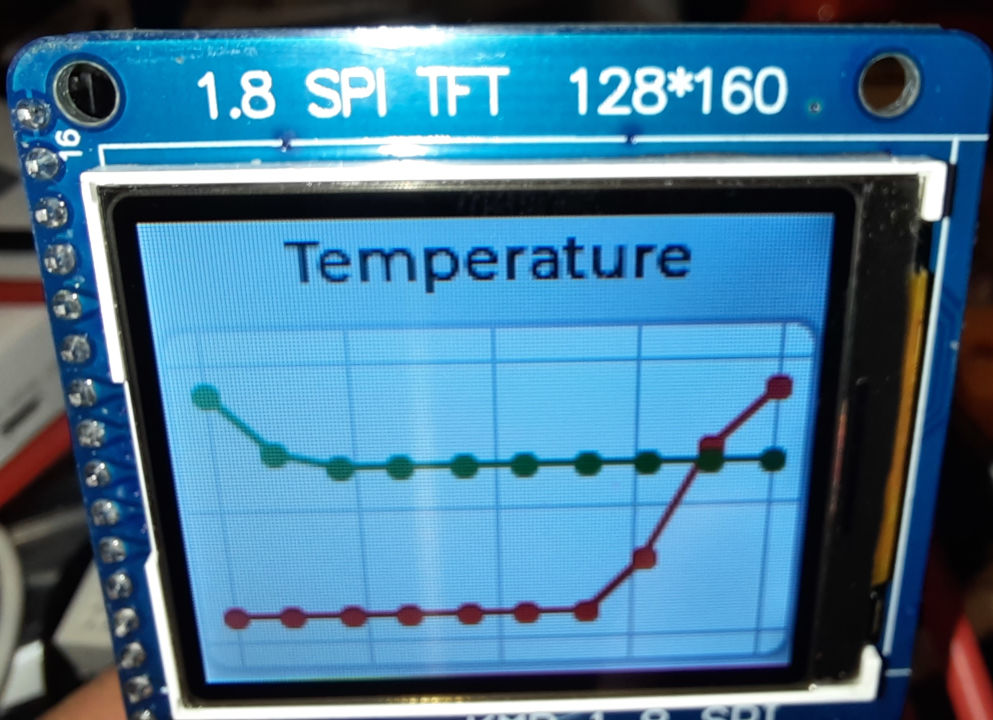
In our previous example ST7735R minimal LVGL chart example for PlatformIO
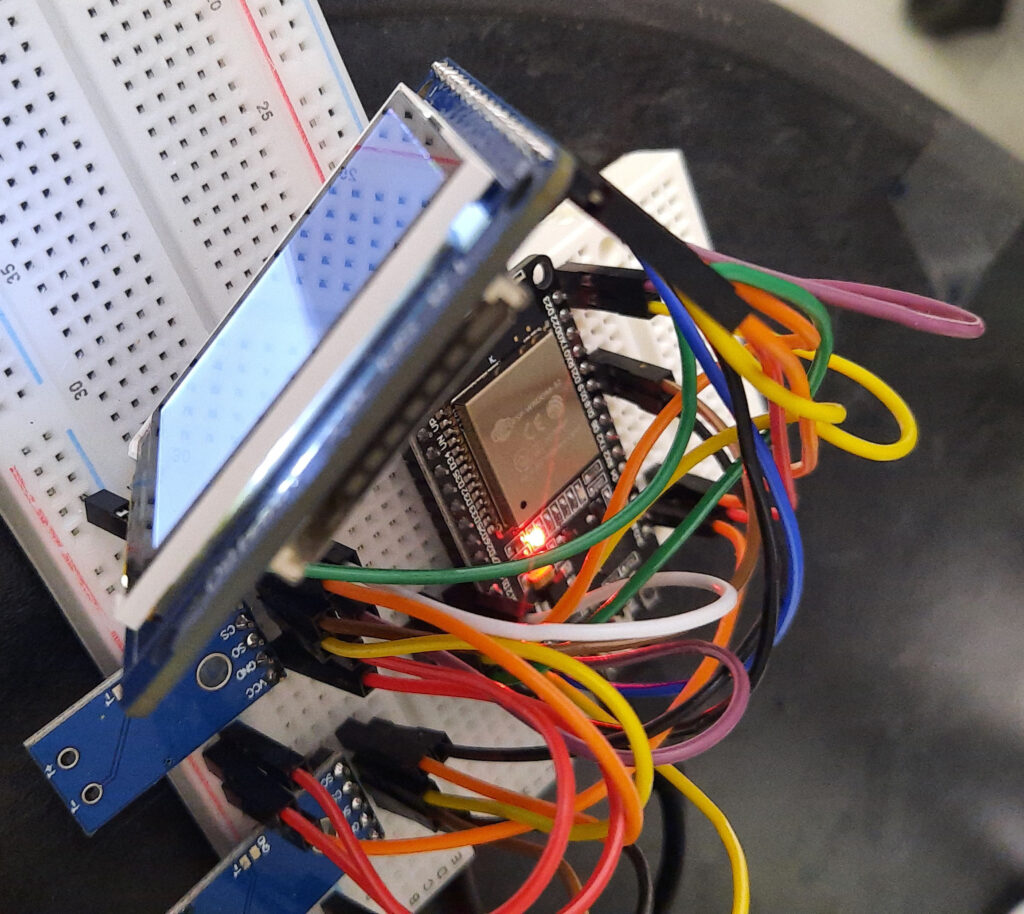
See Minimal ESP32 PlatformIO TFT display example using Adafruit ST7735 for the recommended hardware configuration.
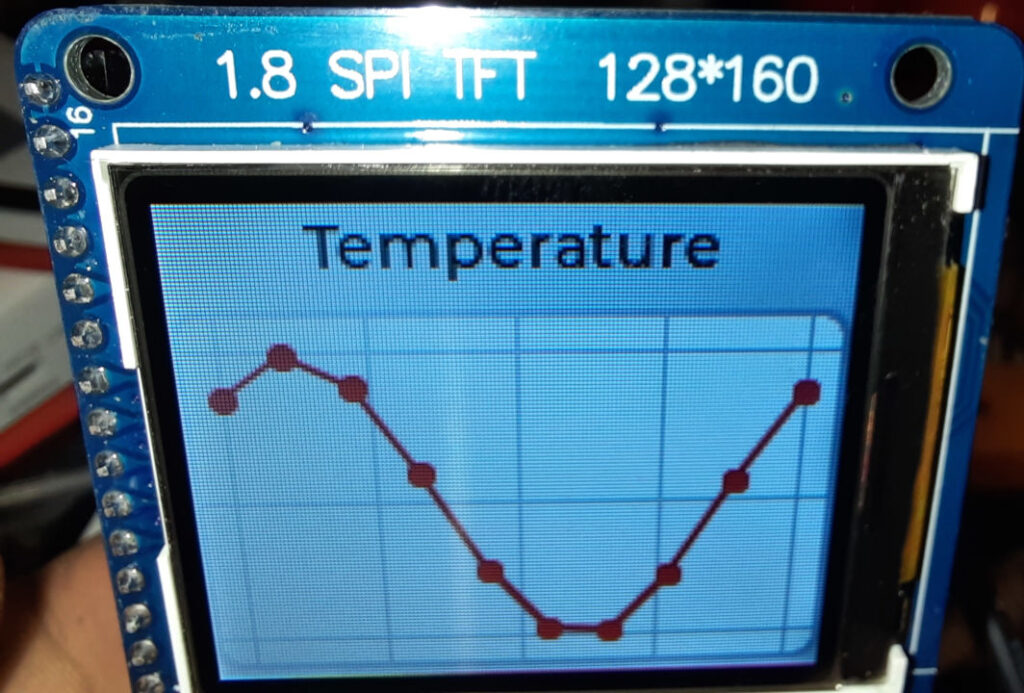
Using an ESP32 with a 128x160px ST7735R display, this code achieves a ~3Hz update rate. Note that this example can easily be modified to work with other LCD controllers or displays.
#include <Arduino.h>
#include <Adafruit_GFX.h>
#include <Adafruit_ST7735.h>
#include <Adafruit_LvGL_Glue.h>
#include <lvgl.h>
#include <string>

constexpr int Pin_LCD_CS = 27;
constexpr int Pin_LCD_DC = 23;
constexpr int Pin_LCD_RST = 22;
constexpr int Pin_LCD_SCLK = 14;
constexpr int Pin_LCD_MISO = 12;
constexpr int Pin_LCD_MOSI = 13;

Adafruit_ST7735 lcd(Pin_LCD_CS, Pin_LCD_DC, Pin_LCD_MOSI, Pin_LCD_SCLK,
                                 Pin_LCD_RST);
Adafruit_LvGL_Glue glue;

lv_obj_t* chart;
lv_chart_series_t * ser1;

void lvgl_chart_setup() {
    /*Create a chart*/
    chart = lv_chart_create(lv_scr_act());
    lv_obj_set_size(chart, 160, 100);
    lv_obj_align(chart, LV_ALIGN_BOTTOM_MID, 0, -3);
    lv_chart_set_type(chart, LV_CHART_TYPE_LINE);   /*Show lines and points too*/

    /*Add two data series*/
    ser1 = lv_chart_add_series(chart, lv_palette_main(LV_PALETTE_RED), LV_CHART_AXIS_PRIMARY_Y);

    /*Set the next points on 'ser1'*/
    lv_chart_set_next_value(chart, ser1, 10);
    lv_chart_set_next_value(chart, ser1, 10);
    lv_chart_set_next_value(chart, ser1, 10);
    lv_chart_set_next_value(chart, ser1, 10);
    lv_chart_set_next_value(chart, ser1, 10);
    lv_chart_set_next_value(chart, ser1, 10);
    lv_chart_set_next_value(chart, ser1, 10);
    lv_chart_set_next_value(chart, ser1, 30);
    lv_chart_set_next_value(chart, ser1, 70);
    lv_chart_set_next_value(chart, ser1, 90);

    lv_chart_refresh(chart);
}

void lvgl_setup(void) {
  // Create simple label centered on screen
  lv_obj_t *label = lv_label_create(lv_scr_act());
  lv_label_set_text(label, "Temperature");
  lv_obj_align(label, LV_ALIGN_TOP_MID, 0, 2);

  lvgl_chart_setup();
}

void setup() {
  Serial.begin(115200);
  lcd.initR(INITR_BLACKTAB);      // Init ST7735S chip, black tab
  lcd.setRotation(1);

  LvGLStatus status = glue.begin(&lcd);
  if(status != LVGL_OK) {
    Serial.printf("Glue error %d\r\n", (int)status);
    ESP.restart();
  }

  lvgl_setup(); // Call UI-building function above
}

void UpdateChart() {
  // Fill chart data with sine wave data
  float sineOffset = millis() / 1000.0;
  int16_t maxValue = 50;
  size_t count = lv_chart_get_point_count(chart);

  for (size_t i = 0; i < count; i++) {
    lv_chart_set_value_by_id(chart, ser1,  i, maxValue * (1 + sin((sineOffset + i) * 0.7)));
  }

  lv_chart_refresh(chart);
}

void loop() {
  // Update display
  UpdateChart();
  lv_task_handler();
  delay(5);
}
[env:esp32dev]
platform = espressif32
board = esp32dev
framework = arduino
monitor_speed = 115200
lib_deps =
adafruit/Adafruit GFX Library@^1.11.5
adafruit/Adafruit ST7735 and ST7789 Library@^1.10.0
adafruit/Adafruit LittlevGL Glue Library@^2.1.4
adafruit/SdFat - Adafruit Fork@^2.2.1
lvgl/lvgl@^8.3.7