You can create /var/lib/zerotier-one/local.conf – by default it doesn’t exist, if it does, just add these settings:
{
  "settings": {
    "primaryPort": 9994
  }
}
You can create /var/lib/zerotier-one/local.conf – by default it doesn’t exist, if it does, just add these settings:
{
  "settings": {
    "primaryPort": 9994
  }
}
On my server, which was running zerotier already using docker, I wanted to install zerotier on a system level.
but whenever I ran zerotier-cli I saw the following error message:
zerotier-one: fatal error: cannot bind to local control interface port 9993
and when I tried to start the daemon using zerotier-one -d this error message was displayed:
zerotier-cli: missing port and zerotier-one.port not found in /var/lib/zerotier-one
In my case, this was due to the standard port 9993 already being used by the dockerized zerotier. Therefore I needed to configure a custom port by creating /var/lib/zerotier-one/local.conf:
{
"settings": {
"primaryPort": 9994
}
}
You can choose any port you like.
Run this command to install the ZeroTier client on Rasbian. You can use the same command to install ZeroTier on virtually any Linux platform.
curl -s https://install.zerotier.com | sudo bash
Source: ZeroTier installation website
Yes, ZeroTier is available via
opkg update
opkg install zerotier
on OpenWRT 19.07. On my router, which is running OpenWRT 19.07.10 I could install ZeroTier without any modifications or extra package repositories.
MikroTik published an official ZeroTier package for MikroTik routers. But not all Routers support
Devices which only support SwOS (SwitchOS) do not support ZeroTier. You need a device running RouterOS.
But even among the RouterOS devices, not all devices support ZeroTier. The first requirement is that you are running a recent version of RouterOS such as RouterOS 7.4.1
At the time of writing this post (2022-08-22), only devices with the ARM and ARM64 architecture support ZeroTier. For other devices, you can’t even download the package. This include CHR (cloud hosted router) running on x86 or x86_64 for which ZeroTier is currently not available.
More specifically, for RouterOS version 7.4.1 and 7.5beta11, neither x86/x86_64 nor the SMIPS/MMIPS/MIPSBE or Tile architecture support ZeroTier.
Before buying a device or commiting to ZeroTier, download the Extra packages for your architecture from the MikroTik download page and check if there’s a zerotier-....npk in the ZIP archive. If it isn’t available there, you currently can’t use ZeroTier on that device – but possibly it will be supported in the future.
In our setup, a virtual machine (running on an XCP-NG host) on was connected to my Desktop (HP Z240, i7-6700 @3.4 GHz running Ubuntu 22.04) in a purely switched network with 1Gbit links. Both devices were connected using a MikroTik 10G switch (Marvell chip
I ran iperf3 -s on the VM and ran iperf3 -c [IP address] on the desktop. Reverse tests have not been performed.
Connecting to host 10.9.2.103, port 5201
[  5] local 10.9.2.10 port 56848 connected to 10.9.2.103 port 5201
[ ID] Interval           Transfer     Bitrate         Retr  Cwnd
[  5]   0.00-1.00   sec  92.8 MBytes   779 Mbits/sec    0    444 KBytes
[  5]   1.00-2.00   sec  90.7 MBytes   761 Mbits/sec    0    543 KBytes
[  5]   2.00-3.00   sec  88.6 MBytes   743 Mbits/sec    0    816 KBytes
[  5]   3.00-4.00   sec  90.0 MBytes   755 Mbits/sec    0    816 KBytes
[  5]   4.00-5.00   sec  90.0 MBytes   755 Mbits/sec    0    856 KBytes
[  5]   5.00-6.00   sec  88.8 MBytes   744 Mbits/sec    0    946 KBytes
[  5]   6.00-7.00   sec  88.8 MBytes   745 Mbits/sec    0    946 KBytes
[  5]   7.00-8.00   sec  90.0 MBytes   755 Mbits/sec    0    993 KBytes
[  5]   8.00-9.00   sec  90.0 MBytes   755 Mbits/sec    0    993 KBytes
[  5]   9.00-10.00  sec  88.8 MBytes   744 Mbits/sec    0    993 KBytes
- - - - - - - - - - - - - - - - - - - - - - - - -
[ ID] Interval           Transfer     Bitrate         Retr
[  5]   0.00-10.00  sec   898 MBytes   754 Mbits/sec    0             sender
[  5]   0.00-10.01  sec   896 MBytes   751 Mbits/sec                  receiver
Connecting to host 10.80.246.34, port 5201
[  5] local 10.80.246.38 port 35474 connected to 10.80.246.34 port 5201
[ ID] Interval           Transfer     Bitrate         Retr  Cwnd
[  5]   0.00-1.00   sec  59.9 MBytes   503 Mbits/sec  338    102 KBytes
[  5]   1.00-2.00   sec  60.2 MBytes   505 Mbits/sec  313    188 KBytes
[  5]   2.00-3.00   sec  63.9 MBytes   536 Mbits/sec  176   99.3 KBytes
[  5]   3.00-4.00   sec  74.3 MBytes   623 Mbits/sec  174    113 KBytes
[  5]   4.00-5.00   sec  67.7 MBytes   568 Mbits/sec  197   83.2 KBytes
[  5]   5.00-6.00   sec  72.5 MBytes   609 Mbits/sec  218    228 KBytes
[  5]   6.00-7.00   sec  61.3 MBytes   514 Mbits/sec  281   77.8 KBytes
[  5]   7.00-8.00   sec  72.0 MBytes   604 Mbits/sec  213   91.2 KBytes
[  5]   8.00-9.00   sec  65.4 MBytes   549 Mbits/sec  309    156 KBytes
[  5]   9.00-10.00  sec  53.9 MBytes   453 Mbits/sec  190    121 KBytes
- - - - - - - - - - - - - - - - - - - - - - - - -
[ ID] Interval           Transfer     Bitrate         Retr
[  5]   0.00-10.00  sec   651 MBytes   546 Mbits/sec  2409             sender
[  5]   0.00-10.01  sec   650 MBytes   545 Mbits/sec                  receiver
Netmaker internally uses a normal (kernel-based) wireguard connection, so in some respect this is a test of Wireguard performance
Connecting to host 10.230.113.3, port 5201
[  5] local 10.230.113.1 port 35534 connected to 10.230.113.3 port 5201
[ ID] Interval           Transfer     Bitrate         Retr  Cwnd
[  5]   0.00-1.00   sec   105 MBytes   881 Mbits/sec    0   1.01 MBytes
[  5]   1.00-2.00   sec   104 MBytes   870 Mbits/sec   86    422 KBytes
[  5]   2.00-3.00   sec   101 MBytes   849 Mbits/sec    0    488 KBytes
[  5]   3.00-4.00   sec  98.8 MBytes   828 Mbits/sec    0    535 KBytes
[  5]   4.00-5.00   sec  98.8 MBytes   828 Mbits/sec    0    584 KBytes
[  5]   5.00-6.00   sec   104 MBytes   870 Mbits/sec    0    615 KBytes
[  5]   6.00-7.00   sec  97.5 MBytes   818 Mbits/sec    7    472 KBytes
[  5]   7.00-8.00   sec   104 MBytes   870 Mbits/sec    0    522 KBytes
[  5]   8.00-9.00   sec   101 MBytes   849 Mbits/sec    0    580 KBytes
[  5]   9.00-10.00  sec   102 MBytes   860 Mbits/sec    0    606 KBytes
- - - - - - - - - - - - - - - - - - - - - - - - -
[ ID] Interval           Transfer     Bitrate         Retr
[  5]   0.00-10.00  sec  1016 MBytes   852 Mbits/sec   93             sender
[  5]   0.00-10.00  sec  1014 MBytes   850 Mbits/sec                  receiver
Tailscale 1.28.0 has been used for this test.
During this test, I ensured that the tailscale connection was established using the switched network and was not going through a DERP server or the routed network.
$ tailscale ping 100.64.0.3
pong from vm (fd5d:7b60:4742::3) via 10.9.2.103:41641 in 1ms
Results:
Connecting to host 100.64.0.3, port 5201
[  5] local 100.64.0.2 port 40690 connected to 100.64.0.3 port 5201
[ ID] Interval           Transfer     Bitrate         Retr  Cwnd
[  5]   0.00-1.00   sec  38.3 MBytes   321 Mbits/sec  389   60.0 KBytes
[  5]   1.00-2.00   sec  37.6 MBytes   315 Mbits/sec  366   43.2 KBytes
[  5]   2.00-3.00   sec  36.7 MBytes   308 Mbits/sec  431   52.8 KBytes
[  5]   3.00-4.00   sec  38.5 MBytes   323 Mbits/sec  488   80.3 KBytes
[  5]   4.00-5.00   sec  29.3 MBytes   246 Mbits/sec  356   38.4 KBytes
[  5]   5.00-6.00   sec  31.0 MBytes   260 Mbits/sec  351   86.3 KBytes
[  5]   6.00-7.00   sec  27.1 MBytes   227 Mbits/sec  287   50.4 KBytes
[  5]   7.00-8.00   sec  26.1 MBytes   219 Mbits/sec  210   46.8 KBytes
[  5]   8.00-9.00   sec  27.1 MBytes   227 Mbits/sec  261   39.6 KBytes
[  5]   9.00-10.00  sec  27.5 MBytes   231 Mbits/sec  222   40.8 KBytes
- - - - - - - - - - - - - - - - - - - - - - - - -
[ ID] Interval           Transfer     Bitrate         Retr
[  5]   0.00-10.00  sec   319 MBytes   268 Mbits/sec  3361             sender
[  5]   0.00-10.01  sec   318 MBytes   267 Mbits/sec                  receiver
The approximate performance expectation in this specific scenario is:
300 Mbit/s550 Mbit/s850 Mbit/s750 Mbit/sCuriously, netmaker performed better than the direct connection. The reason for this is not known at this point, but a similar effect has been observed in this medium.com article.
Generally, one can see that Tailscale (which internally uses software wireguard) is approximately half the speed of ZeroTier, which in turn is outperformed significantly by Netmaker.
In a followup post I will describe advantages and disadvantages of those solutions and explore under which scenarios I would use the solutions.
Joining a network is as simple as
sudo zerotier-cli join [network-id]
for example:
sudo zerotier-cli join 9ecbaef5759219ad
Run this command to install the ZeroTier client on any recent Ubuntu version. Tested on Ubuntu 22.04
curl -s https://install.zerotier.com | sudo bash
Source: ZeroTier installation website
First, create a directory for the ZeroTier One / ZTNCUI files to reside in, e.g.:
mkdir /opt/zerotier-mydomain
Now, create docker-compose.yml in that directory
version: '3.4'

services:
  ztncui:
    container_name: ztncui
    restart: always
    image: keynetworks/ztncui
    ports:
      - 9993:9993/udp
      - 3180:3180
      - 3443:3443
    volumes:
      - ./etc:/opt/key-networks/ztncui/etc
      - ./zt1:/var/lib/zerotier-one
After that, create .env in said directory containing some info about your node:
NODE_ENV=production
HTTPS_PORT=3443
MYDOMAIN=zerotier.mydomain.com
Now we’ll use the script from Create a systemd service for your docker-compose project in 10 seconds in order to create a systemd service to automatically run the service:
curl -fsSL https://techoverflow.net/scripts/create-docker-compose-service.sh | sudo bash /dev/stdin
This script will also automatically start the service (i.e. docker-compose up). ZTNCUI (which comes packaged with ZeroTier One) will generate a temporary admin password automatically, which we can extract from the log using this simple command:
docker-compose exec ztncui cat /var/log/docker-ztncui.log | grep "Current Password" | tail -n 1
2022/08/19 14:32:37 Current Password: esh0Eengai
Be sure to open the ports 9993/udp, 3180 and (unless you are using a reverse proxy) 3443 in your firewall, for example:
sudo ufw allow 9993/udp
sudo ufw allow 3180
sudo ufw allow 3443
Now we can open https://[IP]:3443 to open the webinterface (ignore the certificate validation error). You can also setup a reverse proxy at this stage, which we’ll cover in future posts.
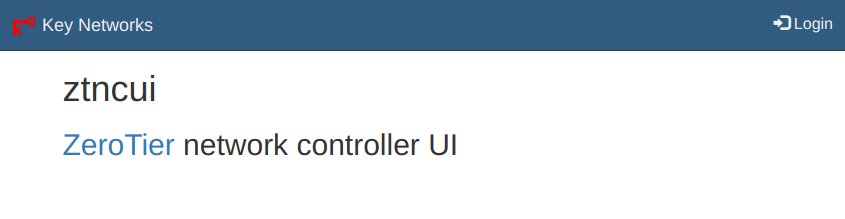
You should see a page like this one:
Click Login at the top right:
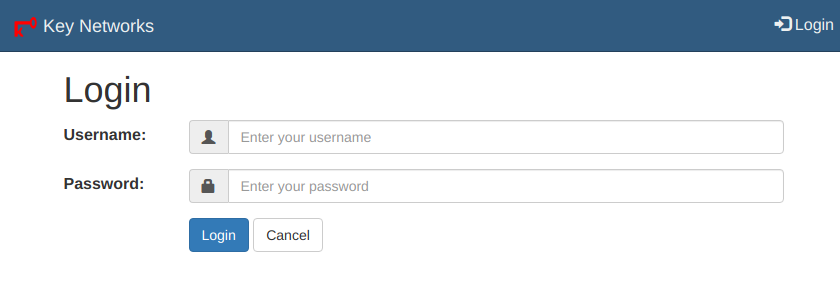
Enter admin as username and the password we extracted above (esh0Eengai in this example).
You will be asked to change your password, and after that you can create ZeroTier networks.