Technologies

The security risk of running docker mariadb/mysql with MYSQL_ALLOW_EMPTY_PASSWORD=yes

This is part of a common docker-compose.yml which is frequently seen on the internet

version: '3'
services:
  mariadb:
    image: 'mariadb:latest'
    environment:
      - MYSQL_ALLOW_EMPTY_PASSWORD=yes
      - MYSQL_DATABASE=redmine
    volumes:
      - './mariadb_data:/var/lib/mysql'
 [...]

Simple and secure, right? A no-root-password MariaDB instance that’s running in a separate container and does not have its port 3306 exposed – so only services from the same docker-compose.yml can reach it since docker-compose puts all those services in a separate network.

Wrong.

While the MariaDB instance is not reachable from the internet since no, it can be reached by any process via its internal IP address.

In order to comprehend what’s happening, we shall take a look at docker’s networks. In this case, my docker-compose config is called redmine.

$ docker network ls | grep redmine
ea7ed38f469b        redmine_default           bridge              local

This is the network that docker-compose creates without any explicit network configuration. Let’s inspect the network to show the hosts:

[
    // [...]
        "Containers": {
            "2578fc65b4dab9f204d0a252e421dd4ddd9f41c35642d48350f4e59370581757": {
                "Name": "redmine_mariadb_1",
                "EndpointID": "1e6d81acc096a12fc740173f4e107090333c42e8a86680ac5c9886c148d578e7",
                "MacAddress": "02:42:ac:12:00:02",
                "IPv4Address": "172.18.0.2/16",
                "IPv6Address": ""
            },
            "7867f71d2a36265c34c133b70aea487b90ea68fcf30ecb42d6e7e9a376cf8e07": {
                "Name": "redmine_redmine_1",
                "EndpointID": "f5ac7b3325aa9bde12f0c625c4881f9a6fc9957da4965767563ec9a3b76c19c3",
                "MacAddress": "02:42:ac:12:00:03",
                "IPv4Address": "172.18.0.3/16",
                "IPv6Address": ""
            }
        },
    // [...]
]

We can see that the IP address of the redmine_mariadb_1 container is 172.18.0.2.

Using the internal IP 172.18.0.2, you can access the MySQL server.

Any process on the host (even from unprivileged users) can connect to the container without any password, e.g.

$ mysqldump -uroot -h172.18.0.2 --all-databases
// This will show the dump of the entire MariaDB database

How to mitigate this security risk?

Mitigation is quite easy since we only need to set a root password for the MariaDB instance.

My recommended best practice is to avoid duplicate passwords. In order to do this, create a .env file in the directory where docker-compose.yml is located.

MARIADB_ROOT_PASSWORD=aiPaipei6ookaemue4voo0NooC0AeH

Remember to replace the password by a random password or use this shell script to automatically create it:

echo MARIADB_ROOT_PASSWORD=$(pwgen 30) > .env

Now we can use ${MARIADB_ROOT_PASSWORD} in docker-compose.yml whereever the MariaDB root password is required, for example:

version: '3'
services:
  mariadb:
    image: 'mariadb:latest'
    environment:
      - MYSQL_ROOT_PASSWORD=${MARIADB_ROOT_PASSWORD}
      - MYSQL_DATABASE=redmine
    volumes:
      - './mariadb_data:/var/lib/mysql'
  redmine:
    image: 'redmine:latest'
    environment:
      - REDMINE_USERNAME=admin
      - REDMINE_PASSWORD=redmineadmin
      - [email protected]
      - REDMINE_DB_MYSQL=mariadb
      - REDMINE_DB_USERNAME=root
      - REDMINE_DB_PASSWORD=${MARIADB_ROOT_PASSWORD}
    ports:
      - '3718:3000'
    volumes:
      - './redmine_data/conf:/usr/src/redmine/conf'
      - './redmine_data/files:/usr/src/redmine/files'
      - './redmine_themes:/usr/src/redmine/public/themes'
    depends_on:
      - mariadb

Note that the mariadb docker image will not change the root password if the database directory already exists (mariadb_data in this example).

My recommended best practice for changing the root password is to use mysqldump --all-databases to export the entire database to a SQL file, then backup and delete the data directory, then re-start the container so the new root password will be set. After that, re-import the dump from the SQL file.
Posted by Uli Köhler in Databases, Docker, Linux

How to fix pyppeteer pyppeteer.errors.BrowserError: Browser closed unexpectedly:

Problem:

You want to run your Pyppeteer application on Linux, but you see an error message like

Traceback (most recent call last):
  File "PyppeteerExample.py", line 15, in <module>
    asyncio.get_event_loop().run_until_complete(main())
  File "/usr/lib/python3.6/asyncio/base_events.py", line 484, in run_until_complete
    return future.result()
  File "PyppeteerExample.py", line 6, in main
    browser = await launch()
  File "/usr/local/lib/python3.6/dist-packages/pyppeteer/launcher.py", line 305, in launch
    return await Launcher(options, **kwargs).launch()
  File "/usr/local/lib/python3.6/dist-packages/pyppeteer/launcher.py", line 166, in launch
    self.browserWSEndpoint = get_ws_endpoint(self.url)
  File "/usr/local/lib/python3.6/dist-packages/pyppeteer/launcher.py", line 225, in get_ws_endpoint
    raise BrowserError('Browser closed unexpectedly:\n')
pyppeteer.errors.BrowserError: Browser closed unexpectedly:

Solution:

In most cases, the underlying error for this error message is Puppetteer’s libX11-xcb.so.1: cannot open shared object file: No such file or directory. In order to fix that, you need to install dependency libraries for Chromium which is used internally by Puppeteer / Pyppeteer:

sudo apt install -y gconf-service libasound2 libatk1.0-0 libc6 libcairo2 libcups2 libdbus-1-3 libexpat1 libfontconfig1 libgcc1 libgconf-2-4 libgdk-pixbuf2.0-0 libglib2.0-0 libgtk-3-0 libnspr4 libpango-1.0-0 libpangocairo-1.0-0 libstdc++6 libx11-6 libx11-xcb1 libxcb1 libxcomposite1 libxcursor1 libxdamage1 libxext6 libxfixes3 libxi6 libxrandr2 libxrender1 libxss1 libxtst6 ca-certificates fonts-liberation libappindicator1 libnss3 lsb-release xdg-utils wget


Posted by Uli Köhler in Pyppeteer, Python

Pyppeteer minimal example

This script is a minimal example on how to use Pyppeteer to fetch a web page and extract the page title (the content of the .logo_default HTML element)

#!/usr/bin/env python3
import asyncio
from pyppeteer import launch

async def main():
    browser = await launch()
    page = await browser.newPage()
    await page.goto('https://www.techoverflow.net')
    # Get the URL and print it
    title = await page.evaluate("() => document.querySelector('.logo-default').textContent")
    print(f"Page title: {title}") # prints Page title: TechOverflow
    # Cleanup
    await browser.close()

asyncio.get_event_loop().run_until_complete(main())

How to run:

sudo pip3 install pyppeteer
python3 PyppeteerExample.py


Posted by Uli Köhler in Pyppeteer

How to get current page URL in pyppeteer

In pyppeteer you can use

url = await page.evaluate("() => window.location.href")

in order to get the current URL. Note that page.evaluate() runs whatever Javascript your give it – hence you can use your Javascript skills in order to create the desired effect.

Full example

import asyncio
from pyppeteer import launch

async def main():
    browser = await launch()
    page = await browser.newPage()
    await page.goto('https://www.techoverflow.net')

    # Get the URL and print it
    url = await page.evaluate("() => window.location.href")
    print(url) # prints https://www.techoverflow.net/

    # Cleanuip
    await browser.close()

asyncio.get_event_loop().run_until_complete(main())


Posted by Uli Köhler in Pyppeteer, Python

How simulate click using pyppeteer

In order to click a button or a link using the the pyppeteer library, you can use page.evaluate().

If you have an <button> element or a link (<a>) like

<button id="mybutton">

you can use

# Now click the search button    
await page.evaluate(f"""() => {{
    document.getElementById('mybutton').dispatchEvent(new MouseEvent('click', {{
        bubbles: true,
        cancelable: true,
        view: window
    }}));
}}""")

in order to generate a MouseEvent that simulates a click. Note that page.evaluate() will run any Javascript code you pass to it, so you can use your Javascript skills in order to create the desired effect

Also see https://gomakethings.com/how-to-simulate-a-click-event-with-javascript/ for more details on how to simulate mouse clicks in pure Javascript without relying on jQuery.

Note that page.evaluate() will just run any Javascript code you give it, so you can put your Javascript skills to use in order to manipulate the page.

Full example

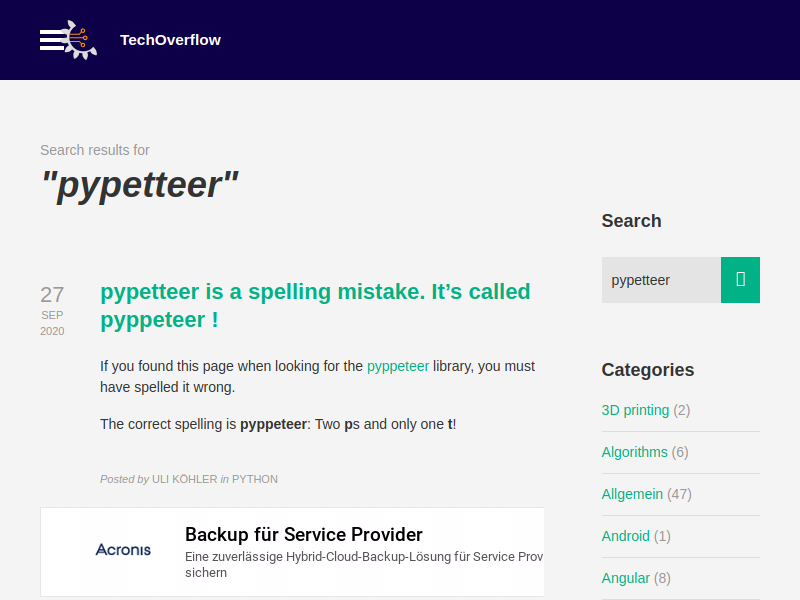
This example will open https://techoverflow.net, enter a search term into the search field, click the search button and then create a screenshot

import asyncio
from pyppeteer import launch

async def main():
    browser = await launch()
    page = await browser.newPage()
    await page.goto('https://techoverflow.net')

    # Fill content into the search field
    content = "pypetteer"
    await page.evaluate(f"""() => {{
        document.getElementById('s').value = '{content}';
    }}""")

    # Now click the search button    
    await page.evaluate(f"""() => {{
        document.getElementById('searchsubmit').dispatchEvent(new MouseEvent('click', {{
            bubbles: true,
            cancelable: true,
            view: window
        }}));
    }}""")

    # Wait until search results page has been loaded
    await page.waitForSelector(".archive-title")

    # Now take screenshot and exit
    await page.screenshot({'path': 'screenshot.png'})
    await browser.close()

asyncio.get_event_loop().run_until_complete(main())

The result will look like this:

Posted by Uli Köhler in Pyppeteer, Python

How to fill <input> field using pyppeteer

In order to fill an input field using the pyppeteer library, you can use page.evaluate().

If you have an <input> element like

<input name="myinput" id="myinput" type="text">

you can use

content = "My content" # This will be filled into <input id="myinput"> !
await page.evaluate(f"""() => {{
    document.getElementById('myinput').value = '{content}';
}}""")

Note that page.evaluate() will just run any Javascript code you give it, so you can put your Javascript skills to use in order to manipulate the page.

Full example

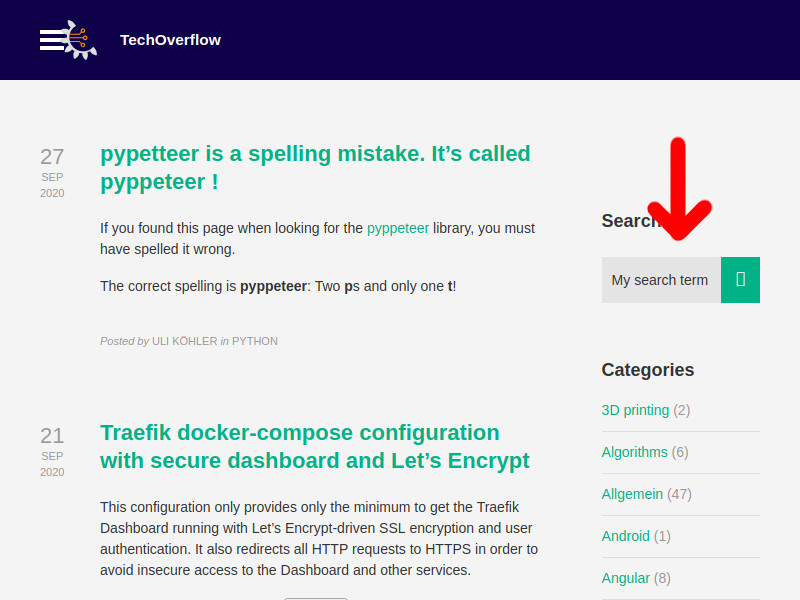
This example will open https://techoverflow.net, enter a search term into the search field and then create a screenshot

#!/usr/bin/env python3
import asyncio
from pyppeteer import launch

async def main():
    browser = await launch()
    page = await browser.newPage()
    await page.goto('https://techoverflow.net')
    
    # This example fills content into the search field
    content = "My search term"
    await page.evaluate(f"""() => {{
        document.getElementById('s').value = '{content}';
    }}""")

    # Make screenshot
    await page.screenshot({'path': 'screenshot.png'})
    await browser.close()

asyncio.get_event_loop().run_until_complete(main())

The result will look like this:

Posted by Uli Köhler in Pyppeteer, Python

pypetteer is a spelling mistake. It’s called pyppeteer !

If you found this page when looking for the pyppeteer library, you must have spelled it wrong.

The correct spelling is pyppeteer: Two ps and only one t!

Posted by Uli Köhler in Pyppeteer, Python

Traefik docker-compose configuration with secure dashboard and Let’s Encrypt

This configuration only provides only the minimum to get the Traefik Dashboard running with Let’s Encrypt-driven SSL encryption and user authentication. It also redirects all HTTP requests to HTTPS in order to avoid insecure access to the Dashboard and other services.

Let’s encrypt is used with the HTTP-01 challenge. This means that Traefik MUST be reachable by Port 80 from the Internet.

In order to install docker & docker-compose, see How to install docker and docker-compose on Ubuntu in 30 seconds.

First prepare the directory (/var/lib/traefik):

sudo mkdir /var/lib/traefik
sudo chown -R $USER: /var/lib/traefik
cd /var/lib/traefik
mkdir acme conf

Now create docker-compose.yml:

version: "3.3"

services:
  traefik:
    image: "traefik:v2.3"
    container_name: "traefik"
    command:
      - "--api=true"
    ports:
      - "80:80"
      - "443:443"
      - "8080:8080"
    volumes:
      - "/var/run/docker.sock:/var/run/docker.sock:ro"
      - "./acme:/etc/traefik/acme"
      - "./traefik.toml:/etc/traefik/traefik.toml"
      - "./conf:/etc/traefik/conf"

Now create the main traefik.toml configuration file:

defaultEntryPoints = ["http", "https"]

[api]
dashboard = true

# You can create config files in /var/lib/traefik/traefik.conf and Traefik will automatically reload them
[providers]
[providers.file]
directory = "/etc/traefik/conf/"
watch = true

# Change this to INFO if you don't want as much debug output
[log]
level = "DEBUG"

[entryPoints.web]
address = ":80"
[entryPoints.web.http]
[entryPoints.web.http.redirections]
[entryPoints.web.http.redirections.entryPoint]
to = "websecure"
scheme = "https"
[entryPoints.websecure]
address = ":443"

[certificatesResolvers.letsencrypttls.acme]
# TODO Add your email here
email = "[email protected]"
storage = "/etc/traefik/acme/acme.json"
[certificatesResolvers.letsencrypttls.acme.httpChallenge]
entryPoint = "web"

Now we need to create the API config file in conf/api.toml:

[http.routers.traefik-api]
# TODO: Set your domain here !!!
rule = "Host(`traefik.example.com`)"
service = "api@internal"
middlewares = ["auth"]
[http.routers.traefik-api.tls]
certresolver = "letsencrypttls"
[http.middlewares.auth.basicAuth]
# TODO Add your admin user & password here, generate e.g. using https://wtools.io/generate-htpasswd-online
users = [
  "admin:$1$ySFBr~_y$GsKgEasDQkpCX8sO8vNia0",
]

Don’t forget to change your email address and the domain name in the config files (marked by TODO). Ensure you have setup all DNS records correctly so that your domains points to the server running Traefik!

Now it’s time to startup Traefik for the first time:

docker-compose up

Traefik will take a few seconds to automatically generate the Let’s Encrypt certificate for your domain. Once you see a message like

traefik    | time="2020-09-20T23:48:30Z" level=debug msg="Certificates obtained for domains [traefik.mydomain.com]" providerName=letsencrypttls.acme routerName=traefik-api@file rule="Host(`traefik.mydomain.com`)"

the certificate is available and loaded automatically.

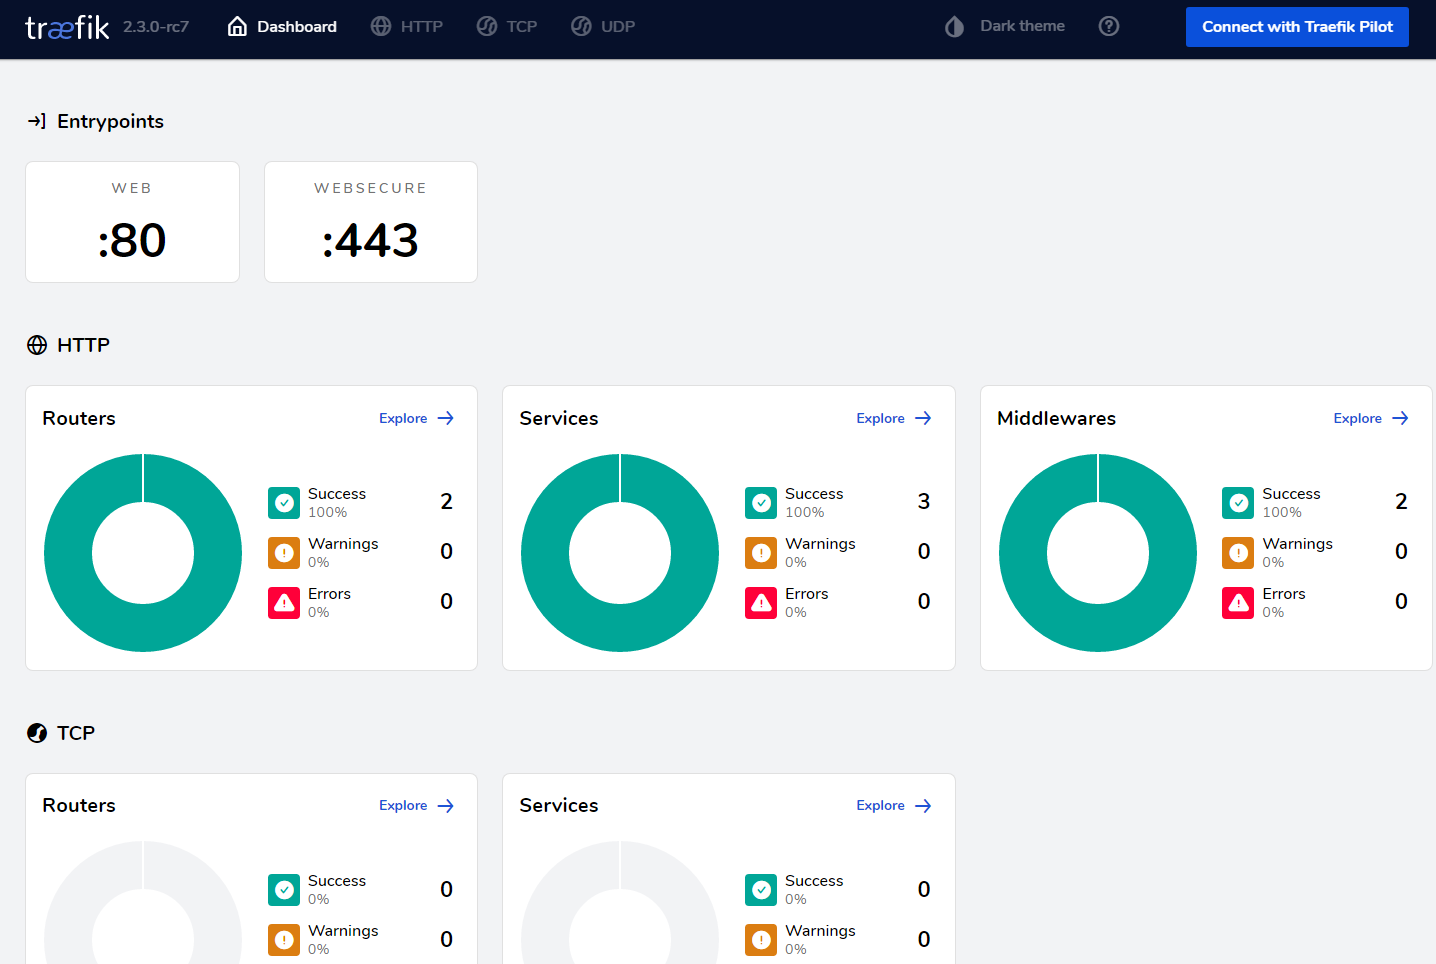
Now you can go to https://traefik.mydomain.com/ , login with the username and password you have generated and check out the dashboard.


If desired, you can also setup a systemd service to automatically start Traefik on boot (generated using docker-compose systemd .service generator). In order to do this, first stop the running docker-compose instance using Ctrl-C if you still have the terminal open and docker-compose down.

Now add this as /etc/systemd/system/traefik.service:

[Unit]
Description=traefik
Requires=docker.service
After=docker.service

[Service]
Restart=always
User=root
Group=docker
WorkingDirectory=/var/lib/traefik
# Shutdown container (if running) when unit is stopped
ExecStartPre=/usr/local/bin/docker-compose -f docker-compose.yml down -v
# Start container when unit is started
ExecStart=/usr/local/bin/docker-compose -f docker-compose.yml up
# Stop container when unit is stopped
ExecStop=/usr/local/bin/docker-compose -f docker-compose.yml down -v

[Install]
WantedBy=multi-user.target

and run

sudo systemctl enable traefik.service
sudo systemctl start traefik.service


Posted by Uli Köhler in Traefik

How to fix Traefik Dashboard/API 404 page not found “api is not enabled”

Problem:

You are trying to configure the Traefik API/Dashboard in a secure way, but every time you try to access the API, you’re only getting a 404 error (unless you set api.insecure=true)

In the logs, you see an error message like this: (if log.level = "DEBUG"):

traefik    | time="2020-09-20T22:53:51Z" level=error msg="api is not enabled" routerName=my-api@file entryPointName=websecure

Solution:

You have to pass --api=true to Traefik, e.g. using docker-compose:

command:
  - "--api=true"

and also set

[api]
dashboard = true

in your traefik.toml.

After that, restart Traefik and you should be able to access your dashboard at /dashboard.

Credits to multiple GitHub users for the original solution.

Posted by Uli Köhler in Traefik

How to fix Traefik “command traefik error: field not found, node: dnsProvider”

Problem:

You are trying to configure your Traefik server but you see an error message like

traefik    | 2020/09/20 22:07:11 command traefik error: field not found, node: dnsProvider

Solution:

dnsProvider is a configuration option from Traefik 1.x. You need to use provider for Traefik 2.x. Example:

[certificatesResolvers.lecloudflare.acme.dnsChallenge]
provider = "cloudflare"

Full example:

[certificatesResolvers.lecloudflare.acme]
email = "[email protected]"
storage = "/etc/traefik/acme/acme.json"

[certificatesResolvers.lecloudflare.acme.dnsChallenge]
provider = "cloudflare"


Posted by Uli Köhler in Traefik

How to emulate Page up / Page down key in Puppeteer

To emulate a keypress to the Page up key in Puppeteer, use

await page.keyboard.press("PageUp");

To emulate a keypress to the Page down key in Puppeteer, use

await page.keyboard.press("PageDown");


Posted by Uli Köhler in Javascript, NodeJS, Puppeteer

How to fix ElasticSearch docker AccessDeniedException[/usr/share/elasticsearch/data/nodes];”,

Problem:

You are trying to start a dockerized ElasticSearch instance but you see an error log like

lasticsearch1    | {"type": "server", "timestamp": "2020-04-18T01:17:27,564Z", "level": "ERROR", "component": "o.e.b.ElasticsearchUncaughtExceptionHandler", "cluster.name": "docker-cluster", "node.name": "elasticsearch1", "message": "uncaught exception in thread [main]", 
elasticsearch1    | "stacktrace": ["org.elasticsearch.bootstrap.StartupException: ElasticsearchException[failed to bind service]; nested: AccessDeniedException[/usr/share/elasticsearch/data/nodes];",
elasticsearch1    | "at org.elasticsearch.bootstrap.Elasticsearch.init(Elasticsearch.java:174) ~[elasticsearch-7.6.2.jar:7.6.2]",
elasticsearch1    | "at org.elasticsearch.bootstrap.Elasticsearch.execute(Elasticsearch.java:161) ~[elasticsearch-7.6.2.jar:7.6.2]",
elasticsearch1    | "at org.elasticsearch.cli.EnvironmentAwareCommand.execute(EnvironmentAwareCommand.java:86) ~[elasticsearch-7.6.2.jar:7.6.2]",
elasticsearch1    | "at org.elasticsearch.cli.Command.mainWithoutErrorHandling(Command.java:125) ~[elasticsearch-cli-7.6.2.jar:7.6.2]",
elasticsearch1    | "at org.elasticsearch.cli.Command.main(Command.java:90) ~[elasticsearch-cli-7.6.2.jar:7.6.2]",
elasticsearch1    | "at org.elasticsearch.bootstrap.Elasticsearch.main(Elasticsearch.java:126) ~[elasticsearch-7.6.2.jar:7.6.2]",
elasticsearch1    | "at org.elasticsearch.bootstrap.Elasticsearch.main(Elasticsearch.java:92) ~[elasticsearch-7.6.2.jar:7.6.2]",
elasticsearch1    | "Caused by: org.elasticsearch.ElasticsearchException: failed to bind service",
elasticsearch1    | "at org.elasticsearch.node.Node.<init>(Node.java:615) ~[elasticsearch-7.6.2.jar:7.6.2]",
elasticsearch1    | "at org.elasticsearch.node.Node.<init>(Node.java:257) ~[elasticsearch-7.6.2.jar:7.6.2]",
elasticsearch1    | "at org.elasticsearch.bootstrap.Bootstrap$5.<init>(Bootstrap.java:221) ~[elasticsearch-7.6.2.jar:7.6.2]",
elasticsearch1    | "at org.elasticsearch.bootstrap.Bootstrap.setup(Bootstrap.java:221) ~[elasticsearch-7.6.2.jar:7.6.2]",
elasticsearch1    | "at org.elasticsearch.bootstrap.Bootstrap.init(Bootstrap.java:349) ~[elasticsearch-7.6.2.jar:7.6.2]",
elasticsearch1    | "at org.elasticsearch.bootstrap.Elasticsearch.init(Elasticsearch.java:170) ~[elasticsearch-7.6.2.jar:7.6.2]",
elasticsearch1    | "... 6 more",
elasticsearch1    | "Caused by: java.nio.file.AccessDeniedException: /usr/share/elasticsearch/data/nodes",
elasticsearch1    | "at sun.nio.fs.UnixException.translateToIOException(UnixException.java:90) ~[?:?]",
elasticsearch1    | "at sun.nio.fs.UnixException.rethrowAsIOException(UnixException.java:111) ~[?:?]",
elasticsearch1    | "at sun.nio.fs.UnixException.rethrowAsIOException(UnixException.java:116) ~[?:?]",
elasticsearch1    | "at sun.nio.fs.UnixFileSystemProvider.createDirectory(UnixFileSystemProvider.java:389) ~[?:?]",
elasticsearch1    | "at java.nio.file.Files.createDirectory(Files.java:693) ~[?:?]",
elasticsearch1    | "at java.nio.file.Files.createAndCheckIsDirectory(Files.java:800) ~[?:?]",
elasticsearch1    | "at java.nio.file.Files.createDirectories(Files.java:786) ~[?:?]",
elasticsearch1    | uncaught exception in thread [main]
elasticsearch1    | "at org.elasticsearch.env.NodeEnvironment.lambda$new$0(NodeEnvironment.java:274) ~[elasticsearch-7.6.2.jar:7.6.2]",
elasticsearch1    | "at org.elasticsearch.env.NodeEnvironment$NodeLock.<init>(NodeEnvironment.java:211) ~[elasticsearch-7.6.2.jar:7.6.2]",
elasticsearch1    | "at org.elasticsearch.env.NodeEnvironment.<init>(NodeEnvironment.java:271) ~[elasticsearch-7.6.2.jar:7.6.2]",
elasticsearch1    | "at org.elasticsearch.node.Node.<init>(Node.java:277) ~[elasticsearch-7.6.2.jar:7.6.2]",
elasticsearch1    | "at org.elasticsearch.node.Node.<init>(Node.java:257) ~[elasticsearch-7.6.2.jar:7.6.2]",
elasticsearch1    | "at org.elasticsearch.bootstrap.Bootstrap$5.<init>(Bootstrap.java:221) ~[elasticsearch-7.6.2.jar:7.6.2]",
elasticsearch1    | "at org.elasticsearch.bootstrap.Bootstrap.setup(Bootstrap.java:221) ~[elasticsearch-7.6.2.jar:7.6.2]",
elasticsearch1    | "at org.elasticsearch.bootstrap.Bootstrap.init(Bootstrap.java:349) ~[elasticsearch-7.6.2.jar:7.6.2]",
elasticsearch1    | "at org.elasticsearch.bootstrap.Elasticsearch.init(Elasticsearch.java:170) ~[elasticsearch-7.6.2.jar:7.6.2]",
elasticsearch1    | "... 6 more"] }
elasticsearch1    | ElasticsearchException[failed to bind service]; nested: AccessDeniedException[/usr/share/elasticsearch/data/nodes];
elasticsearch1    | Likely root cause: java.nio.file.AccessDeniedException: /usr/share/elasticsearch/data/nodes
elasticsearch1    |     at java.base/sun.nio.fs.UnixException.translateToIOException(UnixException.java:90)
elasticsearch1    |     at java.base/sun.nio.fs.UnixException.rethrowAsIOException(UnixException.java:111)
elasticsearch1    |     at java.base/sun.nio.fs.UnixException.rethrowAsIOException(UnixException.java:116)
elasticsearch1    |     at java.base/sun.nio.fs.UnixFileSystemProvider.createDirectory(UnixFileSystemProvider.java:389)
elasticsearch1    |     at java.base/java.nio.file.Files.createDirectory(Files.java:693)
elasticsearch1    |     at java.base/java.nio.file.Files.createAndCheckIsDirectory(Files.java:800)
elasticsearch1    |     at java.base/java.nio.file.Files.createDirectories(Files.java:786)
elasticsearch1    |     at org.elasticsearch.env.NodeEnvironment.lambda$new$0(NodeEnvironment.java:274)
elasticsearch1    |     at org.elasticsearch.env.NodeEnvironment$NodeLock.<init>(NodeEnvironment.java:211)
elasticsearch1    |     at org.elasticsearch.env.NodeEnvironment.<init>(NodeEnvironment.java:271)
elasticsearch1    |     at org.elasticsearch.node.Node.<init>(Node.java:277)
elasticsearch1    |     at org.elasticsearch.node.Node.<init>(Node.java:257)
elasticsearch1    |     at org.elasticsearch.bootstrap.Bootstrap$5.<init>(Bootstrap.java:221)
elasticsearch1    |     at org.elasticsearch.bootstrap.Bootstrap.setup(Bootstrap.java:221)
elasticsearch1    |     at org.elasticsearch.bootstrap.Bootstrap.init(Bootstrap.java:349)
elasticsearch1    |     at org.elasticsearch.bootstrap.Elasticsearch.init(Elasticsearch.java:170)
elasticsearch1    |     at org.elasticsearch.bootstrap.Elasticsearch.execute(Elasticsearch.java:161)
elasticsearch1    |     at org.elasticsearch.cli.EnvironmentAwareCommand.execute(EnvironmentAwareCommand.java:86)
elasticsearch1    |     at org.elasticsearch.cli.Command.mainWithoutErrorHandling(Command.java:125)
elasticsearch1    |     at org.elasticsearch.cli.Command.main(Command.java:90)
elasticsearch1    |     at org.elasticsearch.bootstrap.Elasticsearch.main(Elasticsearch.java:126)
elasticsearch1    |     at org.elasticsearch.bootstrap.Elasticsearch.main(Elasticsearch.java:92)
elasticsearch1    | For complete error details, refer to the log at /usr/share/elasticsearch/logs/docker-cluster.log

Solution:

Fix the permissions of the host directory mapped to /usr/share/elasticsearch/data. On my instance that directory is /var/lib/elasticsearch/esdata1.

Run

sudo chown -R 1000:1000 [directory]

e.g.

sudo chown -R 1000:1000 /var/lib/elasticsearch/esdata1


Posted by Uli Köhler in ElasticSearch

How to repair docker-compose MariaDB instances (aria_chk -r)

Problem:

You are trying to run a MariaDB container using docker-compose. However, the database container doesn’t start up and you see error messages like these in the logs:

[ERROR] mysqld: Aria recovery failed. Please run aria_chk -r on all Aria tables and delete all aria_log.######## files
[ERROR] Plugin 'Aria' init function returned error.
[ERROR] Plugin 'Aria' registration as a STORAGE ENGINE failed.
....
[ERROR] Could not open mysql.plugin table. Some plugins may be not loaded
[ERROR] Failed to initialize plugins.
[ERROR] Aborting

Solution:

The log messages already tell you what to do – but they don’t tell you how to do it:

Aria recovery failed. Please run aria_chk -r on all Aria tables and delete all aria_log.######## files

First, backup the entire MariaDB data directory: Check onto which host directory the data directory (/var/lib/mysql) of the container is mapped and copy the entire directory to a backup space. This is important in case the repair process fails.

Now let’s run aria_chk -r to check and repair MySQL table files.

docker-compose run my-db bash -c 'aria_chk -r /var/lib/mysql/**/*'

Replace my-db by the name of your database container. This will attempt to repair a lot of non-table-files as well but aria_chk will happily ignore those.

Now we can delete the log files:

docker-compose run my-db bash -c 'rm /var/lib/mysql/aria_log.*'

Again, replace my-db by the name of your database container.

Posted by Uli Köhler in Databases, Docker

RocksDB minimal example in C++

This minimal example shows how to open a RocksDB database, write a key and how to read it.

#include <cassert>
#include <string>
#include <rocksdb/db.h>

using namespace std;

int main(int argc, char** argv) {
    rocksdb::DB* db;
    rocksdb::Options options;
    options.create_if_missing = true;
    rocksdb::Status status =
    rocksdb::DB::Open(options, "/tmp/testdb", &db);
    assert(status.ok());

    // Insert value
    status = db->Put(rocksdb::WriteOptions(), "Test key", "Test value");
    assert(status.ok());

    // Read back value
    std::string value;
    status = db->Get(rocksdb::ReadOptions(), "Test key", &value);
    assert(status.ok());
    assert(!status.IsNotFound());

    // Read key which does not exist
    status = db->Get(rocksdb::ReadOptions(), "This key does not exist", &value);
    assert(status.IsNotFound());
}

Build using this CMakeLists.txt

add_executable(rocksdb-example rocksdb-example.cpp)
target_link_libraries(rocksdb-example rocksdb dl)

Compile using

cmake .
make
./rocksdb-example


Posted by Uli Köhler in C/C++, Databases

How to list MongoDB databases on command line

Use this command to list the MongoDB databases on the command line:

echo 'show dbs' | mongo

Example output:

MongoDB shell version v4.0.13
connecting to: mongodb://127.0.0.1:27017/?gssapiServiceName=mongodb
Implicit session: session { "id" : UUID("5c1e505e-9b05-4270-ab20-c537c0760481") }
MongoDB server version: 4.0.13
admin       0.000GB
config      0.000GB
drawing     0.001GB
order       0.000GB
production  0.001GB
standards   0.001GB
user        0.000GB
bye


Posted by Uli Köhler in MongoDB

How to fix Puppetteer ‘Running as root without –no-sandbox is not supported’

Problem:

When you try to run your puppetteer application, e.g. under docker, you see this error message:

Solution:

Note: Unless you are running in a Docker or similar container, first consider running the application as non-root-user!

You have to pass the --no-sandbox option to puppeteer.launch():

const browser = await puppeteer.launch({
    headless: true,
    args: ['--no-sandbox']
});

We recommend to use this slightly more complex solution to pass it only if the process is being run as root:

/**
 * Return true if the current process is run by the root user
 * https://techoverflow.net/2019/11/07/how-to-check-if-nodejs-is-run-by-root/
 */
function isCurrentUserRoot() {
   return process.getuid() == 0; // UID 0 is always root
}

const browser = await puppeteer.launch({
    headless: true,
    args: isCurrentUserRoot() ? ['--no-sandbox'] : undefined
});

This ensures Chromium is run in the most secure mode possible with the current user.

Posted by Uli Köhler in Javascript, NodeJS, Puppeteer

How to get schema of SQLite3 table in Python

Also see How to show table schema for SQLite3 table on the command line

Use this function to find the table schema of a SQLite3 table in Python:

def sqlite_table_schema(conn, name):
    """Return a string representing the table's CREATE"""
    cursor = conn.execute("SELECT sql FROM sqlite_master WHERE name=?;", [name])
    sql = cursor.fetchone()[0]
    cursor.close()
    return sql

Usage example:

print(sqlite_table_schema(conn, 'commands'))

Full example:

#!/usr/bin/env python3
import sqlite3
conn = sqlite3.connect('/usr/share/command-not-found/commands.db')

def sqlite_table_schema(conn, name):
    cursor = conn.execute("SELECT sql FROM sqlite_master WHERE name=?;", [name])
    sql = cursor.fetchone()[0]
    cursor.close()
    return sql

print(sqlite_table_schema(conn, 'commands'))

which prints

CREATE TABLE "commands" 
           (
            [cmdID] INTEGER PRIMARY KEY AUTOINCREMENT NOT NULL,
            [pkgID] INTEGER NOT NULL,
            [command] TEXT,
            FOREIGN KEY ([pkgID]) REFERENCES "pkgs" ([pkgID])
           )


Posted by Uli Köhler in Python, SQLite

How to fix SQLite3 Python ‘Incorrect number of bindings supplied. The current statement uses 1, … supplied’

Problem:

You are trying to run a simple SQL query with placeholders on a SQLite3 database, e.g.:

name = "mytable"
conn.execute("SELECT sql FROM sqlite_master WHERE name=?;", name)

But you get an exception like this:

---------------------------------------------------------------------------
ProgrammingError                          Traceback (most recent call last)
<ipython-input-55-e385cf40fd72> in <module>
      1 name = "mytable"
----> 2 conn.execute("SELECT sql FROM sqlite_master WHERE type='table' AND name=?;", name)

ProgrammingError: Incorrect number of bindings supplied. The current statement uses 1, and there are 7 supplied.

Solution:

You need to use a list as the second argument to conn.execute(...)!

Since you only gave the function a string, the string is being interpreted as list of characters.

In our example from above, you just need to wrap name in square brackets to read [name]:

name = "mytable"
conn.execute("SELECT sql FROM sqlite_master WHERE name=?;", [name])
Posted by Uli Köhler in Python, SQLite

How to show table schema for SQLite3 table on the command line

Also see How to get schema of SQLite3 table in Python

You can use the .schema command to show the SQL CREATE statement for a specific table in a SQLite3 database file using the sqlite3 command line tool:

sqlite3 [database file] ".schema (table name)"

for example:

sqlite3 /usr/share/command-not-found/commands.db ".schema commands"


Posted by Uli Köhler in SQLite

How to list SQLite3 database tables on command line

Also see How to list tables in SQLite3 database in Python

Use this command to list all the tables in a SQLite3 database using the sqlite3 command line tool:

sqlite3 [database file] "SELECT name FROM sqlite_master WHERE type='table' AND name != 'sqlite_sequence';"

Example:

$ sqlite3 /usr/share/command-not-found/commands.db "SELECT name FROM sqlite_master WHERE type='table' AND name != 'sqlite_sequence';"
commands
packages


Posted by Uli Köhler in Databases, SQLite