In order to click a button or a link using the the pyppeteer library, you can use page.evaluate().
If you have an <button> element or a link (<a>) like
<button id="mybutton">
you can use
# Now click the search button
await page.evaluate(f"""() => {{
    document.getElementById('mybutton').dispatchEvent(new MouseEvent('click', {{
        bubbles: true,
        cancelable: true,
        view: window
    }}));
}}""")
in order to generate a MouseEvent that simulates a click. Note that page.evaluate() will run any Javascript code you pass to it, so you can use your Javascript skills in order to create the desired effect
Also see https://gomakethings.com/how-to-simulate-a-click-event-with-javascript/ for more details on how to simulate mouse clicks in pure Javascript without relying on jQuery.
Note that page.evaluate() will just run any Javascript code you give it, so you can put your Javascript skills to use in order to manipulate the page.
Full example
This example will open https://techoverflow.net, enter a search term into the search field, click the search button and then create a screenshot
import asyncio
from pyppeteer import launch

async def main():
    browser = await launch()
    page = await browser.newPage()
    await page.goto('https://techoverflow.net')

    # Fill content into the search field
    content = "pypetteer"
    await page.evaluate(f"""() => {{
        document.getElementById('s').value = '{content}';
    }}""")

    # Now click the search button
    await page.evaluate(f"""() => {{
        document.getElementById('searchsubmit').dispatchEvent(new MouseEvent('click', {{
            bubbles: true,
            cancelable: true,
            view: window
        }}));
    }}""")

    # Wait until search results page has been loaded
    await page.waitForSelector(".archive-title")

    # Now take screenshot and exit
    await page.screenshot({'path': 'screenshot.png'})
    await browser.close()

asyncio.get_event_loop().run_until_complete(main())
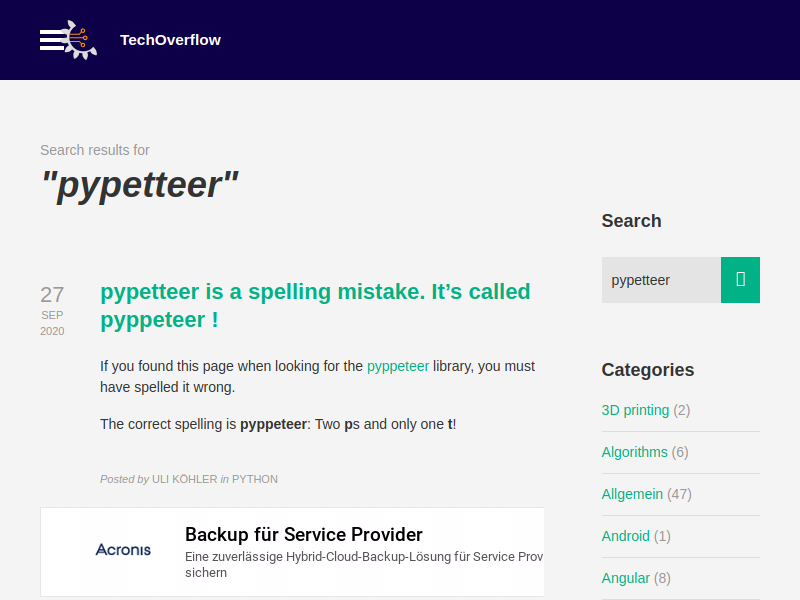
The result will look like this: