
在 Ubuntu 上通过 Docker 在反向代理后运行 Gitlab CE
类似于我之前关于通过 docker 在反向代理后安装 Redmine 的文章,本文详细介绍。由于我在同一台虚拟服务器上运行一个 Redmine 实例和一个 Gitlab 实例,以及数十个其他服务。
虽然 Gitlab CE docker 容器为在专用 VPS 上独立使用做了很好的预配置,但在反向代理后运行它不受支持,将导致大量错误消息 - 实际上需要大量额外工作才能启动和运行。
注意我们不会设置 GitLab 的 SSH 访问。使用此设置是可能的,但通常带来的麻烦多于价值。请参见这篇关于如何存储 git https 密码的文章,这样你就不必每次都输入密码。
安装 Docker 和 Docker-Compose
# 安装前提条件
sudo apt-get update
sudo apt-get -y install apt-transport-https ca-certificates curl software-properties-common
# 添加 docker 的包签名密钥
curl -fsSL https://download.docker.com/linux/ubuntu/gpg | sudo apt-key add -
# 添加仓库
sudo add-apt-repository -y "deb [arch=amd64] https://download.docker.com/linux/ubuntu $(lsb_release -cs) stable"
# 安装最新稳定的 docker 稳定版本
sudo apt-get update
sudo apt-get -y install docker-ce# 安装 docker-compose
sudo curl -L "https://github.com/docker/compose/releases/download/1.23.2/docker-compose-$(uname -s)-$(uname -m)" -o /usr/local/bin/docker-compose
sudo chmod a+x /usr/local/bin/docker-compose
# 将当前用户添加到 docker 组
sudo usermod -a -G docker $USER
# 启用并启动 docker 服务
sudo systemctl enable docker
sudo systemctl start docker运行此 shell 脚本后,从系统注销并登录,以便将 docker 组添加到当前用户。
创建目录和 docker-compose 配置
我们将在 /var/lib/gitlab 中安装 Gitlab,该目录将存放数据目录和 docker-compose 脚本。如果你在所有配置中一致使用,你可以使用任何目录(最重要的是 docker-compose.yml 和 systemd 服务)。
# 创建目录
sudo mkdir /var/lib/gitlab接下来,我们将创建 /var/lib/gitlab/docker-compose.yml。
这里有几件事你需要更改:
- 将
gitlab_rails['gitlab_email_from']和gitlab_rails['gitlab_email_display_name']设置为你希望电子邮件发送的任何发件人地址和名称 - 将 SMTP 凭据(
gitlab_rails['smtp_address']、gitlab_rails['smtp_port']、gitlab_rails['smtp_user_name']、gitlab_rails['smtp_password']和gitlab_rails['smtp_domain'])设置为有效的 SMTP 服务器。在极少数情况下,你还需要更改其他gitlab_rails['smtp_...']设置。 - 你需要将每 4 处出现的
gitlab.mydomain.de更改为你的域名。 - 端口配置,在此例中为
'9080:80'表示 Gitlab 将映射到本地 PC 的端口9080。此端口的选择有些随意 - 因为我们将在 nginx 反向代理后运行 Gitlab,端口不需要是任何特定端口(只要你在所有地方使用相同的端口),但它不能被其他任何东西使用。你可以在此使用任何端口,前提是它不被其他任何东西使用。保持80不变,仅在需要时只更改9080。
gitlab:
   image: 'gitlab/gitlab-ce:latest'
   restart: always
   hostname: 'gitlab.mydomain.de'
   environment:
     GITLAB_OMNIBUS_CONFIG: |
       external_url 'https://gitlab.mydomain.de'
       letsencrypt['enabled'] = false
       # 电子邮件
       gitlab_rails['gitlab_email_enabled'] = true
       gitlab_rails['gitlab_email_from'] = '[email protected]'
       gitlab_rails['gitlab_email_display_name'] = 'My GitLab'
       # SMTP
       gitlab_rails['smtp_enable'] = true
       gitlab_rails['smtp_address'] = "mail.mydomain.de"
       gitlab_rails['smtp_port'] = 25
       gitlab_rails['smtp_user_name'] = "[email protected]"
       gitlab_rails['smtp_password'] = "yourSMTPPassword"
       gitlab_rails['smtp_domain'] = "mydomain.de"
       gitlab_rails['smtp_authentication'] = "login"
       gitlab_rails['smtp_enable_starttls_auto'] = true
       gitlab_rails['smtp_tls'] = true
       gitlab_rails['smtp_openssl_verify_mode'] = 'none'
       # 反向代理 nginx 配置
       nginx['listen_port'] = 80
       nginx['listen_https'] = false
       nginx['proxy_set_headers'] = {
         "X-Forwarded-Proto" => "https",
         "X-Forwarded-Ssl" => "on",
         "Host" => "gitlab.mydomain.de",
         "X-Real-IP" => "$$remote_addr",
         "X-Forwarded-For" => "$$proxy_add_x_forwarded_for",
         "Upgrade" => "$$http_upgrade",
         "Connection" => "$$connection_upgrade"
       }
   ports:
     - '9080:80'
   volumes:
     - './config:/etc/gitlab'
     - './logs:/var/log/gitlab'
- './data:/var/opt/gitlab'设置 systemd 服务
接下来,我们将在 /etc/systemd/system/gitlab.service 中配置 systemd 服务。
在 [Service] 部分将 User=... 设置为你喜欢的用户。该用户需要是 docker 组的成员。还要检查 WorkingDirectory=... 是否正确。
[Unit]
Description=Gitlab
Requires=docker.service
After=docker.service

[Service]
Restart=always
User=root
Group=docker
WorkingDirectory=/var/lib/gitlab
# 当单元停止时关闭容器(如果正在运行)
ExecStartPre=/usr/local/bin/docker-compose -f docker-compose.yml down -v
# 当单元启动时启动容器
ExecStart=/usr/local/bin/docker-compose -f /docker-compose.yml up
# 当单元停止时停止容器
ExecStop=/usr/local/bin/docker-compose -f docker-compose.yml down -v

[Install]
WantedBy=multi-user.target创建文件后,我们可以启用并启动 gitlab 服务:
sudo systemctl enable gitlab
sudo systemctl start gitlab
sudo systemctl start gitlab 的输出应为空。如果是
Job for gitlab.service failed because the control process exited with error code.
See "systemctl status gitlab.service" and "journalctl -xe" for details.你可以使用 journalctl -xe 和 journalctl -e 调试问题
首次启动通常需要约 10 分钟,所以至少准备一杯咖啡。你可以使用 journalctl -xefu gitlab 跟踪进度。一旦你看到类似这样的行
Dec 17 17:28:04 instance-1 docker-compose[4087]: gitlab_1 | {"method":"GET","path":"/-/metrics","format":"html","controller":"MetricsController","action":"index","status":200,"duration":28.82,"view":22.82,"db":0.97,"time":"2018-12-17T17:28:03.252Z","params":[],"remote_ip":null,"user_id":null,"username":null,"ua":null}启动完成。
现在你可以使用以下命令检查 GitLab 是否正在运行
wget -O- http://localhost:9080/(如果你之前更改了端口配置,你需要在 URL 中使用你的自定义端口)。
如果成功,它将显示调试消息输出。由于 gitlab 会自动将你重定向到你的域名(在此示例中为 gitlab.mydomain.de),你应该看到类似这样的内容
--2018-12-17 17:28:32--  http://localhost:9080/
Resolving localhost (localhost)... 127.0.0.1
Connecting to localhost (localhost)|127.0.0.1|:9080... connected.
HTTP request sent, awaiting response... 302 Found
Location: https://gitlab.gridbox.de/users/sign_in [following]
--2018-12-17 17:28:32--  https://gitlab.mydomain.de/users/sign_in
Resolving gitlab.gridbox.de (gitlab.mydomain.de)... 35.198.165.121
Connecting to gitlab.gridbox.de (gitlab.mydomain.de)|35.198.165.121|:443... failed: Connection refused.由于我们尚未设置 nginx 作为反向代理,显示连接被拒绝完全正常。如果你看到上面列出的输出,则重定向已工作。
设置 nginx 反向代理(可选但推荐)
我们将使用 nginx 代理来自特定域名的请求(如果你已经在使用 Apache,也可以,但告诉你如何操作不在本教程范围内)。使用以下命令安装
sudo apt -y install nginx首先,你需要一个配置了 DNS 的域名。在此示例中,我们假设你的域名为 gitlab.mydomain.de!你需要将其更改为你的域名!
首先,我们将在 /etc/nginx/sites-enabled/gitlab.conf 中创建配置文件。记住将 gitlab.mydomain.de **替换为你的域名!**如果你使用不同于 9080 的端口,也要替换它。
map $http_upgrade $connection_upgrade {
    default upgrade;
    '' close;
}

server {
    server_name gitlab.mydomain.de;

    access_log /var/log/nginx/gitlab.access_log;
    error_log /var/log/nginx/gitlab.error_log info;

    location / {
        proxy_pass http://127.0.0.1:9080; # docker container listens here
        proxy_read_timeout 3600s;
        proxy_http_version 1.1;
        # Websocket connection
        proxy_set_header Upgrade $http_upgrade;
        proxy_set_header Connection $connection_upgrade;
    }

    listen 80;
}现在运行 sudo nginx -t 测试配置文件中是否有任何错误。如果一切正常,你将看到
nginx: the configuration file /etc/nginx/nginx.conf syntax is ok
nginx: configuration file /etc/nginx/nginx.conf test is successful一旦你修复了所有错误(如果有),运行 sudo service nginx reload 应用配置。
在检查 Gitlab 是否工作之前,我们需要设置 Let’s Encrypt SSL 证书:
使用 Let’s Encrypt 保护 nginx 反向代理
首先我们需要安装 certbot 和 certbot nginx 插件,以便在 nginx 中创建和安装证书:
sudo apt -y install python3-certbot python3-certbot-nginx幸运的是 certbot 自动化了安装和配置 SSL 及证书的大部分过程。运行
sudo certbot --nginx它会要求你输入电子邮件地址并同意服务条款以及是否想接收 EFF 时事通讯。
之后,certbot 会要求你选择正确的域名:
Which names would you like to activate HTTPS for?
-------------------------------------------------------------------------------
1: gitlab.mydomain.de
-------------------------------------------------------------------------------
Select the appropriate numbers separated by commas and/or spaces, or leave input
blank to select all options shown (Enter 'c' to cancel):在这种情况下,只有一个域名(如果你在 nginx 上激活了更多域名,会有更多!)。
因此,输入 1 并按回车。certbot 现在将生成证书。如果成功,你将看到包含类似这样行的输出
Deploying Certificate to VirtualHost /etc/nginx/sites-enabled/gitlab.mydomain.de.conf现在它会问你是否自动将所有请求重定向到 HTTPS:
Please choose whether or not to redirect HTTP traffic to HTTPS, removing HTTP access.
-------------------------------------------------------------------------------
1: No redirect - Make no further changes to the webserver configuration.
2: Redirect - Make all requests redirect to secure HTTPS access. Choose this for
new sites, or if you're confident your site works on HTTPS. You can undo this
change by editing your web server's configuration.
-------------------------------------------------------------------------------
Select the appropriate number [1-2] then [enter] (press 'c' to cancel):在此选择 Redirect:输入 2 并按回车。现在你可以登录 GitLab 并完成安装。
你需要每 3 个月续订一次证书以保持有效,之后运行 sudo service nginx reload 使用新证书。如果你未能这样做,用户将看到证书过期错误消息,并且无法轻松访问 Gitlab!请参见此文章了解如何大部分自动化此过程!
设置 Gitlab
现在你可以打开浏览器并首次查看你的新 GitLab 安装:
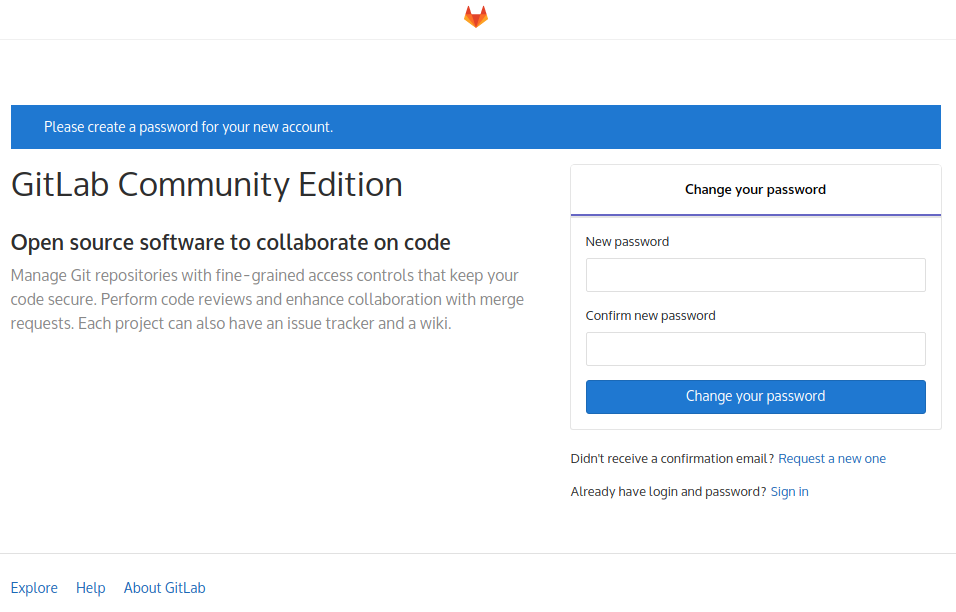
设置新密码,然后使用用户名 root 和你新设置的密码登录。
之后,通过点击顶部紫色导航栏中的扳手图标打开顶部的管理区域。

在左侧的导航栏中,点击 Settings(它在底部 - 你需要向下滚动),然后点击 General。
点击 Visibility and access controls 右侧的 Expand 按钮。向下滚动直到看到 Enabled Git access protocols 并在下拉框中选择 Only HTTP(S)。
然后点击绿色的 Save changes 按钮。
由于我们现在已禁用 SSH 访问(我们一开始就没有设置),你现在可以使用 GitLab。一个好的开始是创建一个新项目并尝试检出。请参见这篇关于如何存储 git https 密码的文章,这样你就不必每次都输入 git 密码。
注意: 如果 GitLab 不发送电子邮件,检查 config/gitlab.rb,搜索 smtp,如有必要修复那里的 SMTP 设置。之后,sudo systemctl stop gitlab && sudo systemctl start gitlab