
使用 Arduino Uno 生成短脉冲 — 第 4 部分:NOP 循环
在我们之前的文章中,我们在直接 GPIO 寄存器访问指令之间插入 NOP 指令来创建可变脉冲宽度,可获得 62.5ns 的分辨率。
现在可以使用 for 循环创建多个 NOP 指令:
nop_for_loop_snippet.cpp
for (int i = 0; i < 3; i++)
{
    _NOP();
}事实上,这与手动使用三个 NOP 完全相同(312.5ns 脉冲宽度),因为它被编译器内联,即编译器只生成三个单独的 NOP,因为 NOP 的数量在编译时已知。
如果我们使用变量 numNOPs 并使用 volatile,这样编译器被指示不要假设它是常量:
short_pulse_example.cpp
volatile int numNOPs = 3;
for (int i = 0; i < numNOPs; i++)
{
  _NOP();
}我们最终得到的脉冲宽度不是 312.5ns 而是 3250ns:
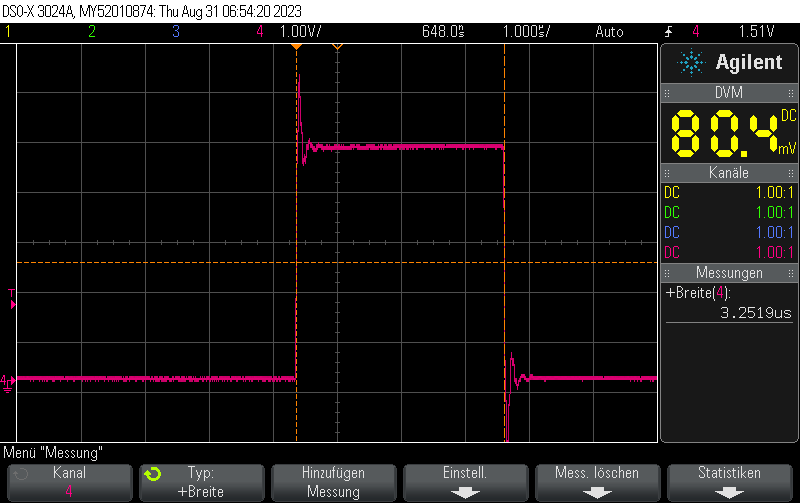
我测量了不同 numNOPs 设置的脉冲宽度:
numNOPs = 1:1.50uspulse widthnumNOPs = 2:2.25uspulse widthnumNOPs = 3:3.00uspulse widthnumNOPs = 4:3.75uspulse widthnumNOPs = 5:4.5uspulse widthnumNOPs = 6:5.25uspulse widthnumNOPs = 7:6.00uspulse widthnumNOPs = 8:6.75uspulse widthnumNOPs = 9:7.5uspulse widthnumNOPs = 10:8.25uspulse width
从这个表格很明显,脉冲宽度的公式是
$$(\text{numNOPs} + 1) \cdot 0.75us$$为什么它比手动粘贴 NOP 慢这么多?因为 for 循环在编译程序的机器指令中引入了许多额外指令,包括内存加载、比较和(条件)跳转。这就是为什么不是 1 条长度为 62.5ns 的指令,而是实际需要 12 条长度为 750ns 的指令来完成一次循环迭代。
完整示例
nop_loop_full_example.cpp
#include <Arduino.h>
#include <avr/io.h>

#define PORT11 PORTB
#define PIN11 3
#define PIN11_MASK (1 << PIN11)

void setup() {
    pinMode(11, OUTPUT);
}

volatile int numNOPs  = 1;

void loop() {
    cli();
    PORT11 |= PIN11_MASK;
    for (int i = 0; i < numNOPs; i++) {
        _NOP();
    }
    PORT11 &= ~PIN11_MASK;
    sei();

    delay(10);
}这是一个在 AVR 上使用 NOP 循环生成短脉冲的简短示例:
nop_loop_example.ino
void loop() {
  // Toggle pin
  PORTB |= (1 << 5);
  // Small delay using NOPs
  for (volatile uint8_t i=0;i<10;i++) __asm__ __volatile__("nop\n");
  PORTB &= ~(1 << 5);
  delay(1000);
}汇编 NOP 示例:
nop_asm.s
.nop_loop:
	nop
	subi r24, 1
brne .nop_loopCheck out similar posts by category:
Arduino
If this post helped you, please consider buying me a coffee or donating via PayPal to support research & publishing of new posts on TechOverflow