By default, mosquitto saves persistence data in mosquitto.db
Source: mosquitto manpage
By default, mosquitto saves persistence data in mosquitto.db
Source: mosquitto manpage
Your ESP32 running a MQTT client is printing the following error messages:
E (285025) TRANSPORT_WS: Sec-WebSocket-Accept not found
E (285025) MQTT_CLIENT: Error transport connect
You’re using MQTT over websockets (ws:// or wss://) but on the given MQTT URL, no MQTT-over-websocket server is running.
This is often caused by using a wrong URL (possibly the URL is missing the path), but it might also be caused by a misconfiguraton of the server or the reverse proxy.
It’s often best to try using a software websocket client to test the correct settings.
In our previous post EMQX 5.x HTTP password authentication server minimal example using NodeJS we provided a complete example of how to implement EMQX HTTP authentication.
This post provides an extension to our previous HTTP auth by adding a Koa router (i.e. a HTTP endpoint / URL) to provide ACL authentication, i.e. allow or deny topic level access with custom logic.
router.post('/emqx/acl', async ctx => {
    const body = ctx.request.body;
    console.log(body)
    // TODO: This example always returns true
    // You need to implement your authentication logic
    ctx.body = {
        result: "allow",
    };
});
Add that code before app.use(router.routes()); in the script from EMQX 5.x HTTP password authentication server minimal example using NodeJS.
My recommended Authorization configuration body which you can set in the EMQX dashboard is
{
  "action": "${action}",
  "client_id": "${clientid}",
  "ip": "${peerhost}",
  "topic": "${topic}",
  "username": "${username}"
}
Note: If you also want to implement ACL authorization via HTTP, see our extension to this example: EMQX 5.x HTTP ACL server using NodeJS
This server implements a minimal HTTP authentication server. In this minimal example, it will always allow authentication – you need to implement your own logic to verify passwords. Note: This server is written for EMQX versionx5.0 and will not work for EMQX 4.x without modification. See the official documentation on EMQX 5.x HTTP auth for more information.
#!/usr/bin/env node
const router = require('koa-router')();
const koaBody = require('koa-body');
const Koa = require('koa');
const app = new Koa();

app.use(koaBody());

router.post('/emqx/auth', async ctx => {
    const body = ctx.request.body;
    const username = body.username;
    const password = body.password;
    // TODO: This example always returns "allow"
    // You need to implement your authentication logic
    ctx.body = {
        result: "allow",
        is_superuser: false
    };
});

app.use(router.routes());

if (!module.parent) app.listen(19261);
This script is based on our previous post Minimal Koa.JS example with Router & Body parser, hence you can install the dependencies using
npm i --save koa koa-router koa-body
The request body config which you can set in the EMQX dashboard is
{
  "client_id": "${clientid}",
  "password": "${password}",
  "username": "${username}"
}
You can install the mosquitto client (mosquitto_sub) by running
sudo apt -y install mosquitto-clients
You can easily load (& start) an EMQX plugin such as emqx_auth_mnesia
./bin/emqx_ctl plugins load emqx_auth_mnesia
If you are using docker-compose and your container is named emqx, you can use
docker-compose exec emqx ./bin/emqx_ctl plugins load emqx_auth_mnesia
After running this command, the plugin will show up as Running in the dashboard:

Changing the password is as simple as
./bin/emqx_ctl admins passwd admin "[new password]"
If you are using docker-compose and your container is named emqx, you can use
docker-compose exec ./bin/emqx_ctl admins passwd admin "[new password]"
The default credentials for EMQX are:
adminpublicIt should go without saying that you must change the password!
The default password for the EMQX admin account is public. Change it as soon as possible 🙂
You can simply run emqx_ctl using the following command:
docker-compose exec emqx ./bin/emqx_ctl [command]
where emqx is the name of the container to run emqx_ctl in.
Example:
docker-compose exec emqx ./bin/emqx_ctl status
When trying to run emqx_ctl in a dockerized emqx setup using a command like
docker-compose exec emqx ./bin/emqx status
you see an error message like
Node '[email protected]' not responding to pings.
/opt/emqx/bin/emqx: line 41: die: command not found
The problem here is that emqx_ctl is trying to connect to the IP address for node1.emqx.mydomain.com but that IP address does not point to the IP address for the docker container (maybe it’s the public IP address for your server?)
The solution here is to create a network alias within docker/docker-compose so that the Docker DNS system resolves node1.emqx.mydomain.com to the internal IP address of the container.
For example, in docker-compose, you can create your network using
networks:
  emqx:
    driver: bridge
and then configure the alias for the container using
services:
  emqx:
    image: emqx:4.4.4
    environment:
      - "EMQX_NAME=emqx"
      - "EMQX_HOST=node1.emqx.mydomain.com"
      - "EMQX_LOADED_PLUGINS=emqx_recon,emqx_retainer,emqx_management,emqx_dashboard"
    ports:
      - 18083:18083
      - 1883:1883
    volumes:
      - ./emqx_data:/opt/emqx/data
      - ./emqx_log:/opt/emqx/log
    networks:
      emqx:
        aliases:
          - "node1.emqx.mydomain.com"
target_link_libraries(myexecutable paho-mqttpp3 paho-mqtt3as ssl crypto)
When trying to do a Tasmota firmware upgrade on the Nous A1T, you see this error message:
Upload Failed
Upload buffer miscompare
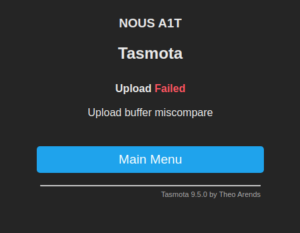
This issue occurs because in the default configuration there is not enough flash space to flash the firmware.
However, this is easy to fix: First, flash the tasmota-minimal.bin.gz firmware, then flash the regular tasmota.bin.gz firmware using the webinterface of the minimal firmware.
Download link for the minimal firmware
Download link for the regular firmware
After that, upgrades will work just fine.
On the Tasmota console, you see an error message like
17:56:11.326 MQT: Connect failed to 10.19.50.10:1883, rc 5. Retry in 50 sec
Your MQTT username/password is wrong. Check if they match what you have configured in your server in the Tasmota MQTT configuration page.
const mqtt = require('mqtt')
const client = mqtt.connect('mqtt://user:[email protected]')

client.on('connect', () => {
  client.subscribe('mytopic');
})

client.on('message', (topic, message) => {
  console.log(topic, JSON.parse(message))
})
If required, you can install the mqtt library using
npm i --save mqtt
Also see: NodeJS MQTT minimal subscribe example with JSON messages
const mqtt = require('mqtt')
const client = mqtt.connect('mqtt://user:[email protected]')

client.on('connect', () => {
  client.subscribe('mytopic');
})

client.on('message', (topic, message) => {
  console.log(topic, message)
})
If required, you can install the mqtt library using
npm i --save mqtt
Set username & password in Paho-MQTT using
client.username_pw_set("myusername", "aeNg8aibai0oiloo7xiad1iaju1uch")You need to call that before calling connect()!
client = mqtt.Client("mqtt-test") # client ID "mqtt-test"
client.on_connect = on_connect
client.on_message = on_message
client.username_pw_set("myusername", "aeNg8aibai0oiloo7xiad1iaju1uch")
client.connect('127.0.0.1', 1883)
client.loop_forever()  # Start networking daemon
When you see result code 5 in paho-mqtt this means Unauthorized! Typically it means you don’t have the correct username and password set.
Set username & password using
client.username_pw_set("myusername", "aeNg8aibai0oiloo7xiad1iaju1uch")client = mqtt.Client("mqtt-test") # client ID "mqtt-test"
client.on_connect = on_connect
client.on_message = on_message
client.username_pw_set("myusername", "aeNg8aibai0oiloo7xiad1iaju1uch")
client.connect('127.0.0.1', 1883)
client.loop_forever() # Start networking daemon
#!/usr/bin/env python3
import paho.mqtt.client as mqtt
def on_connect(client, userdata, flags, rc):
# This will be called once the client connects
print(f"Connected with result code {rc}")
# Subscribe here!
client.subscribe("my-topic")
def on_message(client, userdata, msg):
print(f"Message received [{msg.topic}]: {msg.payload}")
client = mqtt.Client("mqtt-test") # client ID "mqtt-test"
client.on_connect = on_connect
client.on_message = on_message
client.username_pw_set("myusername", "aeNg8aibai0oiloo7xiad1iaju1uch")
client.connect('127.0.0.1', 1883)
client.loop_forever()  # Start networking daemon
When running your Python script, you see an error message like
Traceback (most recent call last):
  File "test.py", line 2, in <module>
    import paho.mqtt.client as mqtt
ModuleNotFoundError: No module named 'paho'
Install the paho-mqtt package using
pip3 install paho-mqtt
or
pip install paho-mqtt