Puppeteer

How to put text into input element in Pyppeteer

In Pyppeteer, if you have an input like this one:

<input id="myInput">

you can fill with text like abc123 by using page.type() like in this snippet:

await page.type('#myInput', 'abc123')

Full example

This example fetches techoverflow.net and puts my search into the search query input on the top right:

#!/usr/bin/env python3
import asyncio
from pyppeteer import launch

async def main():
    browser = await launch()
    page = await browser.newPage()
    await page.goto('https://www.techoverflow.net')
    # Fill text with input
    await page.type('.search-form-input', 'my search')
    # Make screenshot
    await page.screenshot({'path': 'screenshot.png'})
    # Cleanup
    await browser.close()

asyncio.get_event_loop().run_until_complete(main())


Posted by Uli Köhler in Pyppeteer, Python

How to disable SSL certificate verification in Pyppeteer

If you see an error message like

pyppeteer.errors.PageError: net::ERR_CERT_AUTHORITY_INVALID at https://10.9.5.12/

in Pyppeteer and you are sure that you just want to skip certificate verification change

browser = await launch()

to

browser = await launch({"ignoreHTTPSErrors": True})

or add "ignoreHTTPSErrors": True to the list of parameters to launch if you already have other parameters there. This will just ignore the net::ERR_CERT_AUTHORITY_INVALID and other, related HTTPS errors.

Posted by Uli Köhler in Pyppeteer, Python

Pyppeteer minimal screenshot example

This script is a minimal example on how to use Pyppeteer to fetch a web page and save a screenshot to screenshot.png:

#!/usr/bin/env python3
import asyncio
from pyppeteer import launch

async def main():
    browser = await launch()
    page = await browser.newPage()
    await page.goto('https://www.techoverflow.net')
    # Make screenshot
    await page.screenshot({'path': 'screenshot.png'})
    # Cleanup
    await browser.close()

asyncio.get_event_loop().run_until_complete(main())

How to run:

sudo pip3 install pyppeteer
python3 PyppeteerScreenshotExample.py


Posted by Uli Köhler in Pyppeteer

How to get page HTML source code in Puppeteer

In order to get the current page HTML source code (i.e. not the source code received from the server, but the currently loaded source code including Javascript modifications), use

await page.content()

Full example based on Puppeteer minimal example:

// Minimal puppeteer get page HTML source code example
const puppeteer = require('puppeteer');
(async () => {
  const browser = await puppeteer.launch();
  const page = await browser.newPage();
  await page.goto('https://techoverflow.net', {waitUntil: 'domcontentloaded'});
  // Wait for 5 seconds
  console.log(await page.content());
  // Take screenshot
  await browser.close();
})();


Posted by Uli Köhler in Javascript, NodeJS, Puppeteer

How to sleep for X seconds in Puppeteer

In order to sleep for 5 seconds, use

await page.waitForTimeout(5000);

Full example based on Puppeteer minimal example:

// Minimal puppeteer example
const puppeteer = require('puppeteer');
(async () => {
  const browser = await puppeteer.launch();
  const page = await browser.newPage();
  await page.goto('https://techoverflow.net', {waitUntil: 'domcontentloaded'});
  // Wait for 5 seconds
  await page.waitForTimeout(5000);
  // Take screenshot
  await page.screenshot({path: 'screenshot.png'});
  await browser.close();
})();


Posted by Uli Köhler in Javascript, NodeJS, Puppeteer

How to fix pyppeteer pyppeteer.errors.BrowserError: Browser closed unexpectedly:

Problem:

You want to run your Pyppeteer application on Linux, but you see an error message like

Traceback (most recent call last):
  File "PyppeteerExample.py", line 15, in <module>
    asyncio.get_event_loop().run_until_complete(main())
  File "/usr/lib/python3.6/asyncio/base_events.py", line 484, in run_until_complete
    return future.result()
  File "PyppeteerExample.py", line 6, in main
    browser = await launch()
  File "/usr/local/lib/python3.6/dist-packages/pyppeteer/launcher.py", line 305, in launch
    return await Launcher(options, **kwargs).launch()
  File "/usr/local/lib/python3.6/dist-packages/pyppeteer/launcher.py", line 166, in launch
    self.browserWSEndpoint = get_ws_endpoint(self.url)
  File "/usr/local/lib/python3.6/dist-packages/pyppeteer/launcher.py", line 225, in get_ws_endpoint
    raise BrowserError('Browser closed unexpectedly:\n')
pyppeteer.errors.BrowserError: Browser closed unexpectedly:

Solution:

In most cases, the underlying error for this error message is Puppetteer’s libX11-xcb.so.1: cannot open shared object file: No such file or directory. In order to fix that, you need to install dependency libraries for Chromium which is used internally by Puppeteer / Pyppeteer:

sudo apt install -y gconf-service libasound2 libatk1.0-0 libc6 libcairo2 libcups2 libdbus-1-3 libexpat1 libfontconfig1 libgcc1 libgconf-2-4 libgdk-pixbuf2.0-0 libglib2.0-0 libgtk-3-0 libnspr4 libpango-1.0-0 libpangocairo-1.0-0 libstdc++6 libx11-6 libx11-xcb1 libxcb1 libxcomposite1 libxcursor1 libxdamage1 libxext6 libxfixes3 libxi6 libxrandr2 libxrender1 libxss1 libxtst6 ca-certificates fonts-liberation libappindicator1 libnss3 lsb-release xdg-utils wget


Posted by Uli Köhler in Pyppeteer, Python

Pyppeteer minimal example

This script is a minimal example on how to use Pyppeteer to fetch a web page and extract the page title (the content of the .logo_default HTML element)

#!/usr/bin/env python3
import asyncio
from pyppeteer import launch

async def main():
    browser = await launch()
    page = await browser.newPage()
    await page.goto('https://www.techoverflow.net')
    # Get the URL and print it
    title = await page.evaluate("() => document.querySelector('.logo-default').textContent")
    print(f"Page title: {title}") # prints Page title: TechOverflow
    # Cleanup
    await browser.close()

asyncio.get_event_loop().run_until_complete(main())

How to run:

sudo pip3 install pyppeteer
python3 PyppeteerExample.py


Posted by Uli Köhler in Pyppeteer

How to get current page URL in pyppeteer

In pyppeteer you can use

url = await page.evaluate("() => window.location.href")

in order to get the current URL. Note that page.evaluate() runs whatever Javascript your give it – hence you can use your Javascript skills in order to create the desired effect.

Full example

import asyncio
from pyppeteer import launch

async def main():
    browser = await launch()
    page = await browser.newPage()
    await page.goto('https://www.techoverflow.net')

    # Get the URL and print it
    url = await page.evaluate("() => window.location.href")
    print(url) # prints https://www.techoverflow.net/

    # Cleanuip
    await browser.close()

asyncio.get_event_loop().run_until_complete(main())


Posted by Uli Köhler in Pyppeteer, Python

How simulate click using pyppeteer

In order to click a button or a link using the the pyppeteer library, you can use page.evaluate().

If you have an <button> element or a link (<a>) like

<button id="mybutton">

you can use

# Now click the search button    
await page.evaluate(f"""() => {{
    document.getElementById('mybutton').dispatchEvent(new MouseEvent('click', {{
        bubbles: true,
        cancelable: true,
        view: window
    }}));
}}""")

in order to generate a MouseEvent that simulates a click. Note that page.evaluate() will run any Javascript code you pass to it, so you can use your Javascript skills in order to create the desired effect

Also see https://gomakethings.com/how-to-simulate-a-click-event-with-javascript/ for more details on how to simulate mouse clicks in pure Javascript without relying on jQuery.

Note that page.evaluate() will just run any Javascript code you give it, so you can put your Javascript skills to use in order to manipulate the page.

Full example

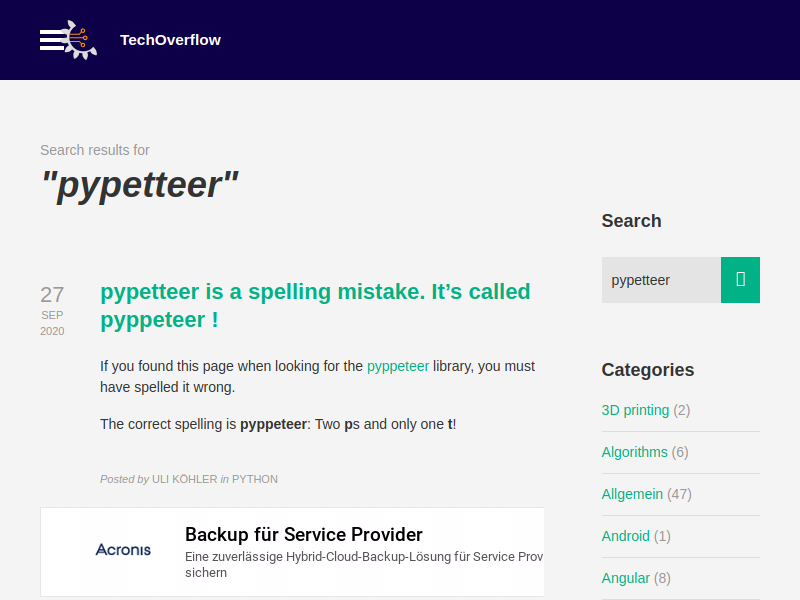
This example will open https://techoverflow.net, enter a search term into the search field, click the search button and then create a screenshot

import asyncio
from pyppeteer import launch

async def main():
    browser = await launch()
    page = await browser.newPage()
    await page.goto('https://techoverflow.net')

    # Fill content into the search field
    content = "pypetteer"
    await page.evaluate(f"""() => {{
        document.getElementById('s').value = '{content}';
    }}""")

    # Now click the search button    
    await page.evaluate(f"""() => {{
        document.getElementById('searchsubmit').dispatchEvent(new MouseEvent('click', {{
            bubbles: true,
            cancelable: true,
            view: window
        }}));
    }}""")

    # Wait until search results page has been loaded
    await page.waitForSelector(".archive-title")

    # Now take screenshot and exit
    await page.screenshot({'path': 'screenshot.png'})
    await browser.close()

asyncio.get_event_loop().run_until_complete(main())

The result will look like this:
Posted by Uli Köhler in Pyppeteer, Python

How to fill <input> field using pyppeteer

In order to fill an input field using the pyppeteer library, you can use page.evaluate().

If you have an <input> element like

<input name="myinput" id="myinput" type="text">

you can use

content = "My content" # This will be filled into <input id="myinput"> !
await page.evaluate(f"""() => {{
    document.getElementById('myinput').value = '{content}';
}}""")

Note that page.evaluate() will just run any Javascript code you give it, so you can put your Javascript skills to use in order to manipulate the page.

Full example

This example will open https://techoverflow.net, enter a search term into the search field and then create a screenshot

#!/usr/bin/env python3
import asyncio
from pyppeteer import launch

async def main():
    browser = await launch()
    page = await browser.newPage()
    await page.goto('https://techoverflow.net')
    
    # This example fills content into the search field
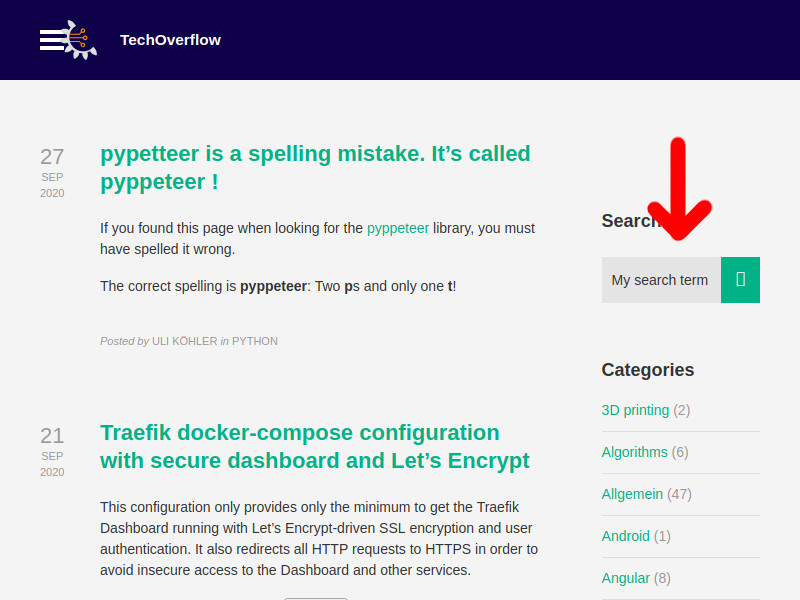
    content = "My search term"
    await page.evaluate(f"""() => {{
        document.getElementById('s').value = '{content}';
    }}""")

    # Make screenshot
    await page.screenshot({'path': 'screenshot.png'})
    await browser.close()

asyncio.get_event_loop().run_until_complete(main())

The result will look like this:

Posted by Uli Köhler in Pyppeteer, Python

pypetteer is a spelling mistake. It’s called pyppeteer !

If you found this page when looking for the pyppeteer library, you must have spelled it wrong.

The correct spelling is pyppeteer: Two ps and only one t!

Posted by Uli Köhler in Pyppeteer, Python

How to emulate Page up / Page down key in Puppeteer

To emulate a keypress to the Page up key in Puppeteer, use

await page.keyboard.press("PageUp");

To emulate a keypress to the Page down key in Puppeteer, use

await page.keyboard.press("PageDown");


Posted by Uli Köhler in Javascript, NodeJS, Puppeteer

How to fix Puppetteer ‘Running as root without –no-sandbox is not supported’

Problem:

When you try to run your puppetteer application, e.g. under docker, you see this error message:

Solution:

Note: Unless you are running in a Docker or similar container, first consider running the application as non-root-user!

You have to pass the --no-sandbox option to puppeteer.launch():

const browser = await puppeteer.launch({
    headless: true,
    args: ['--no-sandbox']
});

We recommend to use this slightly more complex solution to pass it only if the process is being run as root:

/**
 * Return true if the current process is run by the root user
 * https://techoverflow.net/2019/11/07/how-to-check-if-nodejs-is-run-by-root/
 */
function isCurrentUserRoot() {
   return process.getuid() == 0; // UID 0 is always root
}

const browser = await puppeteer.launch({
    headless: true,
    args: isCurrentUserRoot() ? ['--no-sandbox'] : undefined
});

This ensures Chromium is run in the most secure mode possible with the current user.

Posted by Uli Köhler in Javascript, NodeJS, Puppeteer

How to emulate the Enter key in Puppeteer

To emulate a keypress to the Enter key in Puppeteer, use

await page.keyboard.press("Enter");

The E needs to be uppercase for this to work!

Posted by Uli Köhler in Javascript, Puppeteer

How to emulate keyboard input in Puppeteer

To emulate the user typing something on the keyboard, use

await page.keyboard.type("the text");

This will type the text extremely fast with virtually no delay between the characters.

In order to simulate the finite typing speed of real users, use

await page.keyboard.type("the text", {delay: 100});

instead. The delay betwen characters in this example is 100 Milliseconds, i.e. the emulated user types 10 characters per second.

Posted by Uli Köhler in Javascript, NodeJS, Puppeteer

How to emulate TAB key press in Puppeteer

In order to emulate a tab key press in Puppeteer, use

await page.keyboard.press("Tab");

Full example:

// Minimal puppeteer example
const puppeteer = require('puppeteer');
(async () => {
  const browser = await puppeteer.launch({defaultViewport: {width: 1920, height: 1080}});
  const page = await browser.newPage();
  await page.goto('https://techoverflow.net', {waitUntil: 'domcontentloaded'});
  // Press tab 10 times (effectively scrolls down on techoverflow.net)
  for (let i = 0; i < 10; i++) {
      await page.keyboard.press("Tab");
  }
  // Screenshot to verify result
  await page.screenshot({path: 'screenshot.png'});
  // Cleanup
  await browser.close();
})();


Posted by Uli Köhler in Javascript, Puppeteer

How to set <input> value in Puppeteer

Use this snippet to set the value of an HTML <input> element in Puppeteer:

const newInputValue = "test 123";
await page.evaluate(val => document.querySelector('.search-form-input').value = val, newInputValue);amp

Remember to replace '.search-form-input' by whatever CSS selector is suitable to select your <input>. Examples include 'input[name="username"]' or '.username > input'.

Full example:

// Minimal puppeteer example
const puppeteer = require('puppeteer');
(async () => {
  const browser = await puppeteer.launch();
  const page = await browser.newPage();
  await page.goto('https://techoverflow.net', {waitUntil: 'domcontentloaded'});
  // Set input value
  const newInputValue = "test 123";
  await page.evaluate(val => document.querySelector('.search-form-input').value = val, newInputValue);
  // Screenshot to verify result
  await page.screenshot({path: 'screenshot.png'});
  // Cleanup
  await browser.close();
})();

Note that this method will work for any simple <input>, however it might not work for some heavily Javascripted inputs which you can find on some modern websites.

Posted by Uli Köhler in Javascript, Puppeteer

How to save screenshot in Puppeteer as PNG?

You can take a screenshot in Puppeteer using

await page.screenshot({path: 'screenshot.png'});

The path is relative to the current working directory.

Want to have a screenshot in a size different to 800×600? See How to set screenshot size in Puppeteer?

Full example:

// Minimal puppeteer example
const puppeteer = require('puppeteer');
(async () => {
  const browser = await puppeteer.launch();
  const page = await browser.newPage();
  await page.goto('https://techoverflow.net', {waitUntil: 'domcontentloaded'});
  // Screenshot to verify result
  await page.screenshot({path: 'screenshot.png'});
  // Cleanup
  await browser.close();
})();


Posted by Uli Köhler in Javascript, NodeJS, Puppeteer

Minimal puppeteer response interception example

Using Python (pyppeteer)? Check out Pyppeteer minimal network response interception example

This example shows you how to intercept network responses in puppeteer.

Note: This intercepts the response, not the request! This means you can’t abort the request before it is actually sent to the server, but you can read the content of the response! See Minimal puppeteer request interception example for an example on how to intercept requests.

const puppeteer = require('puppeteer');
(async () => {
  const browser = await puppeteer.launch();
  const page = await browser.newPage();
  // Enable response interception
  page.on('response', async (response) => {
      console.info("URL", response.request().url());
      console.info("Method", response.request().method())
      console.info("Response headers", response.headers())
      console.info("Request headers", response.request().headers())
      // Use this to get the content as text
      const responseText = await response.text();
      // ... or as buffer (for binary data)
      const responseBuffer = await response.buffer();
      // ... or as JSON, if it's a JSON (else, this will throw!)
      const responseObj = await response.json();
  })
  await page.goto('https://techoverflow.net', {waitUntil: 'domcontentloaded'});
  // Make a screenshot
  await page.screenshot({path: 'screenshot.png'});
  await browser.close();
})();


Posted by Uli Köhler in Javascript, Puppeteer

Minimal puppeteer request interception example

Using Python (pyppeteer)? Check out Pyppeteer minimal network request interception example

This example shows you how to intercept network requests in puppeteer:

Note: This intercepts the request, not the response! This means you can abort the request made, but you can’t read the content of the response! See Minimal puppeteer response interception example for an example on how to intercept responses.

const puppeteer = require('puppeteer');
(async () => {
  const browser = await puppeteer.launch();
  const page = await browser.newPage();
  // Enable request interception
  await page.setRequestInterception(true);
  page.on('request', async (request) => {
      console.info("URL", request.url());
      console.info("Method", request.method())
      console.info("Headers", request.headers())
      return request.continue(); // Allow request to continue
      // return request.abort(); // use this instead to abort the request!
  })
  await page.goto('https://techoverflow.net', {waitUntil: 'domcontentloaded'});
  // Make a screenshot
  await page.screenshot({path: 'screenshot.png'});
  await browser.close();
})();


Posted by Uli Köhler in Javascript, Puppeteer