Wordpress

How to check WordPress site integrity using wpcli

Check the integrity of the WordPress core:

wp core verify-checksums

Check the integrity of all plugins:

wp plugin verify-checksums --all

docker-compose variant

docker-compose exec wpcli wp core verify-checksums
docker-compose exec wpcli wp plugin verify-checksums --all


Posted by Uli Köhler in Wordpress

How to check database connection using wpcli

wpcli wp db check

Or, with docker-compose, if you have a wpcli container:

docker-compose exec wpcli wp db check

Example output:

wordpress.wp_commentmeta                           OK
wordpress.wp_comments                              OK
wordpress.wp_icl_content_status                    OK
wordpress.wp_icl_core_status                       OK
wordpress.wp_icl_flags                             OK
wordpress.wp_icl_languages                         OK
wordpress.wp_icl_languages_translations            OK
wordpress.wp_icl_locale_map                        OK
wordpress.wp_icl_message_status                    OK
wordpress.wp_icl_mo_files_domains                  OK
wordpress.wp_icl_node                              OK
wordpress.wp_icl_reminders                         OK
wordpress.wp_icl_string_batches                    OK
wordpress.wp_icl_string_packages                   OK
wordpress.wp_icl_string_pages                      OK
wordpress.wp_icl_string_positions                  OK
wordpress.wp_icl_string_status                     OK
wordpress.wp_icl_string_translations               OK
wordpress.wp_icl_string_urls                       OK
wordpress.wp_icl_strings                           OK
Success: Database checked.


Posted by Uli Köhler in Wordpress

How to fix WPCLI Error: Role doesn’t exist: admin

Problem:

While trying to create a user using wpcli using a command such as

wp user create uli [email protected] --role=admin --user_pass=abc123abc

you see the following error message:

Error: Role doesn't exist: admin

Solution:

Run

wp role list

to list all roles. By default, these roles are:

+---------------+---------------+
| name          | role          |
+---------------+---------------+
| Administrator | administrator |
| Editor        | editor        |
| Author        | author        |
| Contributor   | contributor   |
| Subscriber    | subscriber    |
| SEO Manager   | wpseo_manager |
| SEO Editor    | wpseo_editor  |
+---------------+---------------+

You have to use the value from the second column in the wp user create command.

For example, in order to create an admin user, use --role=administrator, e.g.:

wp user create uli [email protected] --role=administrator --user_pass=abc123abc


Posted by Uli Köhler in Wordpress

How I fixed WordPress category page title: Category <span>…</span>

One one of my WordPress sites, the title of category pages was literally

Category <span>My category</span>

Searching through the theme source code didn’t yield a solution quickly, so I added this custom JS using a plugin:

jQuery(document).ready(function( $ ){
    if(jQuery("h1.page-title").text().includes("Category: <span>")) {
        var input = jQuery("h1.page-title").text();
        var output = /<span>(.*)<\/span>/g.exec(input)[1];
        jQuery("h1.page-title").text(output);
    }
});

This will just replace the title by the content of the span tag. You might need to adjust the CSS classes for your theme.

Posted by Uli Köhler in Javascript, Wordpress

How to setup & use WordPress REST API authentication using Python

WordPress authentication plugin setup

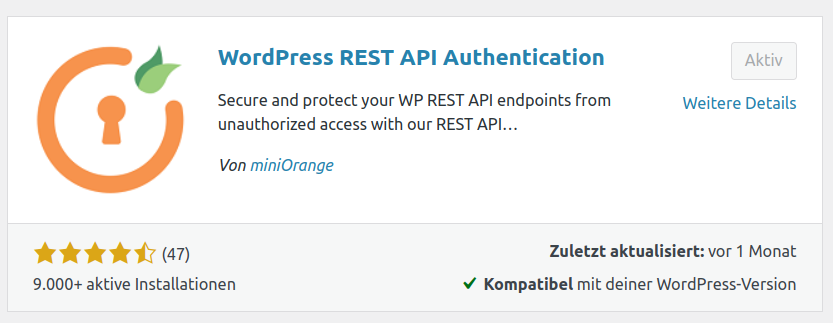
First, install the WordPress REST API Authentication wordpress plugin, which you can find by searching for WordPress REST API Authentication:

Then you need to open the plugin configuration page. Open Plugins in the WordPress admin panel, locate the  WordPress REST API Authentication plugin and click Configure

Select Basic Authentication:

Then click Next on the top right:

and click Finish on the next page:

Setup in Python

Assuming you have a WordPress user admin with password abc123 we can modify our code from How to get WordPress posts as JSON using Python & the WordPress REST API in order to query a non-public endpoint:

import requests
import base64

# Compute basic authentication header
auth_header = b"Basic " + base64.b64encode(b"admin:abc123")

# posts is a list of JSON objects, each representing a post
posts = requests.get("https://mydomain.com/wp-json/wp/v2/posts",
                     params={"context": "edit"},
                     headers={"Authorization": auth_header}).json()


Posted by Uli Köhler in Python, Wordpress

WordPress backup script using bup (bup remote)

This script backups a WordPress installation (including data,base files & directories, excluding cache) to a bup remote server running on 10.1.2.3. You need to ensure passwordless access to that server.

It is based on automated extraction of database host, username & password, see How to grep for WordPress DB_NAME, DB_USER, DB_PASSWORD and DB_HOST in wp-config.php for more details.

#!/bin/bash
export NAME=$(basename $(pwd))
export BUP_DIR=/var/bup/$NAME.bup
export REMOTE_BUP_DIR=/bup-backups/$NAME.bup
export REMOTE_SERVER=10.1.2.3
export BUP_REMOTE=$REMOTE_SERVER:$REMOTE_BUP_DIR

# Init
bup -d $BUP_DIR init -r $BUP_REMOTE
# Save MariaDB dump (extract MariaDB config from wp-config.php)
DB_NAME=$(grep -oP "define\(['\"]DB_NAME['\"],\s*['\"]\K[^'\"]+(?=[\'\"]\s*\)\s*;)" wp-config.php)
DB_USER=$(grep -oP "define\(['\"]DB_USER['\"],\s*['\"]\K[^'\"]+(?=[\'\"]\s*\)\s*;)" wp-config.php)
DB_PASSWORD=$(grep -oP "define\(['\"]DB_PASSWORD['\"],\s*['\"]\K[^'\"]+(?=[\'\"]\s*\)\s*;)" wp-config.php)
DB_HOST=$(grep -oP "define\(['\"]DB_HOST['\"],\s*['\"]\K[^'\"]+(?=[\'\"]\s*\)\s*;)" wp-config.php)
mysqldump -h$DB_HOST -u$DB_USER -p$DB_PASSWORD $DB_NAME | bup -d $BUP_DIR split -n $NAME-$DB_NAME.sql

# Save wordpress directory
bup -d $BUP_DIR index --exclude wp-content/cache --exclude wp-content/uploads/cache . && bup save -r $BUP_REMOTE -9 --strip-path $(pwd) -n $NAME .

# OPTIONAL: Add par2 information
#   This is only recommended for backup on unreliable storage or for extremely critical backups
#   If you already have bitrot protection (like BTRFS with regular scrubbing), this might be overkill.
# Uncomment this line to enable:
# bup on $REMOTE_SERVER -d $REMOTE_BUP_DIR fsck -g

# OPTIONAL: Cleanup old backups
bup on $REMOTE_SERVER -d $REMOTE_BUP_DIR prune-older --keep-all-for 1m --keep-dailies-for 6m --keep-monthlies-for forever -9 --unsafe


Posted by Uli Köhler in bup, Wordpress

How to get all WordPress posts as JSON using Python & the WordPress REST API

In our previous post How to get WordPress posts as JSON using Python & the WordPress REST API we showed how to fetch a single page of 10 posts using the WordPress REST API in Python.

In this post, we’ll use the pagination in order to fetch a list of all the posts.

Firstly, we observe that once we query an invalid page such as ?page=1000000, the returned JSON will be

{'code': 'rest_post_invalid_page_number',
 'message': 'The page number requested is larger than the number of pages available.',
 'data': {'status': 400}}

instead of the JSON array representing the list of posts.

Using this information, we can write a fetcher that fetches pages of 100 posts each until this error message is encountered:

from tqdm import tqdm
import requests

def page_numbers():
    """Infinite generate of page numbers"""
    num = 1
    while True:
        yield num
        num += 1

posts = []
for page in tqdm(page_numbers()):
    # Fetch the next [pagesize=10] posts
    posts_page = requests.get("https://mydomain.com/wp-json/wp/v2/posts", params={"page": page, "per_page": 100}).json()
    # Check for "last page" error code
    if isinstance(posts_page, dict) and posts_page["code"] == "rest_post_invalid_page_number": # Found last page
        break
    # No error code -> add posts
    posts += posts_page


Posted by Uli Köhler in Python, Wordpress

How to get WordPress posts as JSON using Python & the WordPress REST API

You can use the requests library to fetch the posts as JSON from /wp-json/wp/v2/posts

On the wordpress site, you typically don’t need to configure this – the JSON API is enabled by default and accessing publically available info can be done without authentication.

import requests

# posts is a list of JSON objects, each representing a post
posts = requests.get("https://mydomain.com/wp-json/wp/v2/posts").json()

This will, by default, fetch the most recent 10 posts. See TODO for more info on how to fetch all posts using pagination

Posted by Uli Köhler in Python, Wordpress

Free wordpress plugin for searching categories while editing posts & pages

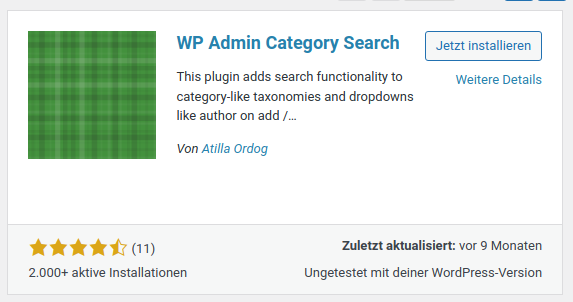
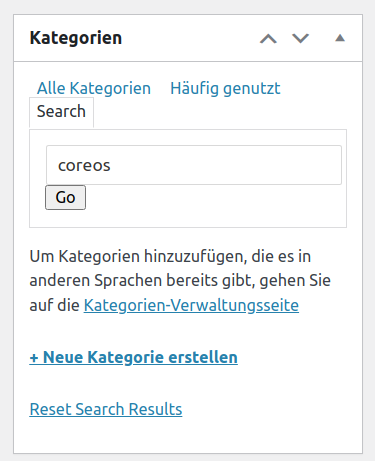
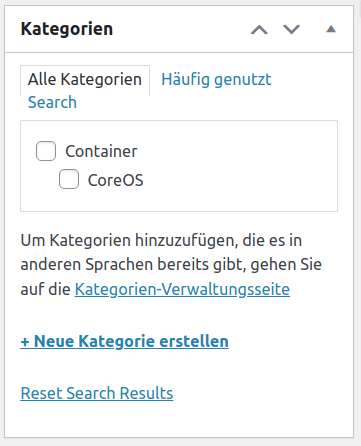
WP Admin Category Search is a free search plugin for searching categories while editing your posts or pages. It allows you to quickly find categories without scrolling through a long list of categories:

Step 1: Install WP Admin Category Search

Go to Plugins -> Install and search for WP Admin Category Search. Install and activate it by clicking the button

Step 2: When editing posts, search for categories…

Step 3: … and find and select them

Posted by Uli Köhler in Wordpress

Recommended local Google Font hosting plugin for WordPress

I tested different local Google Fonts (GPDR) plugins and for some websites especially with Elementor/WPBakery etc, out of all plugins tested, only the OMGF (optimize my google fonts) plugin really worked in removing all fonts for GPDR compliance.

Therefore, I can recommend installing OMGF specifically, even though most other plugins like Self hosted Google Fonts will work for most websites.

You can installing it by opening the WordPress admin panel, clicking Plugins, clicking Install, and then entering OMGF in the search field.

Posted by Uli Köhler in Wordpress

How to fix WordPress docker image upload size 2M limit

Problem:

You are running your WordPress instance using the official WordPress Apache image.

However, the WordPress Media page has a maximum upload size of 2 Megabytes.

Solution:

This setting is configured in the php.ini used by the WordPress docker image internally. While it is possible to use a custom php.ini, it’s much easier to edit .htaccess . Just edit .htaccess in the wordpress directory where wp-config.php is located and append this after # END WordPress to set the upload limit to 256 Megabytes:

php_value upload_max_filesize 256M
php_value post_max_size 256M
php_value max_execution_time 300
php_value max_input_time 300

The change should be effective immediately after reloading the page. Note that you still might need to configure your reverse proxy (if any) to allow larger uploads. My recommendation is to just try it out as is and if large uploads fail, it’s likely that your reverse proxy is at fault.

Full .htaccess example:

# BEGIN WordPress
# Die Anweisungen (Zeilen) zwischen „BEGIN WordPress“ und „END WordPress“ sind
# dynamisch generiert und sollten nur über WordPress-Filter geändert werden.
# Alle Änderungen an den Anweisungen zwischen diesen Markierungen werden überschrieben.
<IfModule mod_rewrite.c>
RewriteEngine On
RewriteRule .* - [E=HTTP_AUTHORIZATION:%{HTTP:Authorization}]
RewriteBase /
RewriteRule ^index\.php$ - [L]
RewriteRule ^en/wp-login.php /wp-login.php [QSA,L]
RewriteRule ^de/wp-login.php /wp-login.php [QSA,L]
RewriteCond %{REQUEST_FILENAME} !-f
RewriteCond %{REQUEST_FILENAME} !-d
RewriteRule . /index.php [L]
</IfModule>

# END WordPress

php_value upload_max_filesize 256M
php_value post_max_size 256M
php_value max_execution_time 300
php_value max_input_time 300


Posted by Uli Köhler in Container, Docker, Wordpress

How to set X-Forwarded-Proto header in nginx

Directly after any proxy_pass line add

proxy_set_header X-Forwarded-Proto $scheme;

Typically X-Forwarded-Proto is used together with X-Forwarded-Host like this:

proxy_set_header X-Forwarded-Host $host;
proxy_set_header X-Forwarded-Proto $scheme;


Posted by Uli Köhler in Networking, nginx, Wordpress

How to allow ALL filetypes for Media upload in WordPress

On your own blog or website, you often don’t care about the WordPress upload restriction and just want to be able to upload all filetypes, to just upload any filetype.

In order to do that, append this line to wp-config.php:

define('ALLOW_UNFILTERED_UPLOADS', true);

and then, log out from WordPress and log back in again.

After that, you should be able to upload any file, no matter its file type.

Posted by Uli Köhler in Wordpress

How to grep for WordPress DB_NAME, DB_USER, DB_PASSWORD and DB_HOST in wp-config.php

This grep statement filters out the DB_NAME, DB_USER, DB_PASSWORD and DB_HOST contents from a wp-config.php:

grep -oP "define\(['\"]DB_NAME['\"],\s*['\"]\K[^'\"]+(?=[\'\"]\s*\)\s*;)" wp-config.php

For example, from the wp-config.php line

define('DB_NAME', 'techoverflow');

it will extract techoverflow.

Here are the statements for DB_NAME, DB_USER, DB_PASSWORD and DB_HOST:

DB_NAME=$(grep -oP "define\(['\"]DB_NAME['\"],\s*['\"]\K[^'\"]+(?=[\'\"]\s*\)\s*;)" wp-config.php)
DB_USER=$(grep -oP "define\(['\"]DB_USER['\"],\s*['\"]\K[^'\"]+(?=[\'\"]\s*\)\s*;)" wp-config.php)
DB_PASSWORD=$(grep -oP "define\(['\"]DB_PASSWORD['\"],\s*['\"]\K[^'\"]+(?=[\'\"]\s*\)\s*;)" wp-config.php)
DB_HOST=$(grep -oP "define\(['\"]DB_HOST['\"],\s*['\"]\K[^'\"]+(?=[\'\"]\s*\)\s*;)" wp-config.php)

You can use this, for example, in automatic backup scripts without manually copying the password to the backup script

Posted by Uli Köhler in PHP, Wordpress

How to fix “OTGS Installer, responsible for receiving automated updates for WPML and Toolset, requires the following PHP component(s) in order to function:cURL” on Ubuntu 20.04

 Problem:

Your WordPress installation running on Ubuntu 20.04 shows you this error message:

OTGS Installer, responsible for receiving automated updates for WPML and Toolset, requires the following PHP component(s) in order to function:cURL

Learn more: Minimum WPML requirements

Solution:

You need to install the curl package for your PHP version.

Typically you can use

sudo apt -y install php7.4-curl

Doing this should immediately fix the issue (just reload your WordPress dashboard). In case you’re using PHP 7.2 you need to sudo apt -y install php7.2-curl instead.

In case the issue is still not fixed after doing this, try restarting your webserver (e.g. sudo service apache restart or sudo service nginx restart), try restarting PHP-FPM by using sudo service php7.4-fpm restart or sudo service php7.2-fpm restart or try rebooting your server. In case that doesn’t help either, you need to manually check which PHP instance the wordpress site is using and install the curl package for that PHP instance.


Posted by Uli Köhler in PHP, Wordpress

How to remove dashicons CSS from WordPress

WordPress uses dashicons as its primary icon font. However, many themes do not require dashicons on the frontend and hence it’s only used in the admin frontend, i.e. when a user is logged in.

I made a simple plugin to make WordPress load the dashicons CSS only if the user is logged in. For non-logged-in users, the dashicons CSS is removed from the frontend (hence improving the loading speed of your website).

<?php 
/*
Plugin Name: TechOverflow remove dashicons
*/

/**
 * Remove dashicons CSS from the page, only load if user is logged in
 */
function dashicons_admin_only() {
    if(!is_user_logged_in()) {
        global $wp_styles;
        wp_dequeue_style('dashicons');
        // wp_deregister_style('dashicons') causes internal PHP errors in WordPress !
        $wp_styles->registered['dashicons']->src = '';
    }
}
    
add_action( 'wp_print_styles', 'dashicons_admin_only' );

Just create an new folder called techoverflow-no-dashicons inside your wp-content/plugins directory, and save the source code listed above as wp-content/plugins/techoverflow-no-dashicons/functions.php inside. After that, you can modify the code to fit your specific needs.

Note that using this plugin might make your site appear differently if you are logged in. Hence it’s important to check your site when not logged in, e.g. using incognito mode.

Posted by Uli Köhler in PHP, Wordpress

WordPress: How to move script to footer if plugin doesn’t support it

Many WordPress plugins provide you with an option to configure whether scripts are loaded in the header or the footer of the page.

If you want to move a script to the footer for performance reasons, and the plugin doesn’t support it, one option is to just edit the wp_enqueue_script() call in the plugin’s source code and set $in_footer = true.

However, these change won’t survive plugin updates and hence are not recommended for security reasons.

A better option is to write a custom plugin that removes the <script> tag from the head and moves it to the footer. The following file is the functions.php of my custom plugin that moves the <script> tag from the cookie-law-info plugin to the bottom of the page.

<?php 
/*
Plugin Name: TechOverflow Cookie Law to footer
*/

function postpone_script($name) {
    global $wp_scripts;
    // Get attributes from original script
    $thesrc = $wp_scripts->registered[$name]->src;
    $theversion = $wp_scripts->registered[$name]->ver;
    // Remove script from the header
    wp_dequeue_script($name);
    wp_deregister_script($name);
    // Add script to the bottom
    wp_enqueue_script($name, $thesrc, false /* no deps */, $theversion, true /* bottom */);
}

/**
 * Move cookie law javascript to the bottom
 */
function postpone_cookie_law() {
    postpone_script('cookie-law-info');
}
    
add_action( 'wp_print_scripts', 'postpone_cookie_law' );

Just create an new folder called techoverflow-cookie-law-footer inside your wp-content/plugins directory, and save the source code listed above as wp-content/plugins/techoverflow-cookie-law-footer/functions.php inside. After that, you can modify the code to fit your specific needs.

Remember to check your page for issues (javascript errors, delayed rendering of some elements) that appear when you move the javascript to the footer, since some plugins may not be compatible with the script being placed in the footer. Also, you might need to call postpone_script() multiple scripts with different $name argument. Check the original plugin’s wp_enqueue_script() calls for the correct $name (first argument). In case it’s not obvious which wp_enqueue_script() call relates to a specific script, you can also check the version in the src of the original <script> tag (e.g. 1.8.2 in ...?ver=1.8.2 ) and search for that version in the plugin’s folder to find the matching wp_enqueue_script() call.

Posted by Uli Köhler in PHP, Wordpress

WordPress: Enqueue script only if user is logged in

Use this snippet in your wordpress plugin to load a script only if a user is logged in:

function enqueue_my_script() {
    if(is_user_logged_in()) {
        wp_enqueue_script( 'my-script', plugins_url('/my-script.js', __FILE__), false, '1.0', 'all');
    }
}

add_action( 'wp_enqueue_scripts', 'enqueue_my_script');

It does not matter how exactly you use wp_enqueue_script(), just wrap it in a

if(is_user_logged_in()) {
    // Call wp_enqueue_script() here !
}


Posted by Uli Köhler in PHP, Wordpress

Minimal WordPress JS plugin example

Also see:
Minimal WordPress CSS plugin example
Minimal WordPress Shortcode plugin example

This plugin adds a static Javascript .js file to WordPress which is loaded in the client.

First, create a directory for your plugin in wp-content/plugins/, e.g. wp-content/plugins/my-js-plugin

Save the following code as functions.php in the plugin folder, e.g. wp-content/plugins/my-js-plugin/functions.php

<?php
/*
Plugin Name: My JS plugin
*/

function my_plugin_enqueue_js(){
    wp_enqueue_script('my-plugin-js', plugins_url('/script.js', __FILE__), false, '1.0.0', true /* in footer */);
}
add_action('wp_enqueue_scripts', "my_plugin_enqueue_js");

Next, save your desired JS file in script.js in the plugin folder, e.g. wp-content/plugins/my-js-plugin/script.js. Example script:

jQuery(document).ready(function() {
    console.info("Your JS plugin works!");
});

Now activate your plugin your WordPress admin area.

Your Javascript will be loaded on each WordPress page until you deactivate the plugin.

Note that if you are using a JS-optimizing plugin like Autoptimize, you might not actually see your JS file as separately loaded script file as it is compiled into the single Autoptimize JS. You javascript will still be loaded on the client!

Posted by Uli Köhler in PHP, Wordpress