NodeJS

EMQX 5.x HTTP password authentication server using NodeJS

Note: If you also want to implement ACL authorization via HTTP, see our extension to this example: EMQX 5.x HTTP ACL server using NodeJS

This server implements a minimal HTTP authentication server. In this minimal example, it will always allow authentication – you need to implement your own logic to verify passwords. Note: This server is written for EMQX versionx5.0 and will not work for EMQX 4.x without modification. See the official documentation on EMQX 5.x HTTP auth for more information.

#!/usr/bin/env node
const router = require('koa-router')();
const koaBody = require('koa-body');
const Koa = require('koa');
const app = new Koa();

app.use(koaBody());

router.post('/emqx/auth', async ctx => {
    const body = ctx.request.body;
    const username = body.username;
    const password = body.password;
    // TODO: This example always returns "allow"
    // You need to implement your authentication logic
    ctx.body = {
        result: "allow",
        is_superuser: false
    };
});

app.use(router.routes());

if (!module.parent) app.listen(19261);

This script is based on our previous post Minimal Koa.JS example with Router & Body parser, hence you can install the dependencies using

npm i --save koa koa-router koa-body

The request body config which you can set in the EMQX dashboard is

{
  "client_id": "${clientid}",
  "password": "${password}",
  "username": "${username}"
}
 

Posted by Uli Köhler in EMQX, MQTT, NodeJS

NodeJS typescript simple auto-reload on file change

First install ts-node-dev:

npm i --save-dev ts-node-dev

Then add

"start": "./node_modules/.bin/tsnd --respawn app.ts"

to package.json in the scripts section, example:

{
  "name": "myapp-backend",
  "version": "1.0.0",
  "description": "To make it easy for you to get started with GitLab, here's a list of recommended next steps.",
  "main": "index.js",
  "scripts": {
    "build": "./node_modules/.bin/tsc -b tsconfig.json",
    "start": "./node_modules/.bin/tsnd --respawn app.ts"
  }
  /* ... */
}


Posted by Uli Köhler in Javascript, NodeJS

NodeJS MQTT minimal subscribe example with JSON messages

const mqtt = require('mqtt')
const client = mqtt.connect('mqtt://user:[email protected]')

client.on('connect', () => {
  client.subscribe('mytopic');
})

client.on('message', (topic, message) => {
  console.log(topic, JSON.parse(message))
})

If required, you can install the mqtt library using

npm i --save mqtt


Posted by Uli Köhler in Javascript, MQTT, NodeJS

NodeJS MQTT minimal subscribe example

Also see: NodeJS MQTT minimal subscribe example with JSON messages

const mqtt = require('mqtt')
const client = mqtt.connect('mqtt://user:[email protected]')

client.on('connect', () => {
  client.subscribe('mytopic');
})

client.on('message', (topic, message) => {
  console.log(topic, message)
})

If required, you can install the mqtt library using

npm i --save mqtt


Posted by Uli Köhler in Javascript, MQTT, NodeJS

How to get page HTML source code in Puppeteer

In order to get the current page HTML source code (i.e. not the source code received from the server, but the currently loaded source code including Javascript modifications), use

await page.content()

Full example based on Puppeteer minimal example:

// Minimal puppeteer get page HTML source code example
const puppeteer = require('puppeteer');
(async () => {
  const browser = await puppeteer.launch();
  const page = await browser.newPage();
  await page.goto('https://techoverflow.net', {waitUntil: 'domcontentloaded'});
  // Wait for 5 seconds
  console.log(await page.content());
  // Take screenshot
  await browser.close();
})();


Posted by Uli Köhler in Javascript, NodeJS, Puppeteer

How to sleep for X seconds in Puppeteer

In order to sleep for 5 seconds, use

await page.waitForTimeout(5000);

Full example based on Puppeteer minimal example:

// Minimal puppeteer example
const puppeteer = require('puppeteer');
(async () => {
  const browser = await puppeteer.launch();
  const page = await browser.newPage();
  await page.goto('https://techoverflow.net', {waitUntil: 'domcontentloaded'});
  // Wait for 5 seconds
  await page.waitForTimeout(5000);
  // Take screenshot
  await page.screenshot({path: 'screenshot.png'});
  await browser.close();
})();


Posted by Uli Köhler in Javascript, NodeJS, Puppeteer

How to install NodeJS 18.x LTS on Ubuntu in 1 minute

Run these shell commands on your Ubuntu computer to install NodeJS 18.x:

sudo apt -y install curl
curl -sL https://deb.nodesource.com/setup_18.x | sudo -E bash -
sudo apt-get install -y nodejs

Instead of setup_18.x you can also choose other versions like setup_16.x. However, using this method, you can’t install multiple versions of NodeJS in parallel.

Source: Official nodesource documentation

Posted by Uli Köhler in Linux, NodeJS

How to identify the latest npm package version

You can use

npm info [package name] version | head -n1

to print just the latest package version, for example:

npm info @angular/cli version | head -n1

The head -n1 part is neccessary to suppress unwanted npm info messages. Just running the command without head -n1 :

npm info @angular/cli version

prints the following output:

12.2.6
npm notice 
npm notice New minor version of npm available! 7.21.1 -> 7.24.0
npm notice Changelog: https://github.com/npm/cli/releases/tag/v7.24.0
npm notice Run npm install -g [email protected] to update!
npm notice

I typically use the node:latest docker container instead of a local npm to find the latest version of an npm package:

docker run -it --rm node:latest npm info meshcommander version | head -n1

At the time of writing this article, the command prints

0.9.0-d


Posted by Uli Köhler in NodeJS

How to emulate Page up / Page down key in Puppeteer

To emulate a keypress to the Page up key in Puppeteer, use

await page.keyboard.press("PageUp");

To emulate a keypress to the Page down key in Puppeteer, use

await page.keyboard.press("PageDown");


Posted by Uli Köhler in Javascript, NodeJS, Puppeteer

NodeJS argparse minimal example

Install argparse using

npm i --save argparse

Optional argument:

const ArgumentParser = require('argparse').ArgumentParser;
const parser = new ArgumentParser({});
parser.addArgument(['-u', '--url'], {help: "The URL to use"});
const args = parser.parseArgs();

// Example usage
console.log(args.url) // null if no such argument

If you want to make an argument mandatory, use required: true:

const ArgumentParser = require('argparse').ArgumentParser;
const parser = new ArgumentParser({});
parser.addArgument(['-u', '--url'], {help: "The URL to use", required: true});
const args = parser.parseArgs();

// Example usage
console.log(args.url)

In case the user does not provide the argument, it will print

usage: CLI.js [-h] -u URL
CLI.js: error: Argument "-u/--url" is required

Positional arguments

This positional argument will always be required:

const ArgumentParser = require('argparse').ArgumentParser;
const parser = new ArgumentParser({});
parser.addArgument(['url'], {help: "The URL to use"});
const args = parser.parseArgs();

// Example usage
console.log(args.url)


Posted by Uli Köhler in Javascript, NodeJS

How to fix Puppetteer ‘Running as root without –no-sandbox is not supported’

Problem:

When you try to run your puppetteer application, e.g. under docker, you see this error message:

Solution:

Note: Unless you are running in a Docker or similar container, first consider running the application as non-root-user!

You have to pass the --no-sandbox option to puppeteer.launch():

const browser = await puppeteer.launch({
    headless: true,
    args: ['--no-sandbox']
});

We recommend to use this slightly more complex solution to pass it only if the process is being run as root:

/**
 * Return true if the current process is run by the root user
 * https://techoverflow.net/2019/11/07/how-to-check-if-nodejs-is-run-by-root/
 */
function isCurrentUserRoot() {
   return process.getuid() == 0; // UID 0 is always root
}

const browser = await puppeteer.launch({
    headless: true,
    args: isCurrentUserRoot() ? ['--no-sandbox'] : undefined
});

This ensures Chromium is run in the most secure mode possible with the current user.

Posted by Uli Köhler in Javascript, NodeJS, Puppeteer

How to check if NodeJS is run by root

Use this function to determine if the current NodeJS process is being run by the root user:

function isCurrentUserRoot() {
    return process.getuid() == 0; // UID 0 is always root
}

Usage example:

if(isCurrentUserRoot()) {
    // TODO Your code for root user goes here
} else {
    // TODO Your code for NON-root user goes here!
}

This works since the UID of the root user is always 0 on Linux/Unix systems.

Note: You don’t need to

const process = require("process");

since the process object is automatically imported in any NodeJS environment

Posted by Uli Köhler in Javascript, NodeJS

How to check NODE_ENV environment variable in Node.JS

You can use process.env.NODE_ENV to check the value of the NODE_ENV environment variable in Node.JS:

if(process.env.NODE_ENV == "development") {
    // TODO your code goes here
}

or

if(process.env.NODE_ENV == "production") {
    // TODO your code goes here
}

Note that by default NODE_ENV is undefined so remember to handle that case appropriately.

Posted by Uli Köhler in Javascript, NodeJS

Minimal Koa.JS example with Router & Body parser

This is the minimal Koa.JS application which I use as a template for new NodeJS webserver applications.

#!/usr/bin/env node
const router = require('koa-router')();
const koaBody = require('koa-body');
const Koa = require('koa');
const app = new Koa();

app.use(koaBody());

router.get('/', async ctx => {
    ctx.body = "Hello world";
});

app.use(router.routes());

if (!module.parent) app.listen(3000);

Install the requirements using

npm i --save koa koa-router koa-body

and run using

node index.js

assuming you have saved our code from above in index.js.

Now (with the node index.js command still running) go to http://localhost:3000 . You should see Hello world there. Now it’s your turn to continue on your endeavour to develop the world’s greatest webservers 🙂

Posted by Uli Köhler in Javascript, NodeJS

What does ‘if (!module.parent)’ mean in NodeJS?

In NodeJS applications you often see code like

if (!module.parent) {
    app.listen(3000);
}

This means: Run app.listen(3000) only if you are running the file

Suppose this code is in index.js. In this case, the code will only be executed if you run index.js directly (i.e. using node index.js) and not if index.js is required from another file (by require('./index.js');).

If index.js is required from another Javascript module (i.e. file), module.parent will be set to that module.

Posted by Uli Köhler in Javascript, NodeJS

How to emulate keyboard input in Puppeteer

To emulate the user typing something on the keyboard, use

await page.keyboard.type("the text");

This will type the text extremely fast with virtually no delay between the characters.

In order to simulate the finite typing speed of real users, use

await page.keyboard.type("the text", {delay: 100});

instead. The delay betwen characters in this example is 100 Milliseconds, i.e. the emulated user types 10 characters per second.

Posted by Uli Köhler in Javascript, NodeJS, Puppeteer

How to save screenshot in Puppeteer as PNG?

You can take a screenshot in Puppeteer using

await page.screenshot({path: 'screenshot.png'});

The path is relative to the current working directory.

Want to have a screenshot in a size different to 800×600? See How to set screenshot size in Puppeteer?

Full example:

// Minimal puppeteer example
const puppeteer = require('puppeteer');
(async () => {
  const browser = await puppeteer.launch();
  const page = await browser.newPage();
  await page.goto('https://techoverflow.net', {waitUntil: 'domcontentloaded'});
  // Screenshot to verify result
  await page.screenshot({path: 'screenshot.png'});
  // Cleanup
  await browser.close();
})();


Posted by Uli Köhler in Javascript, NodeJS, Puppeteer

How to sleep in NodeJS using async/await

The easiest way to sleep using async/await in NodeJS is the sleep-promise package:

npm install --save sleep-promise

Using that package you can simply use await sleep(milliseconds) syntax like this:

const sleep = require('sleep-promise');

// In any async function:
await sleep(2000); // Wait 2000 ms

Note that this sleep() variant is fully asynchronous, IO and other asynchronous operations will still be able to continue in the background – sleep() will not block the NodeJS process.

Full example:

const sleep = require('sleep-promise');

(async () => {
    console.log("This prints immediately");
    await sleep(2000);
    console.log("This prints 2 seconds later");
})();


Posted by Uli Köhler in Javascript, NodeJS

NodeJS equivalent to Python’s time.sleep() using async/await

Install the sleep-promise package:

npm install --save sleep-promise

then you can use

const sleep = require('sleep-promise');

// In any async function:
await sleep(2000); // Wait 2000 ms

Full example:

const sleep = require('sleep-promise');

(async () => {
    console.log("This prints immediately");
    await sleep(2000);
    console.log("This prints 2 seconds later");
})();


Posted by Uli Köhler in Javascript, NodeJS

Puppeteer minimal example

You can use this example as a starting point for your puppeteer application.

// Minimal puppeteer example
const puppeteer = require('puppeteer');

(async () => {
  const browser = await puppeteer.launch();
  const page = await browser.newPage();
  await page.goto('https://techoverflow.net', {waitUntil: 'domcontentloaded'});
  //
  // YOUR CODE GOES HERE!
  //
  await browser.close();
})();

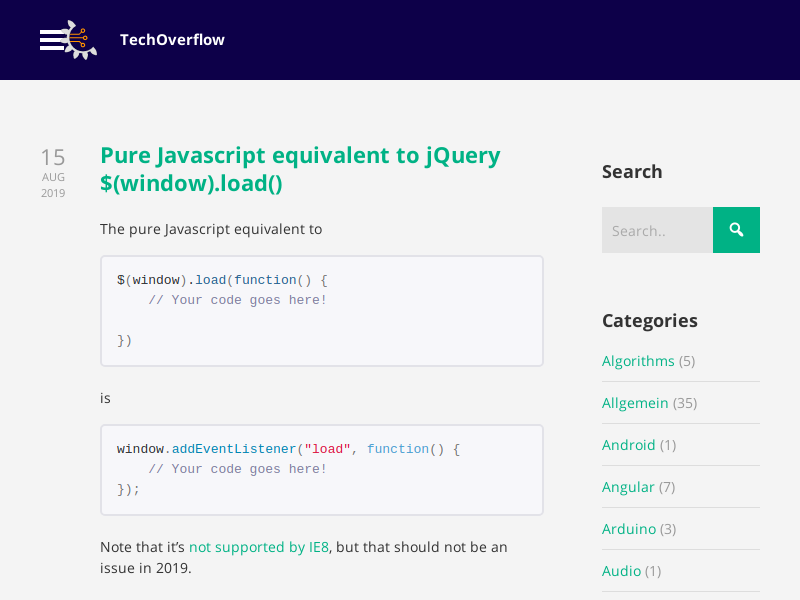
The screenshot is 800x600px by default and could look like this:

Posted by Uli Köhler in Javascript, NodeJS, Puppeteer