Networking

How to enable SSH public key authentication on Teltonika RUTX/TRB series

First, generate a SSH key:

ssh-keygen -t ed25519 -f id_teltonika.pub

Now copy the content of id_teltonika.pub which should look like this:

ssh-ed25519 AAAAC3NzaC1lZDI1NTE5AAAAICfPyvgFaANpm+vjEcbQSHkmXe27DqLanlB++5+muI7H uli@uli-desktop

and open the Teltonika web interface and open System -> Administration -> Access Control

On that page, set Enable key-based authentication  to On. Furthermore, paste the content of id_teltonika.pub into the Public Keys field.

After that remember to click Save & Apply at the bottom of the page!

Now you can login using the public key, e.g.:

ssh -i id_teltonika [email protected]


Posted by Uli Köhler in Networking, OpenWRT

How to install pip (Python) on Teltonika RUTX/TRB (OpenWRT)

You can just install pipon OpenWRT such as on the Teltonika RUTX10/RUTX11 or TRB series using opkg:

opkg update
opkg install python3-pip

Tested on firmware TRB1_R_00.07.02.6.

Posted by Uli Köhler in OpenWRT

How to add route to local network in Linux even if VPN is active

If you route all your traffic via a VPN on Linux, you will typically not be able to access local networks except for the network which you are directly connected to via L2.

In order to fix this, you can simply add a route, which typically takes precedence over the VPN route even with additional options.

The following example will add a route to 10.1.2.0/24 (local network) via the gateway=local router we’re connected via L2 to (192.168.1.1)

sudo ip route add 10.1.2.0/24 via 192.168.1.1


Posted by Uli Köhler in Linux, Networking

Headscale docker-compose config for Traefik HTTPS reverse proxy

This config is based on our previous post How to setup headscale server in 5 minutes using docker-compose and our Traefik configuration with Cloudflare wildcard certs (see Simple Traefik docker-compose setup with Lets Encrypt Cloudflare DNS-01 & TLS-ALPN-01 & HTTP-01 challenges)

version: '3.5'
services:
  headscale:
    image: headscale/headscale:latest
    volumes:
      - ./config:/etc/headscale/
      - ./data:/var/lib/headscale
    ports:
      # - 27896:8080
      - 9090:9090
      - 3478:3478/udp
    command: headscale serve
    restart: unless-stopped
    depends_on:
      - postgres
    labels:
      - "traefik.enable=true"
      - "traefik.http.routers.headscale.rule=Host(`headscale.mydomain.com`)"
      - "traefik.http.routers.headscale.entrypoints=websecure"
      - "traefik.http.routers.headscale.tls.certresolver=cloudflare"
      - "traefik.http.routers.headscale.tls.domains[0].main=mydomain.com"
      - "traefik.http.routers.headscale.tls.domains[0].sans=*.mydomain.com"
      - "traefik.http.services.headscale.loadbalancer.server.port=8080"

  postgres:
    image: postgres:14
    restart: unless-stopped
    volumes:
      - ./pg_data:/var/lib/postgresql/data
    environment:
      - POSTGRES_PASSWORD=${POSTGRES_PASSWORD}
      - POSTGRES_DB=${POSTGRES_DB}
      - POSTGRES_USER=${POSTGRES_USER}


Posted by Uli Köhler in Headscale, Networking, VPN

How to setup bup-server on Synology NAS using docker

This guide shows you how to create a bup server. This is based on our previous post How to setup a “bup remote” server in 5 minutes using docker-compose but uses Synology’s built-in Docker GUI instead of docker-compose.

First, create two shared directories bup-backups (which will store the backups itself) and bup-config )which will store the dropbear SSH server configuration, that is SSH host keys and authorized client keys).

Alternatively, you can also use sub-directories of existing shared directories, but I’d like to keep them separate.

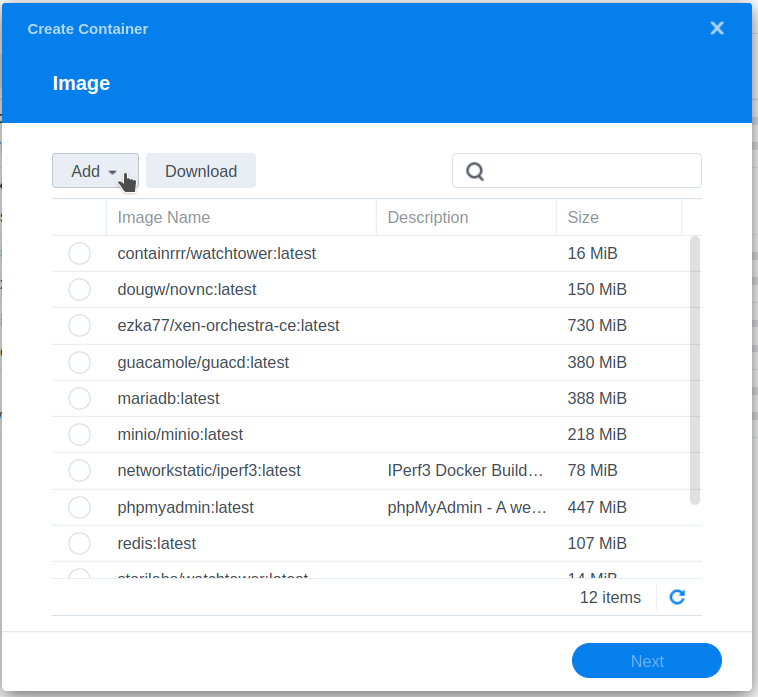
Then create a new Docker container by opening Docker -> Container, clicking Create and follow these steps:

Download ulikoehler/bup-server:lastest

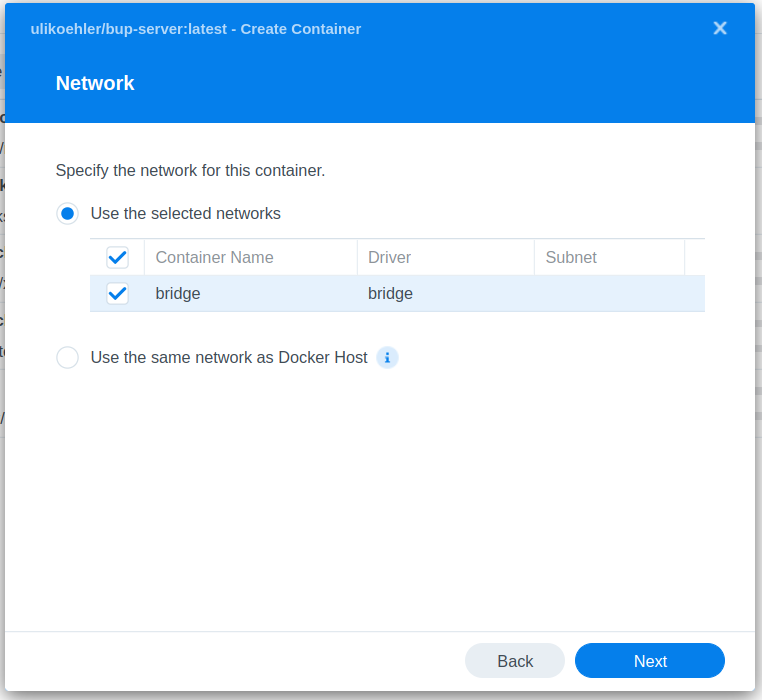
Create a new container from the image

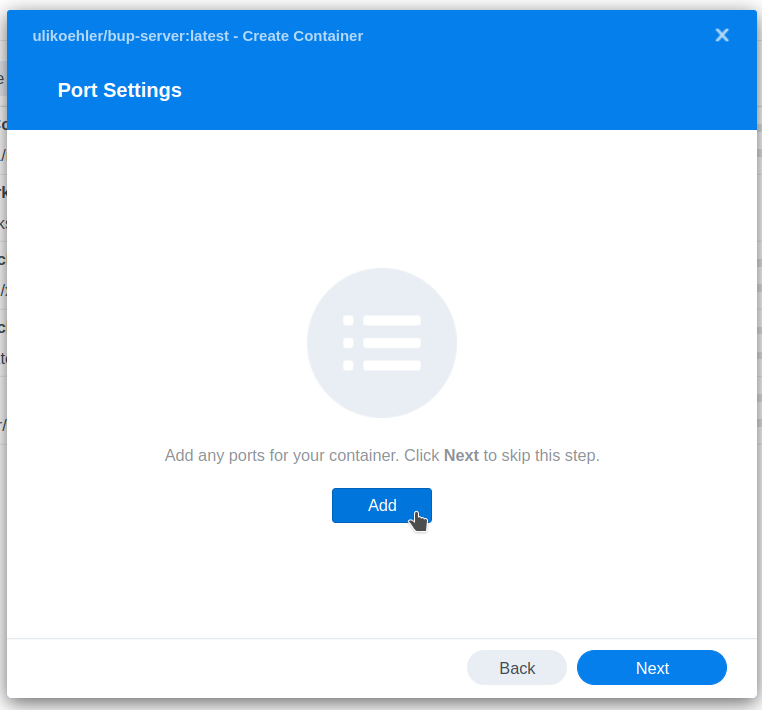
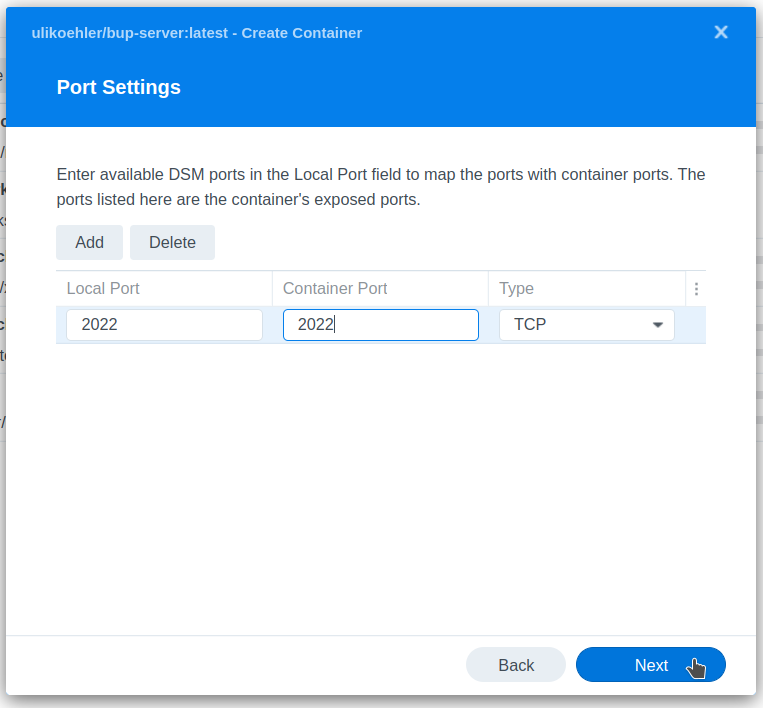
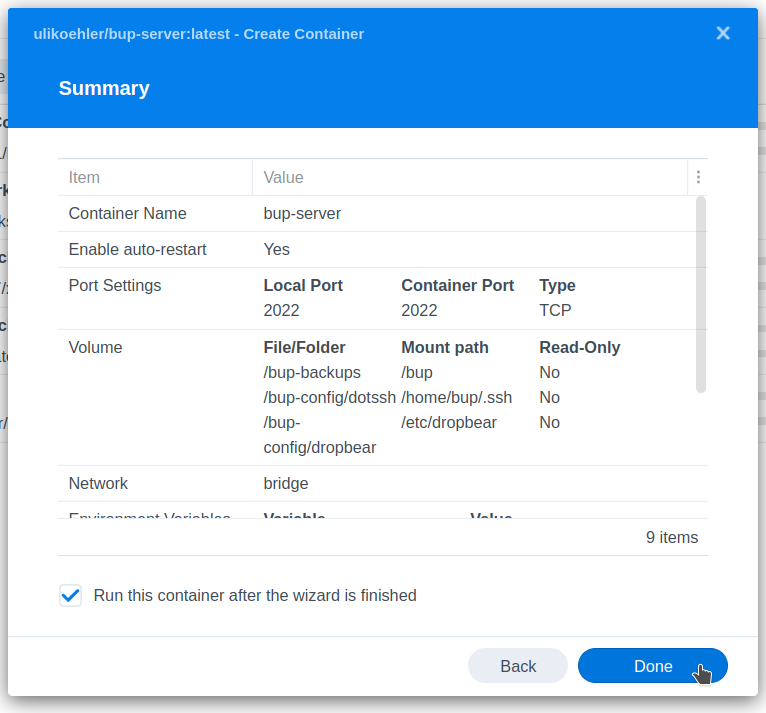
Map out port 2022 (bup server SSH port)

You can choose any other port in Local Port but keep the Container Port the same.
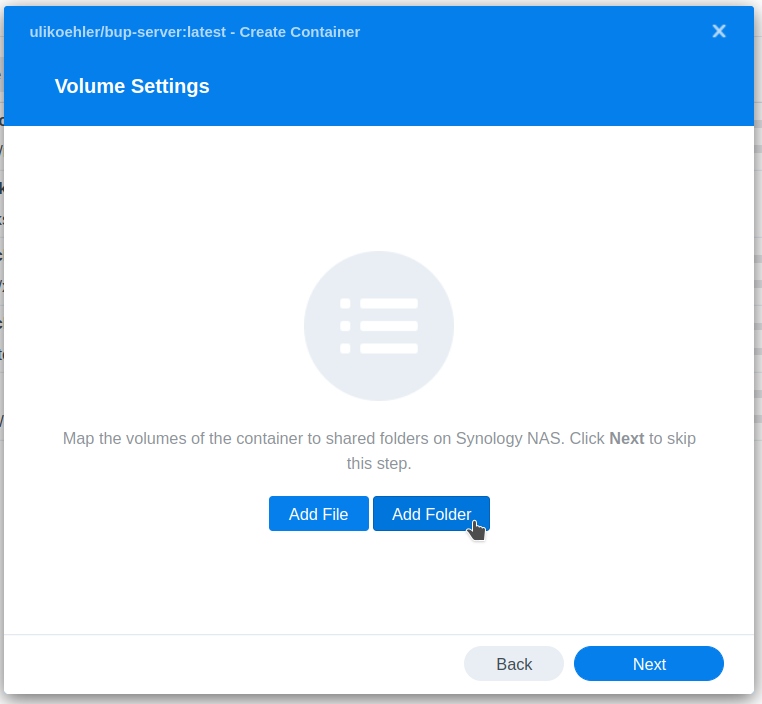
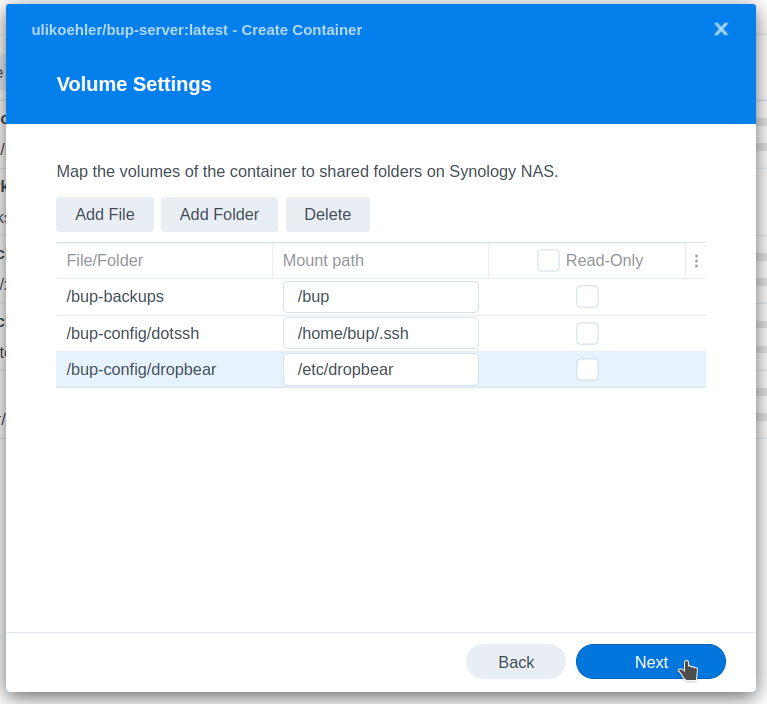
Map the volumes

As we said before, any directory will do. Create the sub-directories as needed.

Creating the SSH keys

On your local linux computer, create a SSH key using

ssh-keygen -t ed25519 -f id_bup -N ""

Upload id_bup and id_bup.pub to the bup-config shared folder.

Furthermore, copy id_pub.pub to bup-config/dotssh/authorized_keys.

After that you can startup the container.

Test the login

Use

ssh -i id_bup -p 2022 bup@[AS IP address]

to try to connect to your NAS.

Troubleshooting

In case connecting via SSH does not work, most likely the issue is with your public/private key and/or your authorized_keys file. Check if it is in the right directory (/home/bup/.ssh/authorized_keys on the container). Also check the logs of the Docker container.

Posted by Uli Köhler in bup, Synology

bup remote server docker-compose config with CIFS-mounted backup store

In our previous post How to setup a “bup remote” server in 5 minutes using docker-compose we outlined how to setup your own bup remote server using docker-composeRead that post before this one!

This post provides an alternate docker-compose.yml config file that mounts a remote CIFS directory as /bup backup directory instead of using a local directory. This is most useful when using a NAS and a separate bup server.

For this example, we’ll mount the CIFS share //10.1.2.3/bup-backups with user cifsuser and password pheT8Eigho.

Note: For performance reasons, the CIFS server (NAS) and the bup server should be locally connected, not via the internet.

# Mount the backup volume using CIFS
# NOTE: We recommend to not use a storage mounted over the internet
# for performance reasons. Instead, deploy a bup remote server locally.
volumes:
  bup-backups:
    driver_opts:
      type: cifs
      o: "username=cifsuser,password=pheT8Eigho,uid=1111,gid=1111"
      device: "//10.1.2.3/bup-backups"

version: "3.8"
services:
  bup-server:
    image: ulikoehler/bup-server:latest
    environment:
      - SSH_PORT=2022
    volumes:
      - ./dotssh:/home/bup/.ssh
      - ./dropbear:/etc/dropbear
      # BUP backup storage: CIFS mounted
      - bup-backups:/bup
    ports:
      - 2022:2022
    restart: unless-stopped


Posted by Uli Köhler in bup, Docker, Networking

How to create directory on RouterOS using the terminal

As of RouterOS 7.6 there is no official command to create a directory on a RouterOS filesystem. However, there’s a trick involving a SMB share. By creating the SMB share, RouterOS will create the directory. After that, you can delete the SMB share.

The following script will create the backups directory:

/ip smb shares add name=deleteme directory=backups ; /ip smb shares remove [find name=deleteme]')
Posted by Uli Köhler in MikroTik, Networking

How to delete file(s) by regex filename on RouterOS

The following RouterOS command will delete all files starting with backup-:

/file/remove [/file find where name~"^backup-.*\$"]


Posted by Uli Köhler in MikroTik, Networking

How to delete file on RouterOS by filename using terminal or SSH (minimal example)

In order to delete a file named mybackup.backup on a RouterOS device using the terminal, use the following command:

/file/remove [find name="mybackup.backup"]


Posted by Uli Köhler in MikroTik, Networking

Netmiko MikroTik RouterOS minimal example

This example prints the identity (i.e. user-defined name) of the switch/router at IP address 10.0.0.1 with password abc123abc.

from netmiko import ConnectHandler
mikrotik = {
    'device_type': 'mikrotik_routeros',
    'host':   '10.0.0.1',
    'username': 'admin',
    'password': 'abc123abc'
}

mikrotik_connection = ConnectHandler(**mikrotik)
print(mikrotik_connection.send_command(f'/system/identity/print', cmd_verify=False))

Example output:

name: MySwitch01


Posted by Uli Köhler in MikroTik, Networking, Python

MikroTik User Manager (RADIUS): Add user with VLAN

The following RouterOS terminal command adds a User Manager user assigned to a VLAN with ID 998. This setup is compatible with Unifi access points.

/user-manager user add attributes=Tunnel-Type:13,Tunnel-Medium-Type:6,Tunnel-Private-Group-ID:998 name=myuser password=uNah2ieghi

Note that Tunnel-Type:13,Tunnel-Medium-Type:6 will always stay the same, they will tell RADIUS to assign a VLAN.

In WebFig, the same config looks like this:

In WinBox, these settings look like this:

Posted by Uli Köhler in MikroTik, Networking

MikroTik RouterOS Wake-on-LAN (magic packet) script example

On RouterOS, we can create a simple Wake-on-LAN script using a MAC address using

/tool/wol mac=DC:4A:3E:7A:87:12 interface=bridge


Posted by Uli Köhler in MikroTik, Networking

MikroTik scripting: simple foreach example

The following example uses MikroTik scripting to iterate over all ethernet interfaces and print the name of the interface:

foreach v in=[/interface/ethernet find] do={
    :put [/interface/ethernet get $v value-name=name]
}

Example output:

[admin@MySwitch] > foreach v in=[/interface/ethernet find] do={:put [/interface/ethernet get $v value-name=name]}
ether1
sfp-CoreSwitch-Uplink
sfp-sfpplus3
sfp-NAS
sfp-Virtualization
sfp-WAN
sfp-sfpplus4
sfp-sfpplus7
sfp-sfpplus8


Posted by Uli Köhler in MikroTik

Setup Netbox in 5 minutes using docker-compose & nginx

First, create a directory for netbox and all its data to reside in. In this example, we’ll use /opt/services/netbox.mydomain.com. Place all files (unless mentioned otherwise) in said directory.

.env

Obviously, generate new passwords and enter the correct domain name.

[email protected]
SUPERUSER_PASSWORD=Soogohki0eidaQu4zaW9EjaBiuseeW

POSTGRES_PASSWORD=chied2EatoZ1EFeish1OixaiVee7ae

DOMAIN=netbox.mydomain.com

docker-compose.yml

You shouldn’t need to modify anything here (except for the port)

version: "3.7"
services:
  netbox-db:
    image: postgres:15-alpine
    restart: unless-stopped
    volumes:
      - ./pg_data:/var/lib/postgresql/data
    environment:
      - POSTGRES_PASSWORD=${POSTGRES_PASSWORD}
      - POSTGRES_DB=netbox
      - POSTGRES_USER=netbox

  netbox-redis:
    image: redis:7-alpine
    user: 1000:1000
    command: redis-server
    restart: always
    volumes:
      - ./redis_data:/data

  netbox:
    image: lscr.io/linuxserver/netbox:latest
    container_name: netbox
    environment:
      - PUID=1000
      - PGID=1000
      - TZ=Europe/Berlin
      - SUPERUSER_EMAIL=${SUPERUSER_EMAIL}
      - SUPERUSER_PASSWORD=${SUPERUSER_PASSWORD}
      - ALLOWED_HOST=${DOMAIN}
      - DB_NAME=netbox
      - DB_USER=netbox
      - DB_PASSWORD=${POSTGRES_PASSWORD}
      - DB_HOST=netbox-db
      - DB_PORT=5432
      - REDIS_HOST=netbox-redis
      - REDIS_PORT=6379
      #- REDIS_PASSWORD=<REDIS_PASSWORD>
      - REDIS_DB_TASK=0 # Database ID for tasks
      - REDIS_DB_CACHE=1 # Database ID for cache
      #- BASE_PATH=<BASE_PATH> #optional
      #- REMOTE_AUTH_ENABLED=<REMOTE_AUTH_ENABLED> #optional
      #- REMOTE_AUTH_BACKEND=<REMOTE_AUTH_BACKEND> #optional
      #- REMOTE_AUTH_HEADER=<REMOTE_AUTH_HEADER> #optional
      #- REMOTE_AUTH_AUTO_CREATE_USER=<REMOTE_AUTH_AUTO_CREATE_USER> #optional
      #- REMOTE_AUTH_DEFAULT_GROUPS=<REMOTE_AUTH_DEFAULT_GROUPS> #optional
      #- REMOTE_AUTH_DEFAULT_PERMISSIONS=<REMOTE_AUTH_DEFAULT_PERMISSIONS> #optional
    volumes:
      - ./netbox_config:/config
    ports:
      - 13031:8000
    depends_on:
      - netbox-db
      - netbox-redis
    restart: unless-stopped

nginx config

Place this e.g. in /etc/nginx/sites-enabled/netbox-mydomain.conf.

server {
    server_name  netbox.mydomain.com;

    location / {
        proxy_pass http://localhost:13031/;
        proxy_http_version 1.1;
        proxy_set_header Upgrade $http_upgrade;
        proxy_set_header Connection "Upgrade";
        proxy_set_header Host $host;
        proxy_redirect default;
    }

    listen [::]:443 ssl; # managed by Certbot
    ssl_certificate /etc/letsencrypt/live/mydomain.com/fullchain.pem; # managed by Certbot
    ssl_certificate_key /etc/letsencrypt/live/mydomain.com/privkey.pem; # managed by Certbot
    include /etc/letsencrypt/options-ssl-nginx.conf; # managed by Certbot


}
server {
    if ($host = netbox.mydomain.com) {
        return 301 https://$host$request_uri;
    } # managed by Certbot

    server_name  netbox.mydomain.com;

    listen [::]:80; # managed by Certbot
    return 404; # managed by Certbot
}

After that, use our script to automatically create a systemd service & autostart Netbox on boot:

curl -fsSL https://techoverflow.net/scripts/create-docker-compose-service.sh | sudo bash /dev/stdin

Also, reload the nginx config:

sudo service nginx reload
Posted by Uli Köhler in Networking

How to fix Netbox nginx Invalid HTTP_HOST header: ‘localhost:13031’. You may need to add ‘localhost’ to ALLOWED_HOSTS.

Problem:

When trying to operate netbox behind an nginx reverse proxy, you see the following log messages:

netbox          | Invalid HTTP_HOST header: 'localhost:13031'. You may need to add 'localhost' to ALLOWED_HOSTS.
netbox          | Bad Request: /

Solution:

Set the Host header in the proxied requests using

proxy_set_header X-Real-IP $remote_addr;
proxy_set_header X-Forwarded-Proto $scheme;      
proxy_set_header X-Forwarded-Host $server_name;

in order to tell Netbox which host was originally requested (else, it will assume localhost).

The following location config works fine with Netbox:

location / {
    proxy_pass http://localhost:13031/;
    proxy_http_version 1.1;
    proxy_set_header Upgrade $http_upgrade;
    proxy_set_header Connection "Upgrade";
    proxy_set_header X-Real-IP $remote_addr;
    proxy_set_header X-Forwarded-Proto $scheme;      
    proxy_set_header X-Forwarded-Host $server_name;
    proxy_redirect default;
}

Full config example

server {
    server_name  netbox.mydomain.com;

    location / {
        proxy_pass http://localhost:13031/;
        proxy_http_version 1.1;
        proxy_set_header Upgrade $http_upgrade;
        proxy_set_header Connection "Upgrade";
        proxy_set_header X-Real-IP $remote_addr;
        proxy_set_header X-Forwarded-Proto $scheme;      
        proxy_set_header X-Forwarded-Host $server_name;
        proxy_redirect default;
    }

    listen [::]:443 ssl; # managed by Certbot
    ssl_certificate /etc/letsencrypt/live/mydomain.com/fullchain.pem; # managed by Certbot
    ssl_certificate_key /etc/letsencrypt/live/mydomain.com/privkey.pem; # managed by Certbot
    include /etc/letsencrypt/options-ssl-nginx.conf; # managed by Certbot


}
server {
    if ($host = netbox.mydomain.com) {
        return 301 https://$host$request_uri;
    } # managed by Certbot

    server_name  netbox.mydomain.com;

    listen [::]:80; # managed by Certbot
    return 404; # managed by Certbot
}


Posted by Uli Köhler in Networking, nginx

How to snmpwalk MikroTik RB260GS(P) (SwOS)

In the default configuration, you can use snmpwalk using SNMPv1 to query information from the MikroTik RB260GS or RB260GSP.

snmpwalk -v1 -c public IPADDRESS

for example:

snmpwalk -v1 -c public 192.168.88.1


Posted by Uli Köhler in MikroTik, SNMP

How to get client ID, site ID & auth key in Tactical RMM

In order to get the Client IDSite ID and authkey for manual installation of a tactical RMM client, click on the Agents menu and click Install Agent:

This will open the Install Agent window. Leave Windows selected even if you are installing for Linux! Select Manual install at the bottom

After you click Show manual installation instructions, you will see the following window, from which you can copy & paste the Client IDSite ID and authkey :

Posted by Uli Köhler in Networking, Tactical RMM

How to create self-signed certificate with SAN (subjectAltName) using OpenSSL

The following command will create a certificate with a subject alternative name (SAN) representing a self-signed wildcard certificate.

openssl req -x509 -sha512 -days 365000 -nodes -out cert.pem -newkey ed25519 -keyout privkey.pem -subj "/CN=mydomain.com" -addext "subjectAltName=DNS:*.mydomain.com"

Using this approach, no config file is required – all parameters can be passed using just the command line arguments.

Posted by Uli Köhler in Networking

How to install mosquitto_sub on Teltonika RUTX/TRB (OpenWRT)

You can just install mosquitto_sub on OpenWRT routers such as on the Teltonika RUTX10/RUTX11 or TRB series using opkg:

opkg update
opkg install mosquitto-client

In case you see error messages like

* check_data_file_clashes: Package libmosquitto-nossl wants to install file /usr/lib/libmosquitto.so
       But that file is already provided by package  * libmosquitto-ssl
* check_data_file_clashes: Package libmosquitto-nossl wants to install file /usr/lib/libmosquitto.so.1
       But that file is already provided by package  * libmosquitto-ssl
* opkg_install_cmd: Cannot install package mosquitto-client.

install mosquitto-client-ssl instead:

opkg install mosquitto-client-ssl

Tested on firmware TRB1_R_00.07.02.6.

Posted by Uli Köhler in OpenWRT

How to install tcpdump on Teltonika RUTX/TRB (OpenWRT)

You can just install tcpdumpon OpenWRT such as on the Teltonika RUTX10/RUTX11 or TRB series using opkg:

opkg update
opkg install tcpdump

Tested on firmware TRB1_R_00.07.02.6.

Posted by Uli Köhler in OpenWRT