Embedded

How to compute Ethernet CRC32 on ESP32 (0x04C11DB7)

The ESP32 ROM provides functionality for calculating CRC8, CRC16 & CRC32 checksums, but that functionality is poorly documented.

By educated trial and error and comparing with Arduino_CRC32 (which implements the Ethernet CRC32 algorithm with polynomial 0x04C11DB7 based on the pyCRC library) I found out how to compute the CRC32 checksum using the Ethernet polynomial.

First, include crc.h:

#include <esp32/rom/crc.h>

Now given a buffer with length length, use this code:

uint32_t romCRC = (~crc32_le((uint32_t)~(0xffffffff), (const uint8_t*)buffer, length))^0xffffffff;

Complete example code

This PlatformIO/Arduino code compares the result of the ESP32 ROM CRC32 functiolity by printing out both results on the serial port.

#include <Arduino.h>
#include <esp32/rom/crc.h>
#include <Arduino_CRC32.h>

void setup() {
    Serial.begin(115200);
}

void loop() {
    const char* data = "ABCDEFGHIJ";
  
    // Compute using ESP32 ROM CRC library
    uint32_t romCRC = (~crc32_le((uint32_t)~(0xffffffff), (const uint8_t*)data, 8))^0xffffffFF;

    // Compute using Arduino_CRC32 library (based on pyCRC)
    Arduino_CRC32 crc32;
    uint32_t libCRC = crc32.calc((uint8_t const *)data, 8);

    // Print out btoh v
    char crcBytes[4];
    memcpy(crcBytes, &romCRC, sizeof(uint32_t));
    Serial.printf("ROM CRC: %02X %02X %02X %02X\n", crcBytes[0], crcBytes[1], crcBytes[2], crcBytes[3]);

    memcpy(crcBytes, &libCRC, sizeof(uint32_t));
    Serial.printf("Lib CRC: %02X %02X %02X %02X\n", crcBytes[0], crcBytes[1], crcBytes[2], crcBytes[3]);
    Serial.println("\n");
    delay(500);
}
[env:esp32dev]
platform = espressif32
platform_packages = framework-arduinoespressif32 @ https://github.com/espressif/arduino-esp32.git#2.0.3
board = esp32dev
framework = arduino
monitor_speed = 115200
lib_deps =
    arduino-libraries/Arduino_CRC32@^1.0.0

Example output:

ROM CRC: 1C B6 DC 68
Lib CRC: 1C B6 DC 68
 

Posted by Uli Köhler in Arduino, ESP8266/ESP32

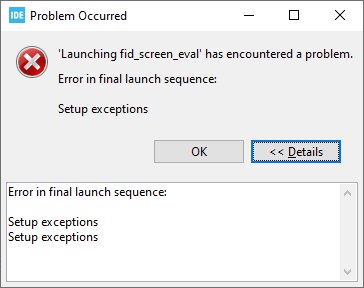
How to fix STM32CubeIDE: Error in final lauch sequence – Setup exceptions (debugger)

Problem:

While trying to start the STM32CubeIDE debugger, you see the following error message just after clicking Continue :

Error in final launch sequence

Setup exceptions
Setup exceptions

Solution:

This error occurs because you clicked Continue too early. The flashing process was still underway when you clicked Continue. Therefore, the solution is to wait until the stack trace shows main() and only then click Continue.

Posted by Uli Köhler in STM32

What is SYS_STARTUP_FN() on the ESP32?

SYS_STARTUP_FN() is being called at the end of call_start_cpu0() during the app startup process (after the bootloader has already finished executing).

It essentially just calls the function pointer g_startup_fn for the current core:

#define SYS_STARTUP_FN()  ((*g_startup_fn[(cpu_hal_get_core_id())])())
g_startup_fn, in turn, is defined to basically start_cpu0 and start_cpu1 in this rather convoluted but still conceptually easy code.


Posted by Uli Köhler in Embedded, ESP8266/ESP32

Where is esp_startup_start_app_common() started on the ESP32 (ESP-IDF)?

esp_startup_start_app_common() is called in start_cpu0_default(), which is located in components/esp_system/startup.c
Note that start_cpu0_default() is a weak alias for start_cpu0().

For version 4.4.1 of the ESP-IDF, this is the link to the location where it is called.

Posted by Uli Köhler in Embedded, ESP8266/ESP32

Where is esp_startup_start_app_common() started on the ESP32 (ESP-IDF)?

esp_startup_start_app_common() is called in esp_startup_start_app(), which is a function specific to the architecture (xtensa or riscv).

For version 4.4.1 of the ESP-IDF, this is the link to the location where it is called for the xtensa port.

Posted by Uli Köhler in Embedded, ESP8266/ESP32

Where is the bootloader_init() source code for the ESP32?

In the ESP32 bootloader_start.c, you can see that bootloader_init() is called during bootloader startup:

if (bootloader_init() != ESP_OK) {
    bootloader_reset();
}

The implementation of bootloader_init() is sightly harder to find because it is not located in components/bootloader but components/bootloader_support, within a specific platform-specific subdirectory, for example in components/bootloader_support/src/esp32s2/bootloader_esp32s2.c for the ESP32S2 – Github link to the v4.4.1 source code.


Posted by Uli Köhler in Embedded, ESP8266/ESP32

Where is main_task() started on the ESP32 (ESP-IDF)?

The FreeRTOS main taskmain_task() (which in turn starts app_main()) is  started in esp_startup_start_app_common():

portBASE_TYPE res = xTaskCreatePinnedToCore(&main_task, "main",
                                            ESP_TASK_MAIN_STACK, NULL,
                                            ESP_TASK_MAIN_PRIO, NULL, ESP_TASK_MAIN_CORE);


For version 4.4.1 of the ESP-IDF, this is the link to the location where it is called.

Posted by Uli Köhler in Embedded, ESP8266/ESP32

What are the default UART0 RX/TX pins for the ESP32S2?

As shown in the ESP32S2 datasheet:

  • U0TXD (UART 0 transmit) is GPIO43, which is pin 48 in the QFN56 package#
  • U0RXD is GPIO44, which is pin 49 in the QFN56 package
Posted by Uli Köhler in Embedded, ESP8266/ESP32

What is SPI flash manufacturer 20 / Device ID 4016

I have seen Manufacturer 20, device 4016 via esptool.py flash_id in a SOICW-8 flash device in a ESP8266 module. It is labeled XMC and P50H32C

It is a 32Mbit (4Mbyte) flash device.

Posted by Uli Köhler in Embedded

Which pins are USB D+/D- on the ESP32S2?

As listed in the ESP32S2 datasheet,

  • GPIO19 is USB-D-
  • GPIO20 is USB-D+
Posted by Uli Köhler in Electronics, Embedded, ESP8266/ESP32

How to fix PlatformIO No such file or directory bootloader__80m.bin/bootloader__40m.bin

Problem:

While trying to upload/flash an ESP32(S2/S3) project using PlatformIO with a platformio.ini like this:

[env:esp32-s2-saola-1]
platform = espressif32
board = esp32-s2-saola-1
framework = arduino

you see an error message like

esptool write_flash: error: argument <address> <filename>: [Errno 2] No such file or directory: '/home/uli/.platformio/packages/framework-arduinoespressif32/tools/sdk/esp32s2/bin/bootloader__80m.bin'
*** [upload] Error 2

or

esptool write_flash: error: argument <address> <filename>: [Errno 2] No such file or directory: '/home/uli/.platformio/packages/framework-arduinoespressif32/tools/sdk/esp32/bin/bootloader__40m.bin'

Solution:

This is a bug in version 2.0.4 of the arduino-espressif32 framework. In order to work around it, use version 2.0.3 until this bux is fixed. You can do this by appending

platform_packages = framework-arduinoespressif32 @ https://github.com/espressif/arduino-esp32.git#2.0.3

to platformio.ini. Full example:

[env:esp32dev]
platform = espressif32
platform_packages = framework-arduinoespressif32 @ https://github.com/espressif/arduino-esp32.git#2.0.3
board = esp32dev
framework = arduino


Posted by Uli Köhler in Arduino, ESP8266/ESP32, PlatformIO

How to initialize struct sockaddr_in using initializer lists

This way of initializing a struct sockaddr_in uses modern C and avoids all the raw of days that should long be forgotten, at least for most applications. I use this approach successfully e.g. for ESP32 microcontrollers.

struct sockaddr_in server_addr = {
    .sin_family = AF_INET,
    .sin_port = htons(46118),
    .sin_addr = {.s_addr = htonl(INADDR_ANY)}
};


Posted by Uli Köhler in C/C++, ESP8266/ESP32, PlatformIO

ESP32 Filesystem initialization code example (LittleFS)

This example code takes care of mounting the filesystem, or creating a filesystem if none is present.

#pragma once
#include <stddef.h>

// InitFilesystem() sets this to true if the filesystem is available.
extern volatile bool filesystemOK;

void InitFilesystem();
#include "FS.h"
#include "LittleFS.h"

volatile bool filesystemOK = false;

void InitFilesystem() {
  // Initialize LittleFS
  if (!LittleFS.begin(false /* false: Do not format if mount failed */)) {
    Serial.println("Failed to mount LittleFS");
    if (!LittleFS.begin(true /* true: format */)) {
      Serial.println("Failed to format LittleFS");
    } else {
      Serial.println("LittleFS formatted successfully");
      filesystemOK = true;
    }
  } else { // Initial mount success
    filesystemOK = true;
  }
}


Posted by Uli Köhler in C/C++, ESP8266/ESP32

How to run PlatformIO serial monitor from the command line

First, activate the PlatformIO virtual environment which will give you access to the pio script:

source ~/.platformio/penv/bin/activate

Now, if you have – for example – an environment called esp32dev listed in platformio.ini:

[env:esp32dev]
platform = espressif32
board = esp32dev
framework = arduino

you can build & upload using the following code:

pio run -e esp32dev -t monitor

You can also combine both commands (the virtual env activation and the pio run command) into a single line of shell script:

source ~/.platformio/penv/bin/activate && pio run -e esp32dev -t monitor
Posted by Uli Köhler in PlatformIO

How to run PlatformIO build & upload from the command line

First, activate the PlatformIO virtual environment which will give you access to the pio script:

source ~/.platformio/penv/bin/activate

Now, if you have – for example – an environment called esp32dev listed in platformio.ini:

[env:esp32dev]
platform = espressif32
board = esp32dev
framework = arduino

you can build & upload using the following code:

pio run -e esp32dev -t upload

You can also combine both commands (the virtual env activation and the pio run command) into a single line of shell script:

source ~/.platformio/penv/bin/activate && pio run -e esp32dev -t upload
Posted by Uli Köhler in PlatformIO

A Python SLIP decoder using serial_asyncio

The following Python script receives SLIP-encoded data from a serial port (/dev/ttyACM0 in this example) and decodes the SLIP messages using the fully asynchronous (asyncio-based) serial_asyncio library which you can install using

pip install -U pyserial-asyncio

You also need to install ansicolors for colored printing on the console:

pip install -U ansicolors

Full source code

#!/usr/bin/env python3
# -*- coding: utf-8 -*-
__author__ = "Uli Köhler"
__license__ = "CC0 1.0 Universal"

import asyncio
from colors import red
import serial_asyncio

SLIP_END = 0o300
SLIP_ESC = 0o333
SLIP_ESCEND = 0o334
SLIP_ESCESC = 0o335

def handle_slip_message(msg):
    print(f"Received message of length", len(msg))

class SLIPProtocol(asyncio.Protocol):
    def connection_made(self, transport):
        self.msg = bytes() # Message buffer
        self.transport = transport
        print('port opened', transport)
        transport.serial.rts = False  # You can manipulate Serial object via transport
        # Send "enter" to prompt output
        self.buf = b''

    def check_for_slip_message(self):
        # Identify end of message in data
        decoded = []
        last_char_is_esc = False
        for i in range(len(self.buf)):
            c = self.buf[i]
            if last_char_is_esc:
                # This character must be either
                # SLIP_ESCEND or SLIP_ESCESC
                if c == SLIP_ESCEND: # Literal END character
                    decoded.append(SLIP_END)
                elif c == SLIP_ESCESC: # Literal ESC character
                    decoded.append(SLIP_ESC)
                else:
                    print(red("Encountered invalid SLIP escape sequence. Ignoring..."))
                    # Ignore bad part of message
                    self.buf = self.buf[i+1:]
                    break
                last_char_is_esc = False # Reset state
            else: # last char was NOT ESC
                if c == 192: # END of message
                    # Remove current message from buffer
                    self.buf = self.buf[i+1:]
                    # Emit message
                    return bytes(decoded)
                elif c == SLIP_ESC:
                    # Handle escaped character next 
                    last_char_is_esc = True
                else: # Any other character
                    decoded.append(c)
        # No more bytes in buffer => no more message
        return None

    def data_received(self, data):
        # Append new data to buffer
        self.buf += data
        while True:
            msg = self.check_for_slip_message()
            if msg is None:
                break # Need to wait for more data
            else: # msg is not None
                handle_slip_message(msg)

    def connection_lost(self, exc):
        print('port closed')
        self.transport.loop.stop()

    def pause_writing(self):
        print('pause writing')
        print(self.transport.get_write_buffer_size())

    def resume_writing(self):
        print(self.transport.get_write_buffer_size())
        print('resume writing')

loop = asyncio.get_event_loop()
coro = serial_asyncio.create_serial_connection(loop, SLIPProtocol, '/dev/ttyACM0', baudrate=115200)
transport, protocol = loop.run_until_complete(coro)
loop.run_forever()
loop.close()


Posted by Uli Köhler in Embedded, Python

How to see PlatformIO actual commands during build or upload

Having a look at the actual commands being used by PlatformIO is pretty easy:

Instead of clicking Build or Upload, open the Advanced folder and select Verbose Build or Verbose Upload.

This will show you all raw commands such as esptool.py commands that are being run.

Posted by Uli Köhler in PlatformIO

How to fix /dev/ttyUSB0 or /dev/ttyACM0 permission error

Problem:

When trying to connect to a USB device, you see an error like

[Errno 13] Permission denied: '/dev/ttyUSB0'

and the USB connection can’t be established.

Solution:

On Debian & Ubuntu, the /dev/ttyUSBx and /dev/ttyACMx devices are owned by the dialout group. Therefore, the solution is to add your user to the dialout group:

sudo usermod -a -G dialout $USER

After that, you need to logout completely and login again (if in doubt, reboot your computer)!

While you can sometimes quickly solve this issue by running whatever command you want to use as root using sudo, this is not a recommended solution since it will allow the program you’re calling full access to the entire computer – not just access restricted to the USB device. Therefore, this approach poses a significant security risk and additionally, some programs don’t work properly when called using sudo.

Posted by Uli Köhler in Embedded, Linux

How to install ESP32 esptool / esptool.py on Ubuntu

The recommended way is to install the current version using pip since the version installed using apt might be out of date:

sudo pip install esptool

After that, you can use esptool.py – note that you need to call it as esptool.py, not just as esptool!

In case you are missing pip , install python3-dev using apt:

sudo apt -y install python3-pip


Posted by Uli Köhler in ESP8266/ESP32, Linux, Python