See this doxygen link for the official API documentation.
13
May
2023
See this doxygen link for the official API documentation.
Iterate the pads of a given pcbnew.FOOTPRINT object using
for pad in list(footprint.Pads()):
    # Example of what to do with [pad]
    print(f"{footprint.GetReference()} {pad.GetNetname()}")
Example of how to print all pads for every footprint on the board:
for footprint in list(pcbnew.GetBoard().GetFootprints()):
    for pad in list(footprint.Pads()):
        # Example of what to do with [pad]
        print(f"{footprint.GetReference()} {pad.GetNetname()}")
This will print, for example:
D1 Net-(D1-K)
Use the following for loop to iterate all footprints in the current board:
for footprint in list(pcbnew.GetBoard().GetFootprints()):
    # Example of what to do with [footprint]
    print(footprint.GetReference())
In our previous post, we showed how to get all selected objects using the KiCAD python API using
pcbnew.GetCurrentSelection()
You can simply filter these entries to obtain just a list of selected zones using either a for loop with inline filtering:
for selected_object in pcbnew.GetCurrentSelection():
    if type(selected_object).__name__ == 'ZONE':
        print(selected_object.GetReference())
or using a list comprehension:
selected_footprints: list[pcbnew.FOOTPRINT] = [
    zone for zone in pcbnew.GetCurrentSelection() if type(zone).__name__ == 'ZONE'
]#!/usr/bin/env python
import pcbnew
import os
class SimplePlugin(pcbnew.ActionPlugin):
def defaults(self):
self.name = "Plugin Name as shown in Pcbnew: Tools->External Plugins"
self.category = "A descriptive category name"
self.description = "A description of the plugin and what it does"
self.show_toolbar_button = False # Optional, defaults to False
self.icon_file_name = os.path.join(os.path.dirname(__file__), 'simple_plugin.png') # Optional, defaults to ""
def Run(self):
board: pcbnew.BOARD = pcbnew.GetBoard()
footprints: list[pcbnew.FOOTPRINT] = board.GetFootprints()
# TODO Do something useful with [board]
for selected_object in pcbnew.GetCurrentSelection():
print(selected_object)
SimplePlugin().register() # Instantiate and register to PcbnewD39 D32 D23 D37 D18 D34 D11 D15
The following python script is more or less the minimal example of a KiCAD pcbnew plugin from our previous post How to show wx dialog message in KiCAD pcbnew plugin.
#!/usr/bin/env python
import pcbnew
import wx

class DialogExamplePlugin(pcbnew.ActionPlugin):
    def defaults(self):
        self.name = "Show dialog example"
        self.category = "A descriptive category name"
        self.description = "A description of the plugin and what it does"
        self.show_toolbar_button = False # Optional, defaults to False

    def Run(self):
        dlg = wx.MessageDialog(None, "Please select one or multiple footprints!\n...or use Ctrl+A to select everything.", "No footprints selected", wx.OK | wx.ICON_ERROR)
        dlg.ShowModal()
        dlg.Destroy()

DialogExamplePlugin().register() # Instantiate and register to Pcbnew
You can place this plugin, for example, in
~/.local/share/kicad/7.0/scripting/plugins/DialogExamplePlugin.py
Don’t forget to refresh the plugins from the pcbnew menu.
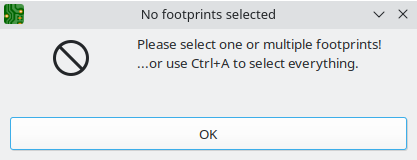
When using KiCAD’s Python API for pcbnew, you can show a dialog by using the following snippet
# Show info dialog
dlg = wx.MessageDialog(None, "Please select one or multiple footprints!\n...or use Ctrl+A to select everything.", "No footprints selected", wx.OK | wx.ICON_ERROR)
dlg.ShowModal()
dlg.Destroy()
Note that you need to
import wx
at the top of your plugin.
This code will show the following dialog:
#!/usr/bin/env python
import pcbnew
import wx

class DialogExamplePlugin(pcbnew.ActionPlugin):
    def defaults(self):
        self.name = "Show dialog example"
        self.category = "A descriptive category name"
        self.description = "A description of the plugin and what it does"
        self.show_toolbar_button = False # Optional, defaults to False

    def Run(self):
        dlg = wx.MessageDialog(None, "Please select one or multiple footprints!\n...or use Ctrl+A to select everything.", "No footprints selected", wx.OK | wx.ICON_ERROR)
        dlg.ShowModal()
        dlg.Destroy()

DialogExamplePlugin().register() # Instantiate and register to Pcbnew
You can place this plugin, for example, in
~/.local/share/kicad/7.0/scripting/plugins/DialogExamplePlugin.py
Don’t forget to refresh the plugins from the pcbnew menu.
In order to create a custom simple KiCAD plugin, save it as NAME.py in the following folder (where NAME is any filename such as MyTestPlugin):
~/.local/share/kicad/7.0/scripting/plugins
For example, you could place a plugin in
~/.local/share/kicad/7.0/scripting/plugins/MyPlugin.py
or in
~/.local/share/kicad/7.0/scripting/plugins/AddMyStuff.py
Note that you don’t need to restat pcbnew to load the plugins, you can just reload all plugins from the menu!
If you’ve exported a KiCAD pick & place position file using the GUI or the command line:
kicad-cli pcb export pos MyPCB.kicad_pcb --units mm -o MyPCB.pos
you can read it from within your Python script using pandas.read_table(...) like this:
import pandas as pd

pos = pd.read_table('KKS-Microcontroller-Board-R2.2.pos', delim_whitespace=True, names=["Ref", "Val", "Package", "PosX", "PosY", "Rot","Side"], comment="#")
Optionally, you can also index pos by the Ref column (which contains values such as C12, D1 or U5):
pos.set_index("Ref", inplace=True)You can also pack all that into a function:
def read_kicad_pos_file(filename):
    pos = pd.read_table(filename, delim_whitespace=True, names=["Ref", "Val", "Package", "PosX", "PosY", "Rot","Side"], comment="#")
    pos.set_index("Ref", inplace=True)
    return pos
If you’ve used .set_index(), you can access a component such as C13 using
pos.loc["C13"]
Example output:
Val                100nF_25V
Package    C_0603_1608Metric
PosX                187.1472
PosY               -101.8243
Rot                    180.0
Side                     top
Name: C1, dtype: object
Since KiCAD 7.0, you can use the kicad-cli command line tool to export a pick & place position TSV file from a KiCAD project.
First, find out what the filename of the PCB file is. Typically, if your project is named MyPCB.kicad_pro, your main schematic file is named MyPCB.kicad_pcb.
Now you can export the position file using
kicad-cli pcb export pos MyPCB.kicad_pcb --units mm
This will output, for example
Loading board
If the PCB file is named MyPCB.kicad_pcb, the position file will be called MyPCB.pos.
You can also set a custom output file name such as out.pos using the -o option.
kicad-cli pcb export pos MyPCB.kicad_pcb -o out.pos --units mm
Since KiCAD 7.0, you can use the kicad-cli command line tool to export a colored schematic PDF from a KiCAD project.
First, find out what the filename of the main schematic file is. Typically, if your project is named MyPCB.kicad_pro, your main schematic file is named MyPCB.kicad_sch.
Now you can export the schematic PDF using
kicad-cli sch export pdf MyPCB.kicad_sch
This will output, for example
Plotted to '/home/uli/MyPCB/MyPCB.pdf'.

Done.
The PDF file from the output contains your schematic PDF.
As for most parts, if you order more than just a few pcs, LCSC is the cheapest source of these components (however, you need to consider the rather expensive shipping costs).
Here’s some SMA connectors I’ve used:
Note that I don’t use them in typical RF applications, so I don’t have any information on impedance matching or accuracy etc.
JST VH connectors such as the 6-pin B6P-VH male header have a current rating of 10 A per pin.
Source: JST VH datasheet
JST VH connectors such as the 6-pin B6P-VH male header have a pin pitch of 3.96mm.
Source: JST VH datasheet
For SMD MELF resistors with less than 20 Watts rated power, the correct tariff code is
8533.21.0040
with the following description:
Fixed Resistors, Power Handling Capacity Not Exceeding 20w,smd, Having Two Terminals, Cylindrical Leadless
Source: DigiKey shipment with such MELF resistors to me, confirmed by this Avnet page
On 2023-04-23 I asked the JLCPCB support which milling tool radius is used for internal cutouts.
They answered that normally they use 0.5mm milling tool radius, leading to a minimum internal cutout width of 1mm.
You can use the UliEngineering library in order to compute the output voltage of your voltage converter.
First, you need to know Vfb, the feedback voltage of your converter IC, which you need to read from the datasheet. For this example, we’ll use the AP3012‘s feedback voltage of 1.25V.
from UliEngineering.Electronics.VoltageDivider import feedback_actual_voltage
from UliEngineering.EngineerIO import auto_format


# Compute voltage
output_voltage = feedback_actual_voltage("220k", "12.1k", vfb="1.25V")
# output_voltage == 23.97727272727273

# ... or format and print it
auto_format(feedback_actual_voltage, "220k", "12.1k", vfb="1.25V") #  Prints "24.0V"
This is a starting point for how to compress data from a buffer using heatshrink and write the data into an output buffer:
Note that this has not been thoroughly tested, but at least it doesn’t crash 🙂
// TODO Your code goes here
const size_t outbuf_size = filesize + 128;
char* outbuf = new char[outbuf_size];
heatshrink_encoder* encoder = heatshrink_encoder_alloc(10, 4);
size_t tosink = filesize;
size_t output_size = 0;
while(tosink > 0) {
    size_t sunk = 0;
    auto err = heatshrink_encoder_sink(encoder, reinterpret_cast<uint8_t*>(buf), (size_t)filesize, &sunk);
    if(err != HSER_SINK_OK) {
        std::cerr << "Error sinking data" << std::endl;
        break;
    }
    if(sunk == 0) {
        std::cerr << "No data sunk" << std::endl;
        break;
    }
    // Check how much has been sunk & update tosink
    tosink -= sunk;
    // Poll for output
    size_t polled = 0;
    auto err2 = heatshrink_encoder_poll(encoder, reinterpret_cast<uint8_t*>(outbuf + output_size), outbuf_size - output_size, &polled);
    if(err2 == HSER_POLL_ERROR_NULL || err2 == HSER_POLL_ERROR_MISUSE) {
        std::cerr << "Error polling data" << std::endl;
        break;
    }
    output_size += polled;
}
// Input data finished
auto err3 = heatshrink_encoder_finish(encoder);
// Poll for final output
// Poll for output
size_t polled = 0;
auto err2 = heatshrink_encoder_poll(encoder, reinterpret_cast<uint8_t*>(outbuf + output_size), outbuf_size - output_size, &polled);
if(err2 == HSER_POLL_ERROR_NULL || err2 == HSER_POLL_ERROR_MISUSE) {
    std::cerr << "Error finally polling data" << std::endl;
}
output_size += polled;

cout << "Original size: " << filesize << ", compressed size: " << output_size << endl;
This script applies a rotation offset such as -90° to every component in a OpenPNP .board.xml file.
#!/usr/bin/env python3
import sys
import argparse
import xml.etree.ElementTree as ET

def rotate_placements(board_file, rotation_offset):
    tree = ET.parse(board_file)
    root = tree.getroot()

    for placement in root.iter('placement'):
        location = placement.find('location')
        if location is not None:
            rotation = float(location.get('rotation', 0))
            new_rotation = (rotation + rotation_offset) % 360
            location.set('rotation', str(new_rotation))
            print(rotation, new_rotation)

    tree.write(board_file, encoding="utf-8", xml_declaration=True)

if __name__ == "__main__":
    parser = argparse.ArgumentParser(description="Rotate placements in an OpenPnP board.xml file")
    parser.add_argument("board_file", type=str, help="Path to the board.xml file")
    parser.add_argument("-r", "--rotation-offset", required=True, type=float, help="Rotation offset in degrees")

    args = parser.parse_args()

    rotate_placements(args.board_file, args.rotation_offset)
The 74HC4051 and its variants such as the CD74HC4051 have an input called INH or ~E depending on the manufacturer.
Typically you should hard-connect this pin to GND in order to always enable the multiplexer.
Whenever you want to disable the multiplexer (i.e. none of the inputs is connected to the output, connect this pin to Vcc temporarily.
Source: This NXP datasheet, section 7.
The following systemd service will automatically. See this guide for more information on the setup and ensure sudo i2cdetect -y 1 detects the RTC with address 0x68.
This is an automatic service installation & enable script based on A simple systemd service autoinstall script . This script will automatically enable the service on boot:
#!/bin/bash
# This script installs and enables/starts a systemd service
# It also installs the service file
export NAME=ConfigureRTC

cat >/etc/systemd/system/${NAME}.service <<EOF
[Unit]
Description=${NAME}

[Service]
ExecStart=/bin/bash -c 'echo ds1307 0x68 > /sys/class/i2c-adapter/i2c-1/new_device && hwclock -s'
Restart=always

[Install]
WantedBy=multi-user.target
EOF

# Enable and start service
systemctl enable --now ${NAME}.service
This is just the systemd service:
[Unit]
Description=ConfigureRTC

[Service]
ExecStart=/bin/bash -c 'echo ds1307 0x68 > /sys/class/i2c-adapter/i2c-1/new_device && hwclock -s'
Restart=always

[Install]
WantedBy=multi-user.target